Set up divisions
By the end you’ll have your seasons grouped into divisions, each with its own public season, and a division switcher on your website.
Before you start
- You need at least two seasons in the same sport, one per division you run. For example, Men’s Fall 2026 and Women’s Fall 2026. See Create your first season and teams.
- A division groups seasons by age or level, like Youth or Men’s. You need two divisions for your website to show a switcher.
Steps
-
Step 1: In the left menu, click Seasons & playoffs.
Your seasons are listed. Here: Men’s, Women’s and Masters Fall 2026.
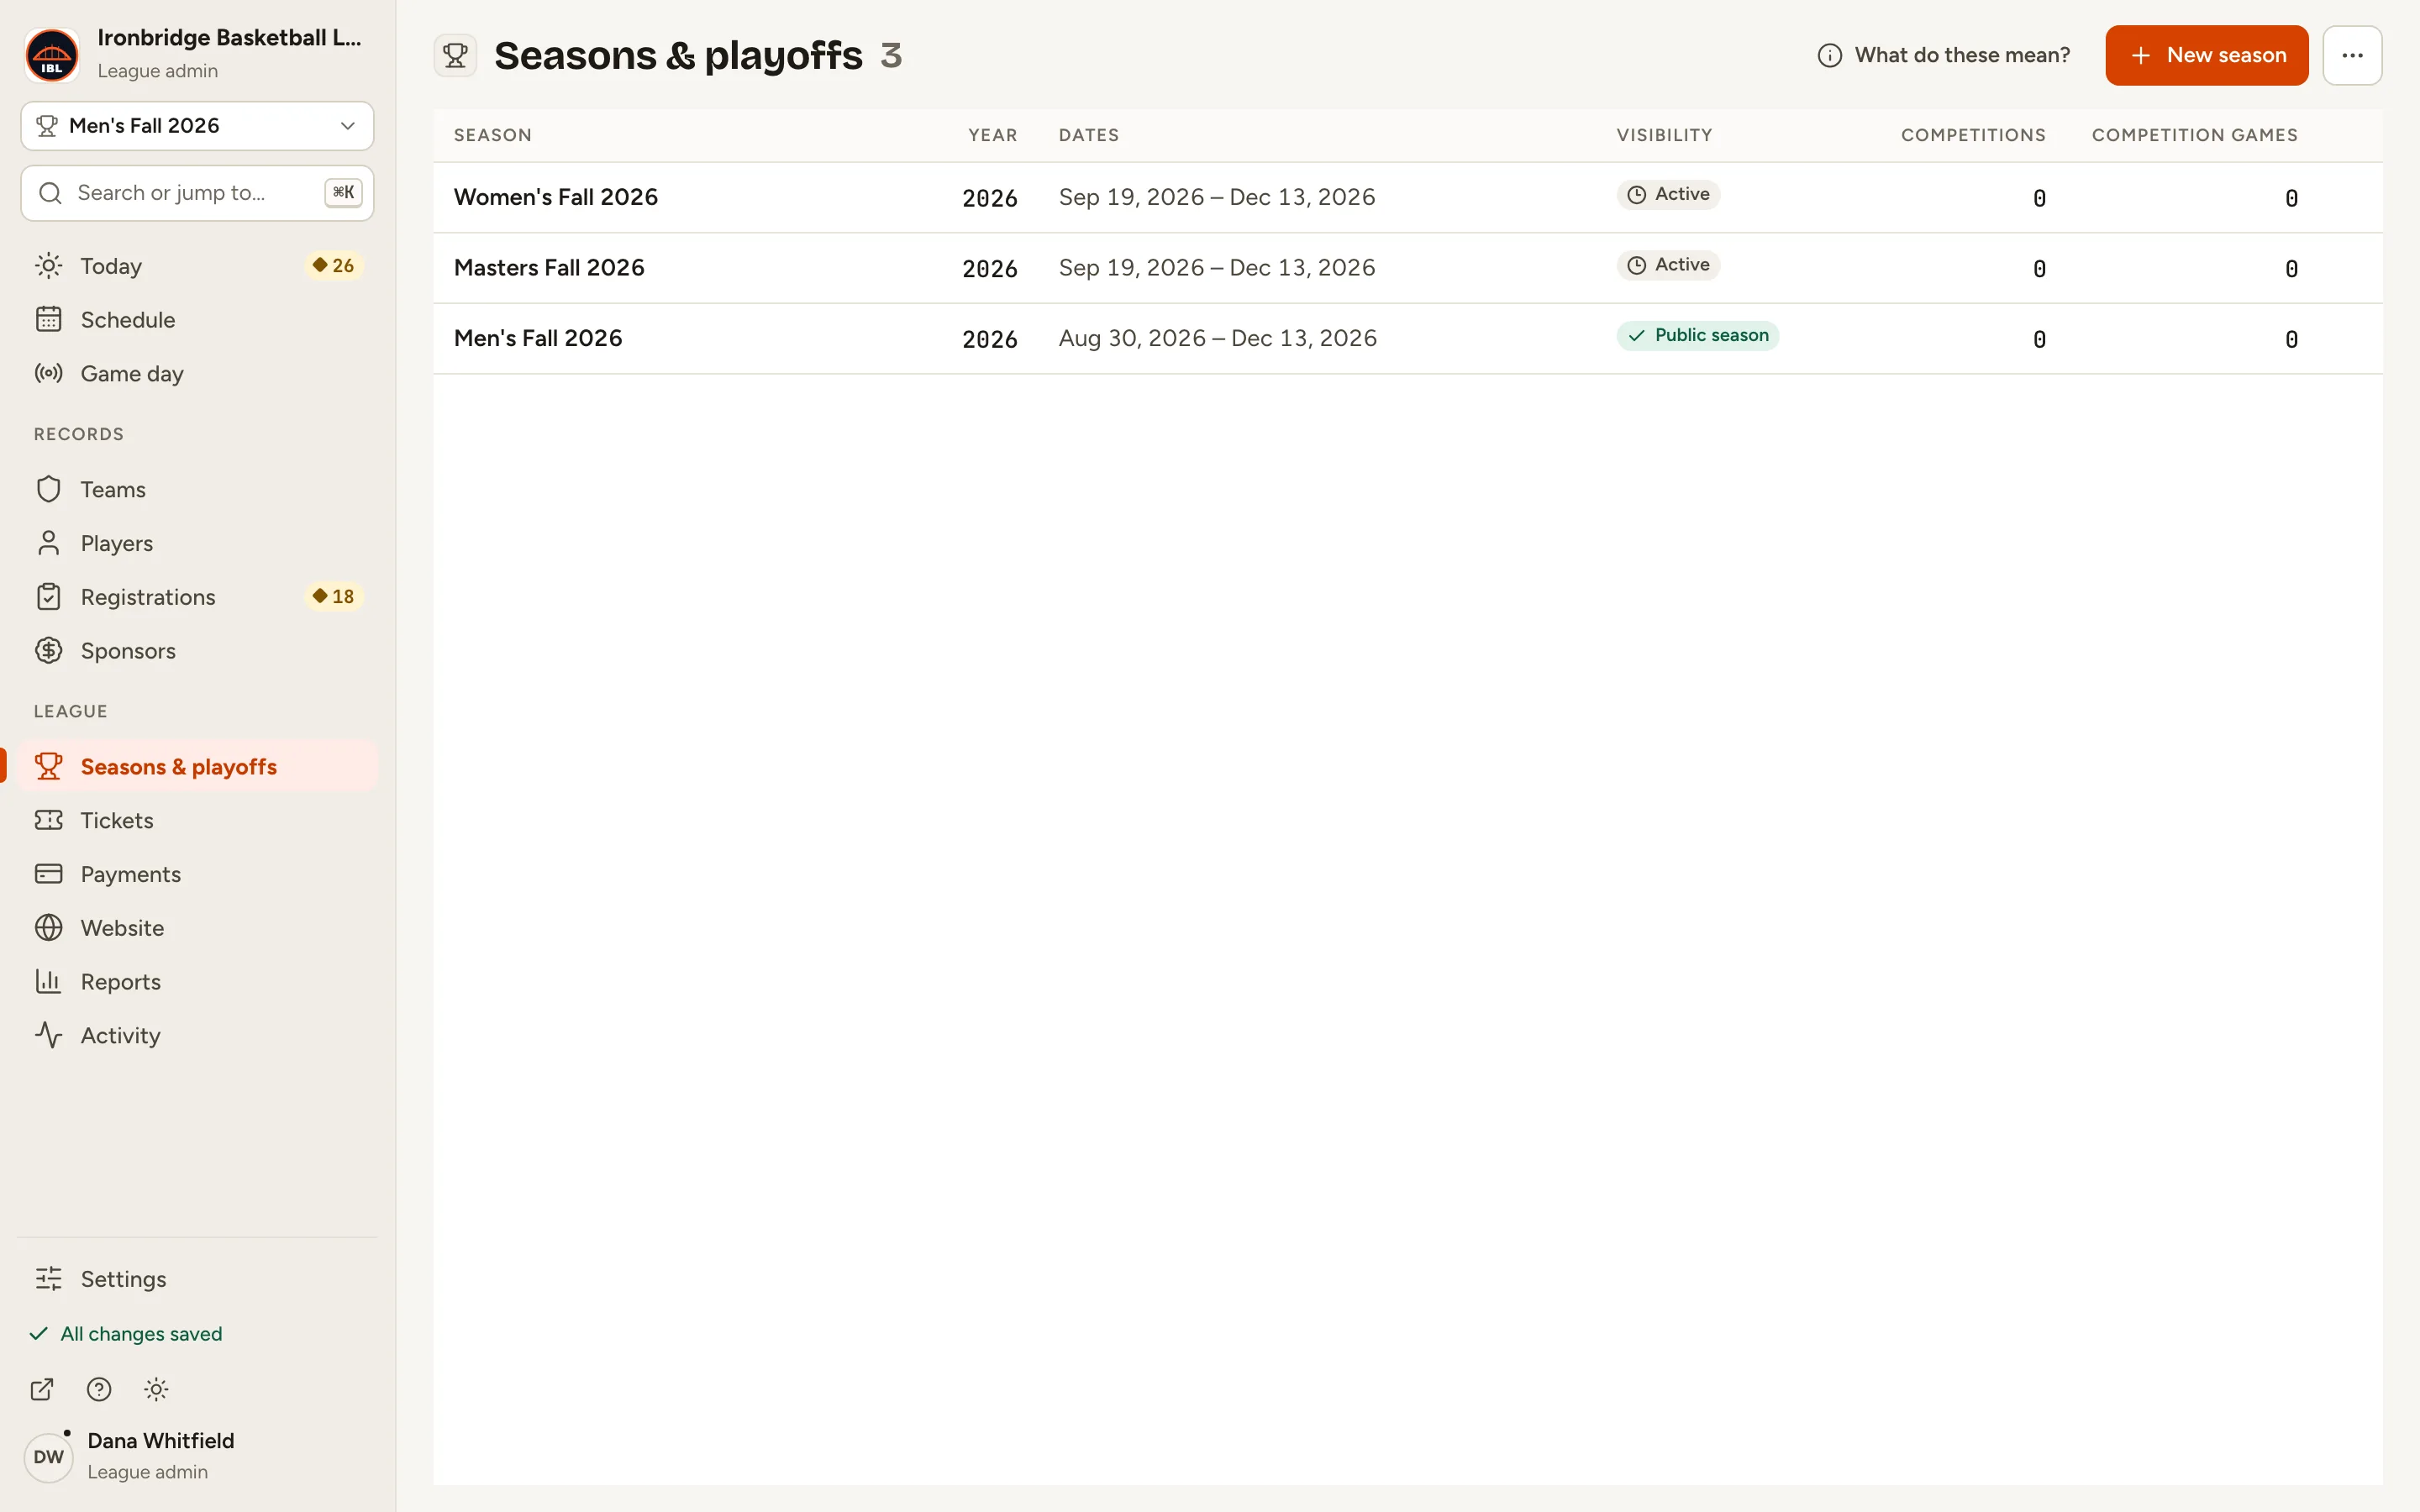
Fig. 1Seasons & playoffs with three seasons. -
Step 2: Click ··· (More for seasons) at the top right, next to New season.
A menu opens with the division options.
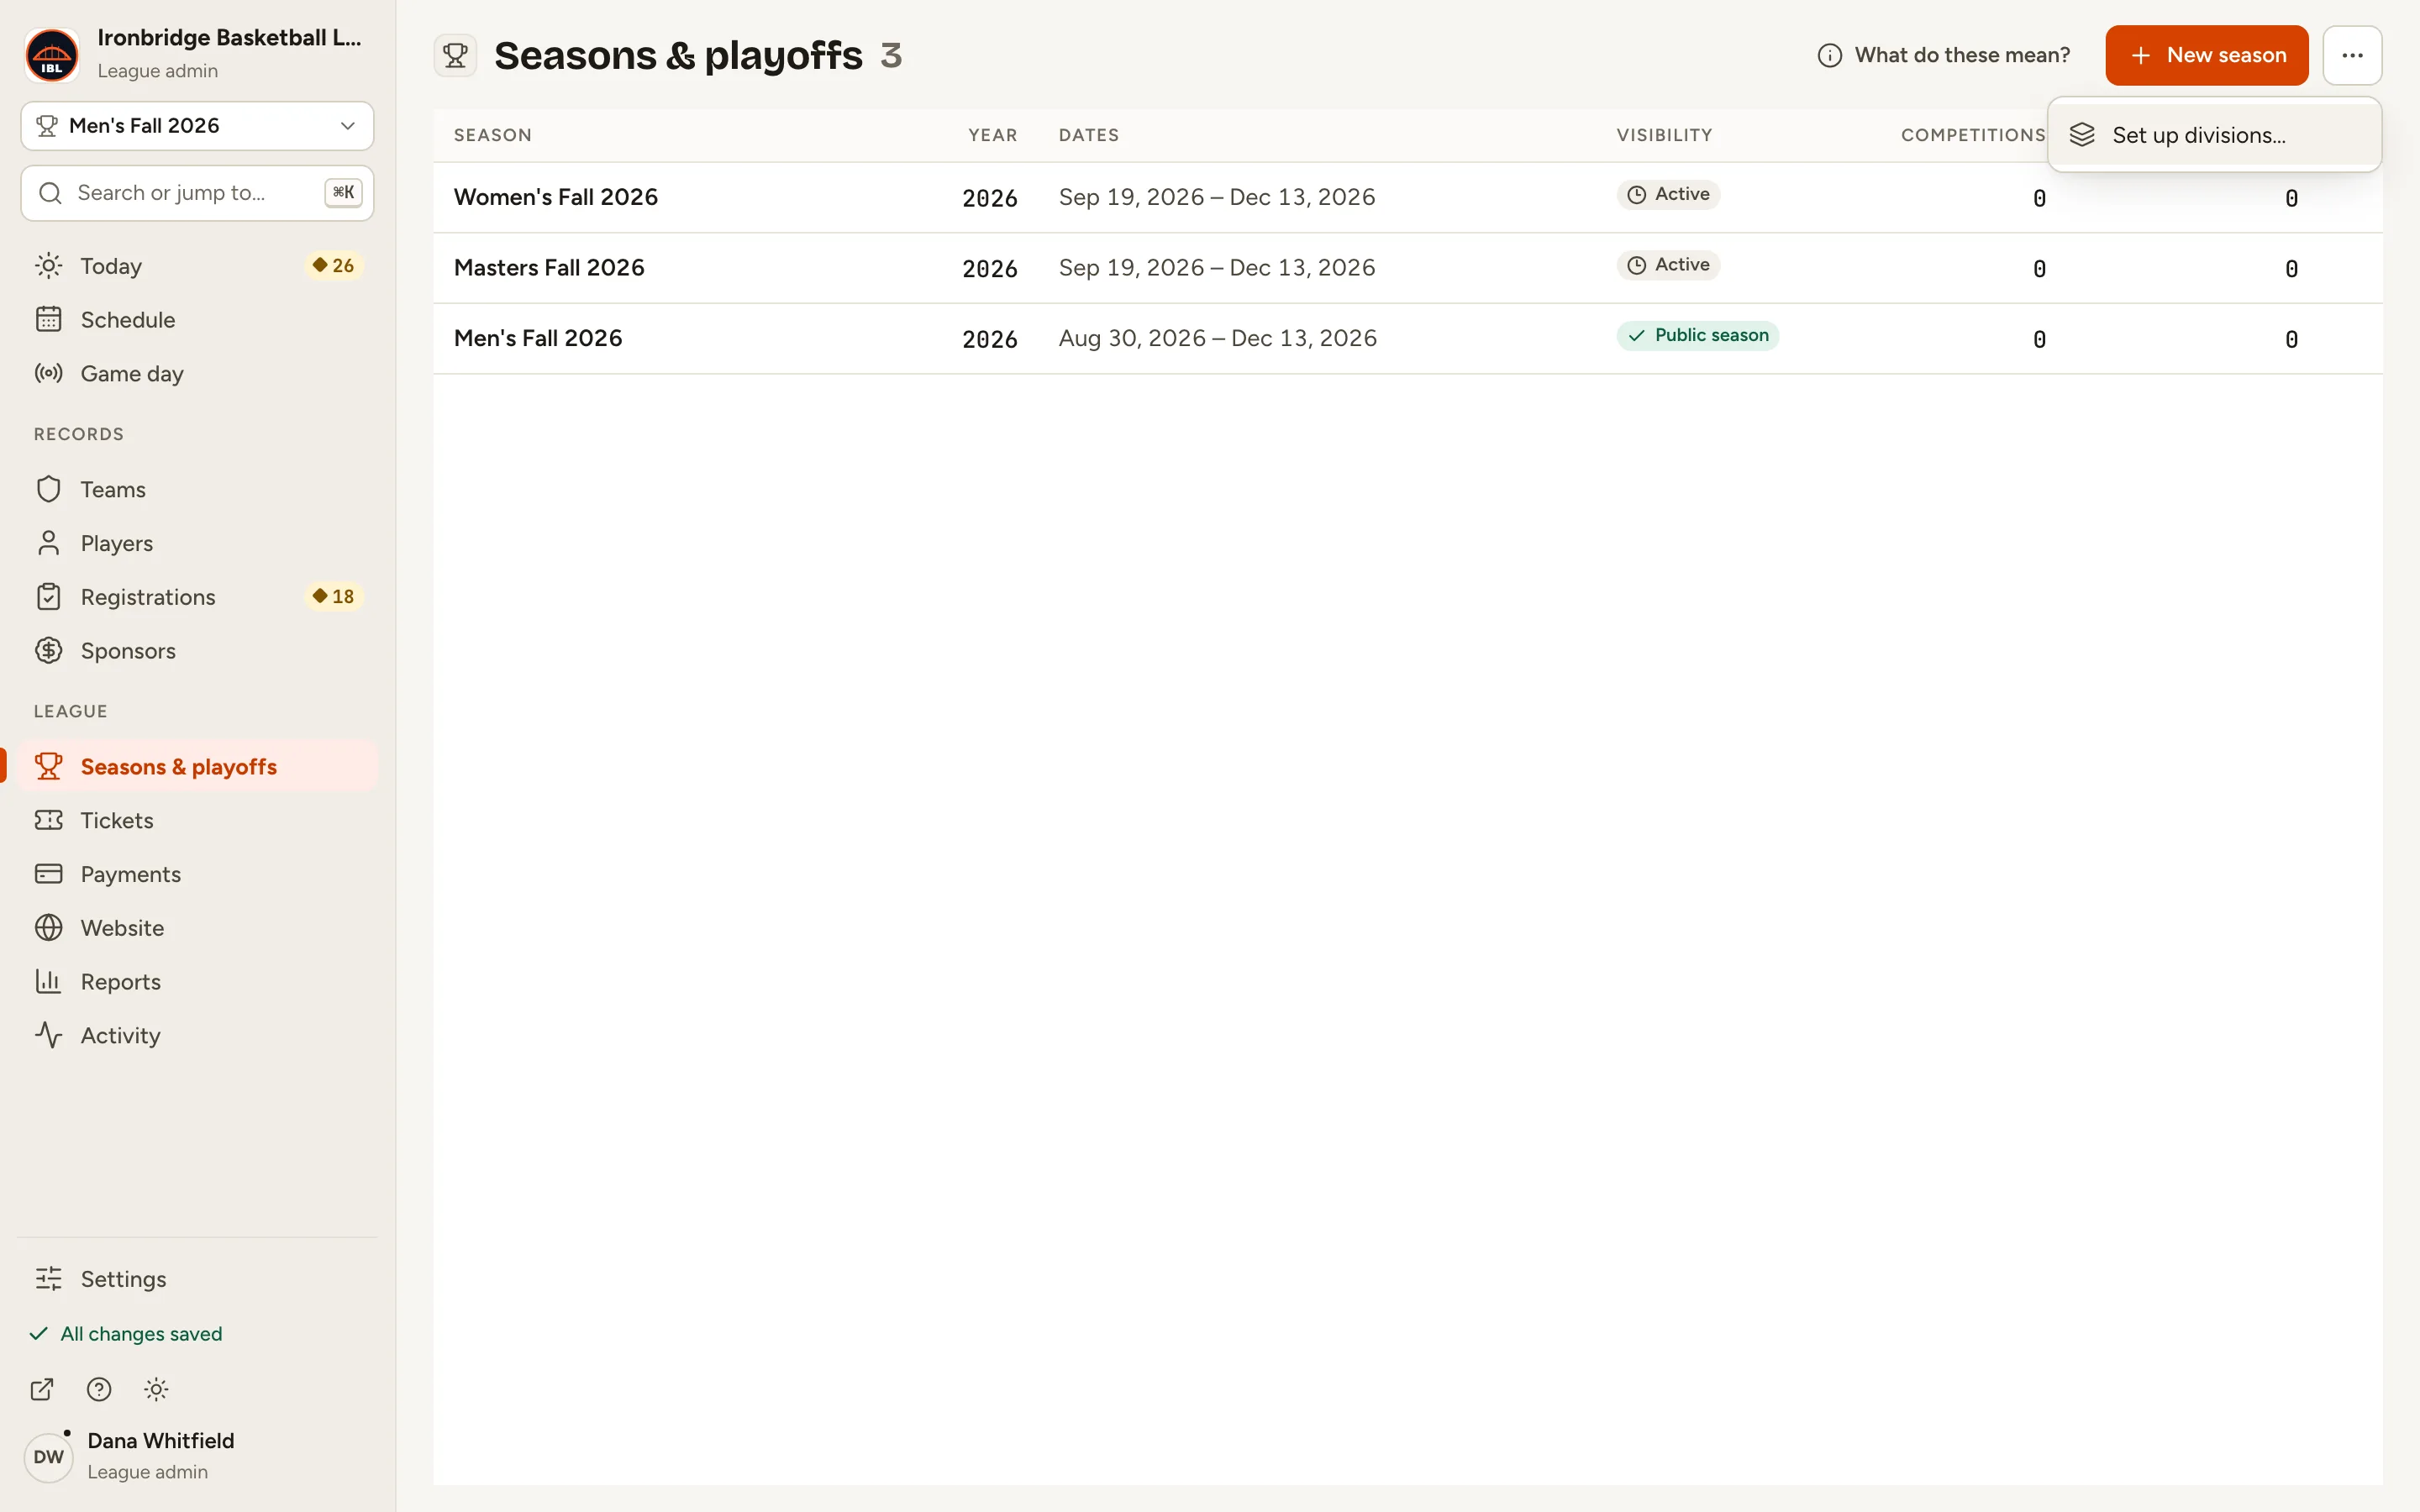
Fig. 2The ··· menu next to New season. -
Step 3: Choose Set up divisions…
A panel opens on Name your divisions, with names suggested from your seasons. It’s a draft: nothing is saved until you click Done.
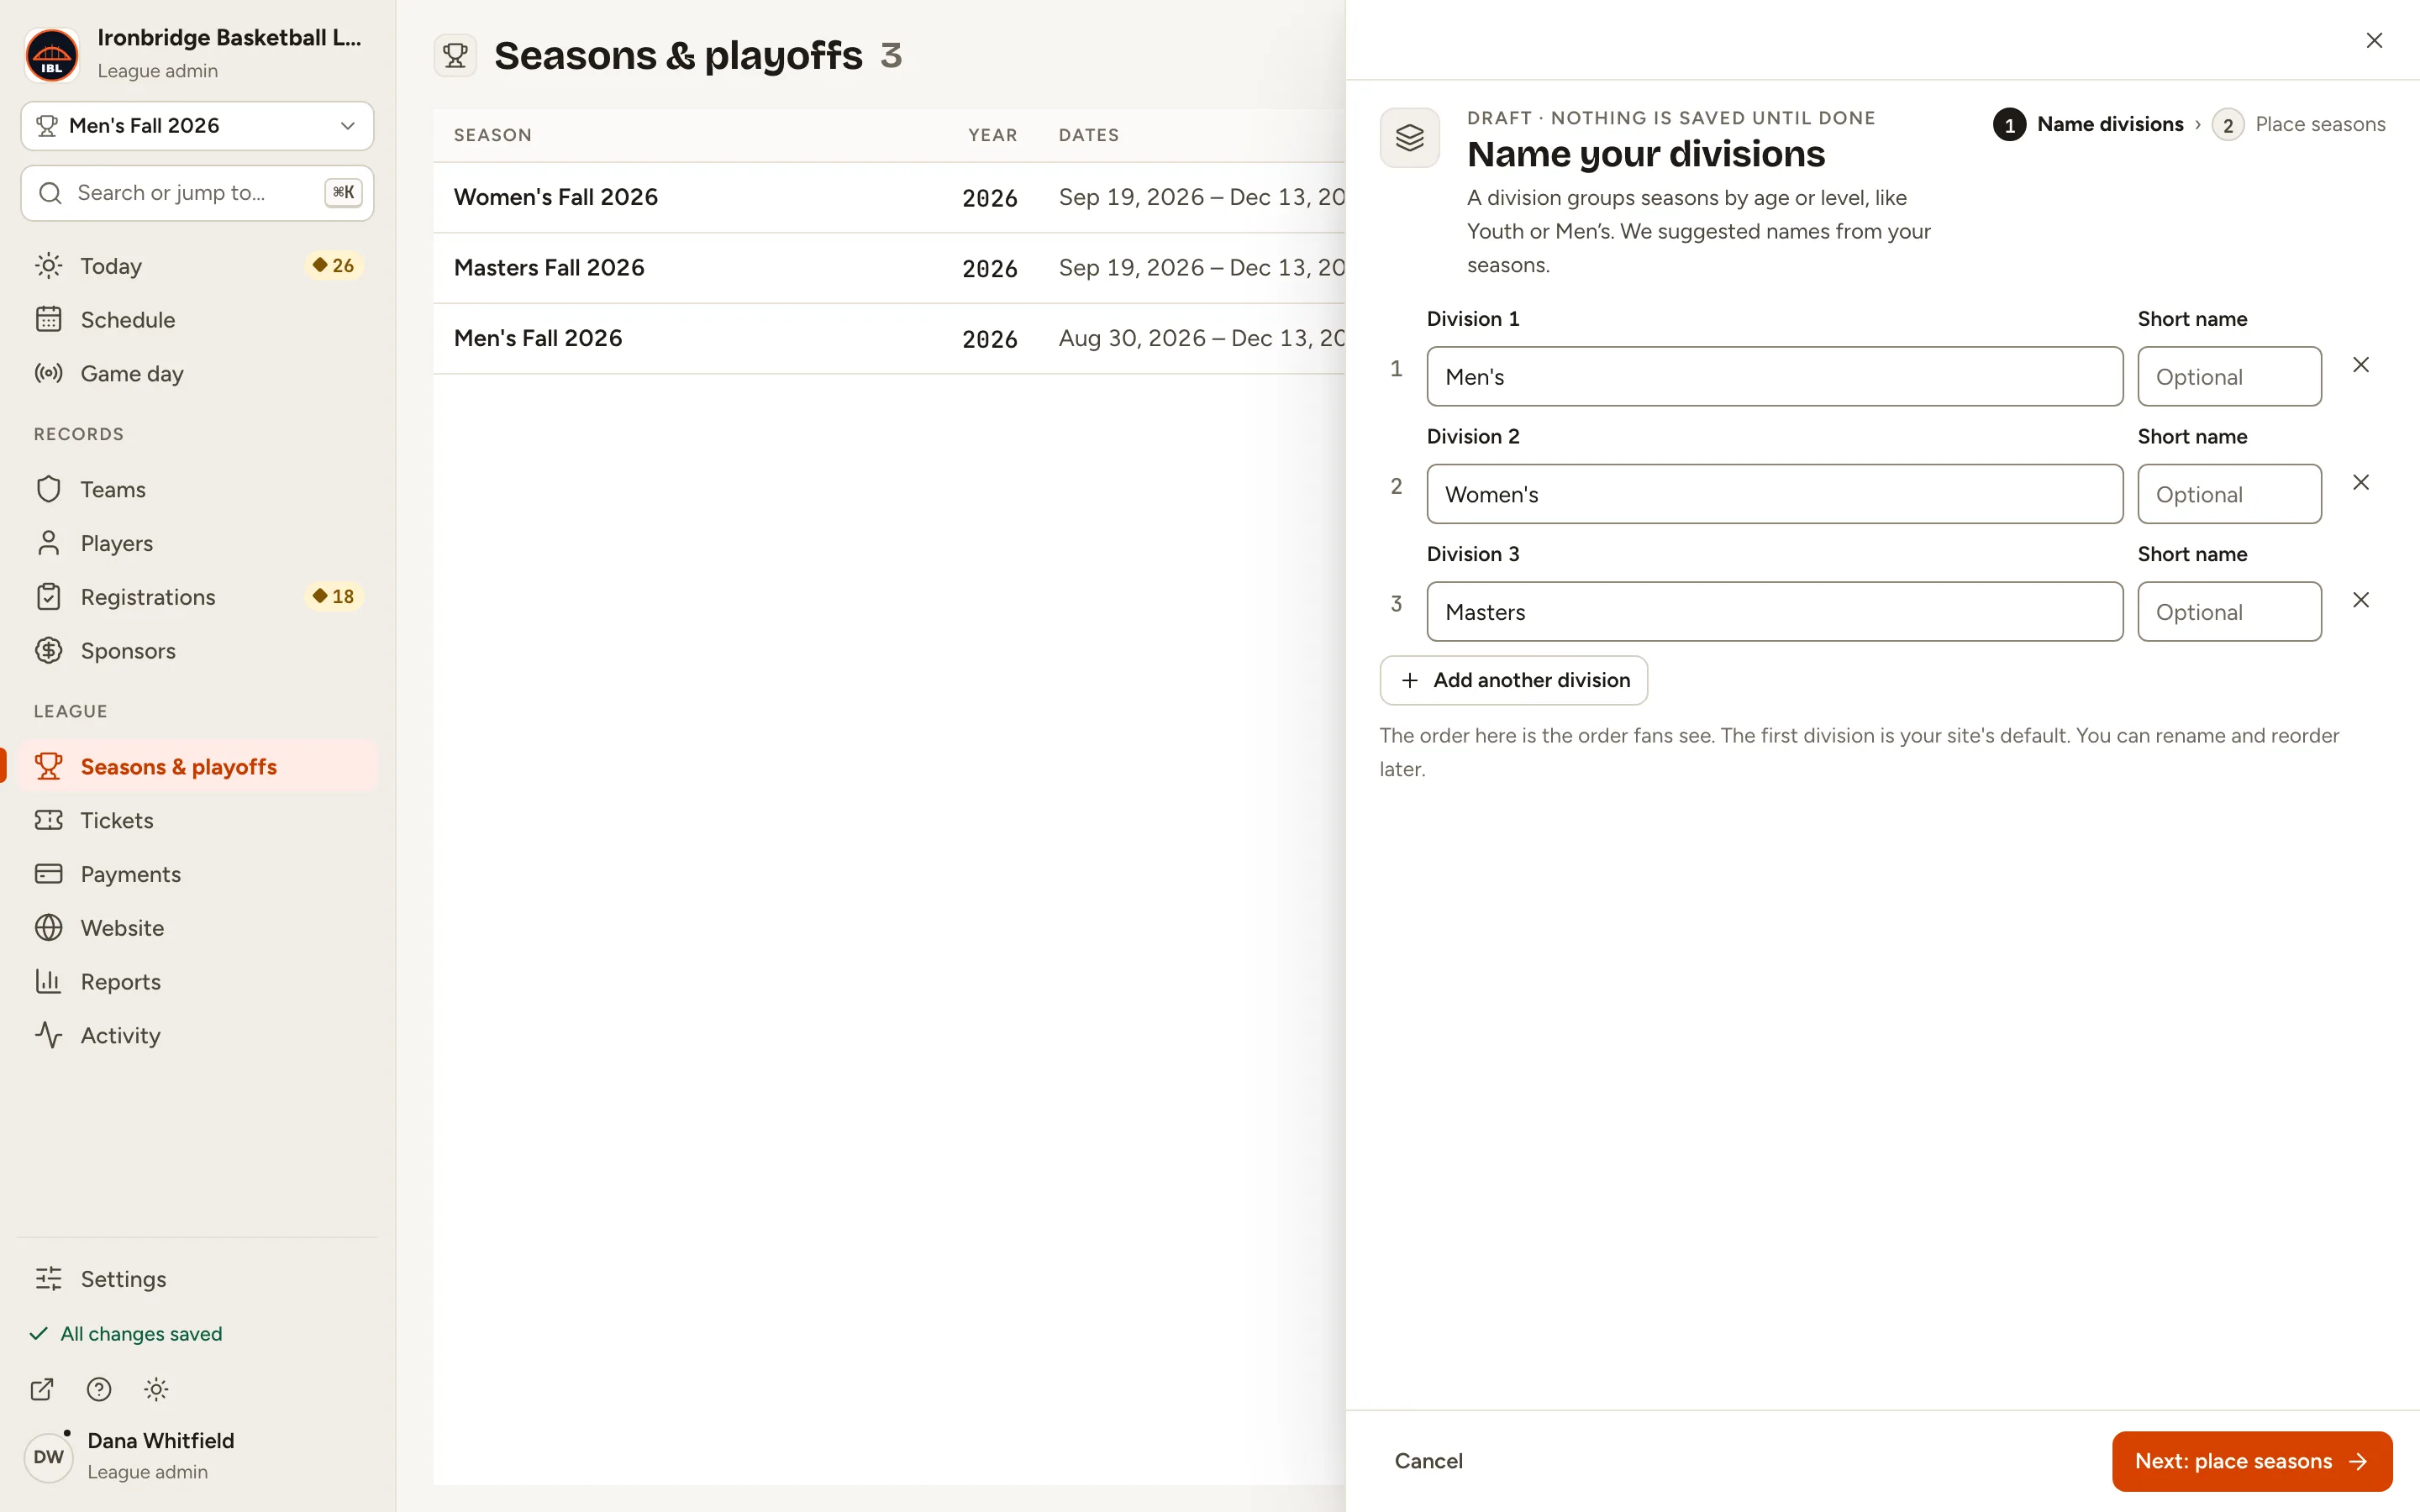
Fig. 3Name your divisions, with names suggested from your seasons. -
Step 4: Check the names. Optional: click Short name next to a division and type one, like 35+ for Masters.
The short name is used where space is tight, like tags. The order here is the order fans see, and the first division is your site’s default.
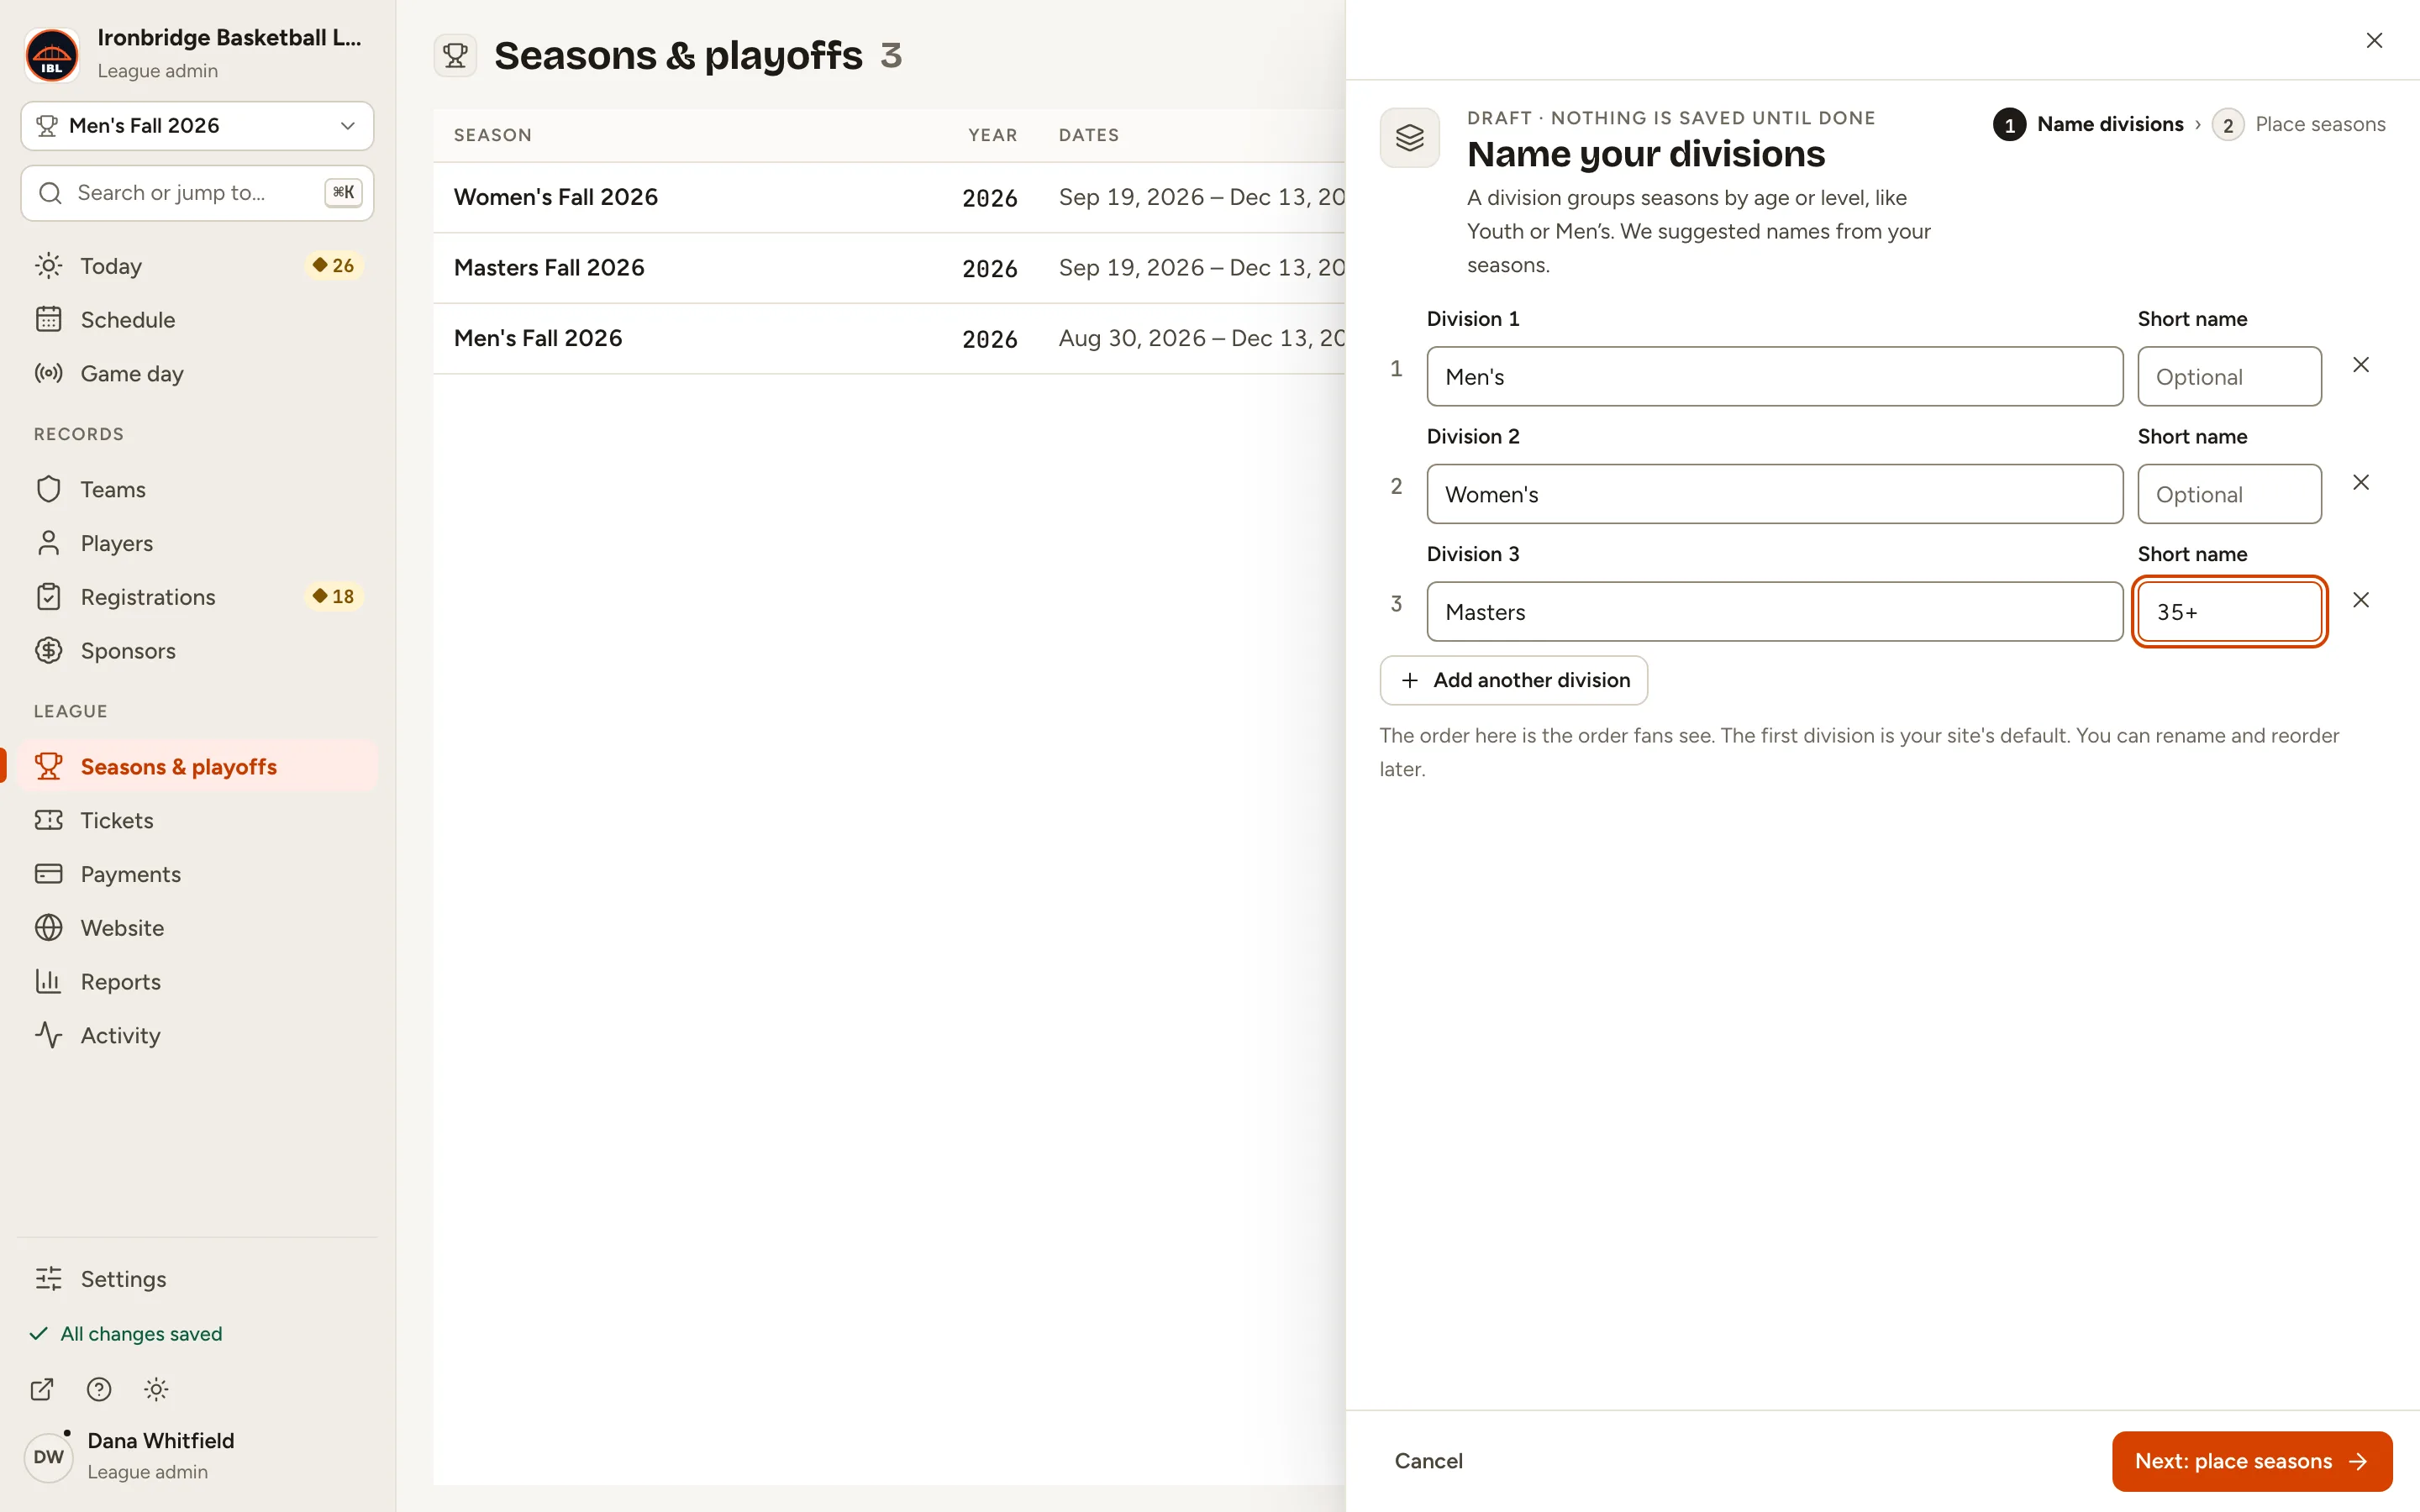
Fig. 4A short name for Masters. -
Step 5: Click Next: place seasons at the bottom right.
On Put your seasons in divisions, each season is matched to its division by name and marked Suggested. Season ids, games, stats and public links don’t change.
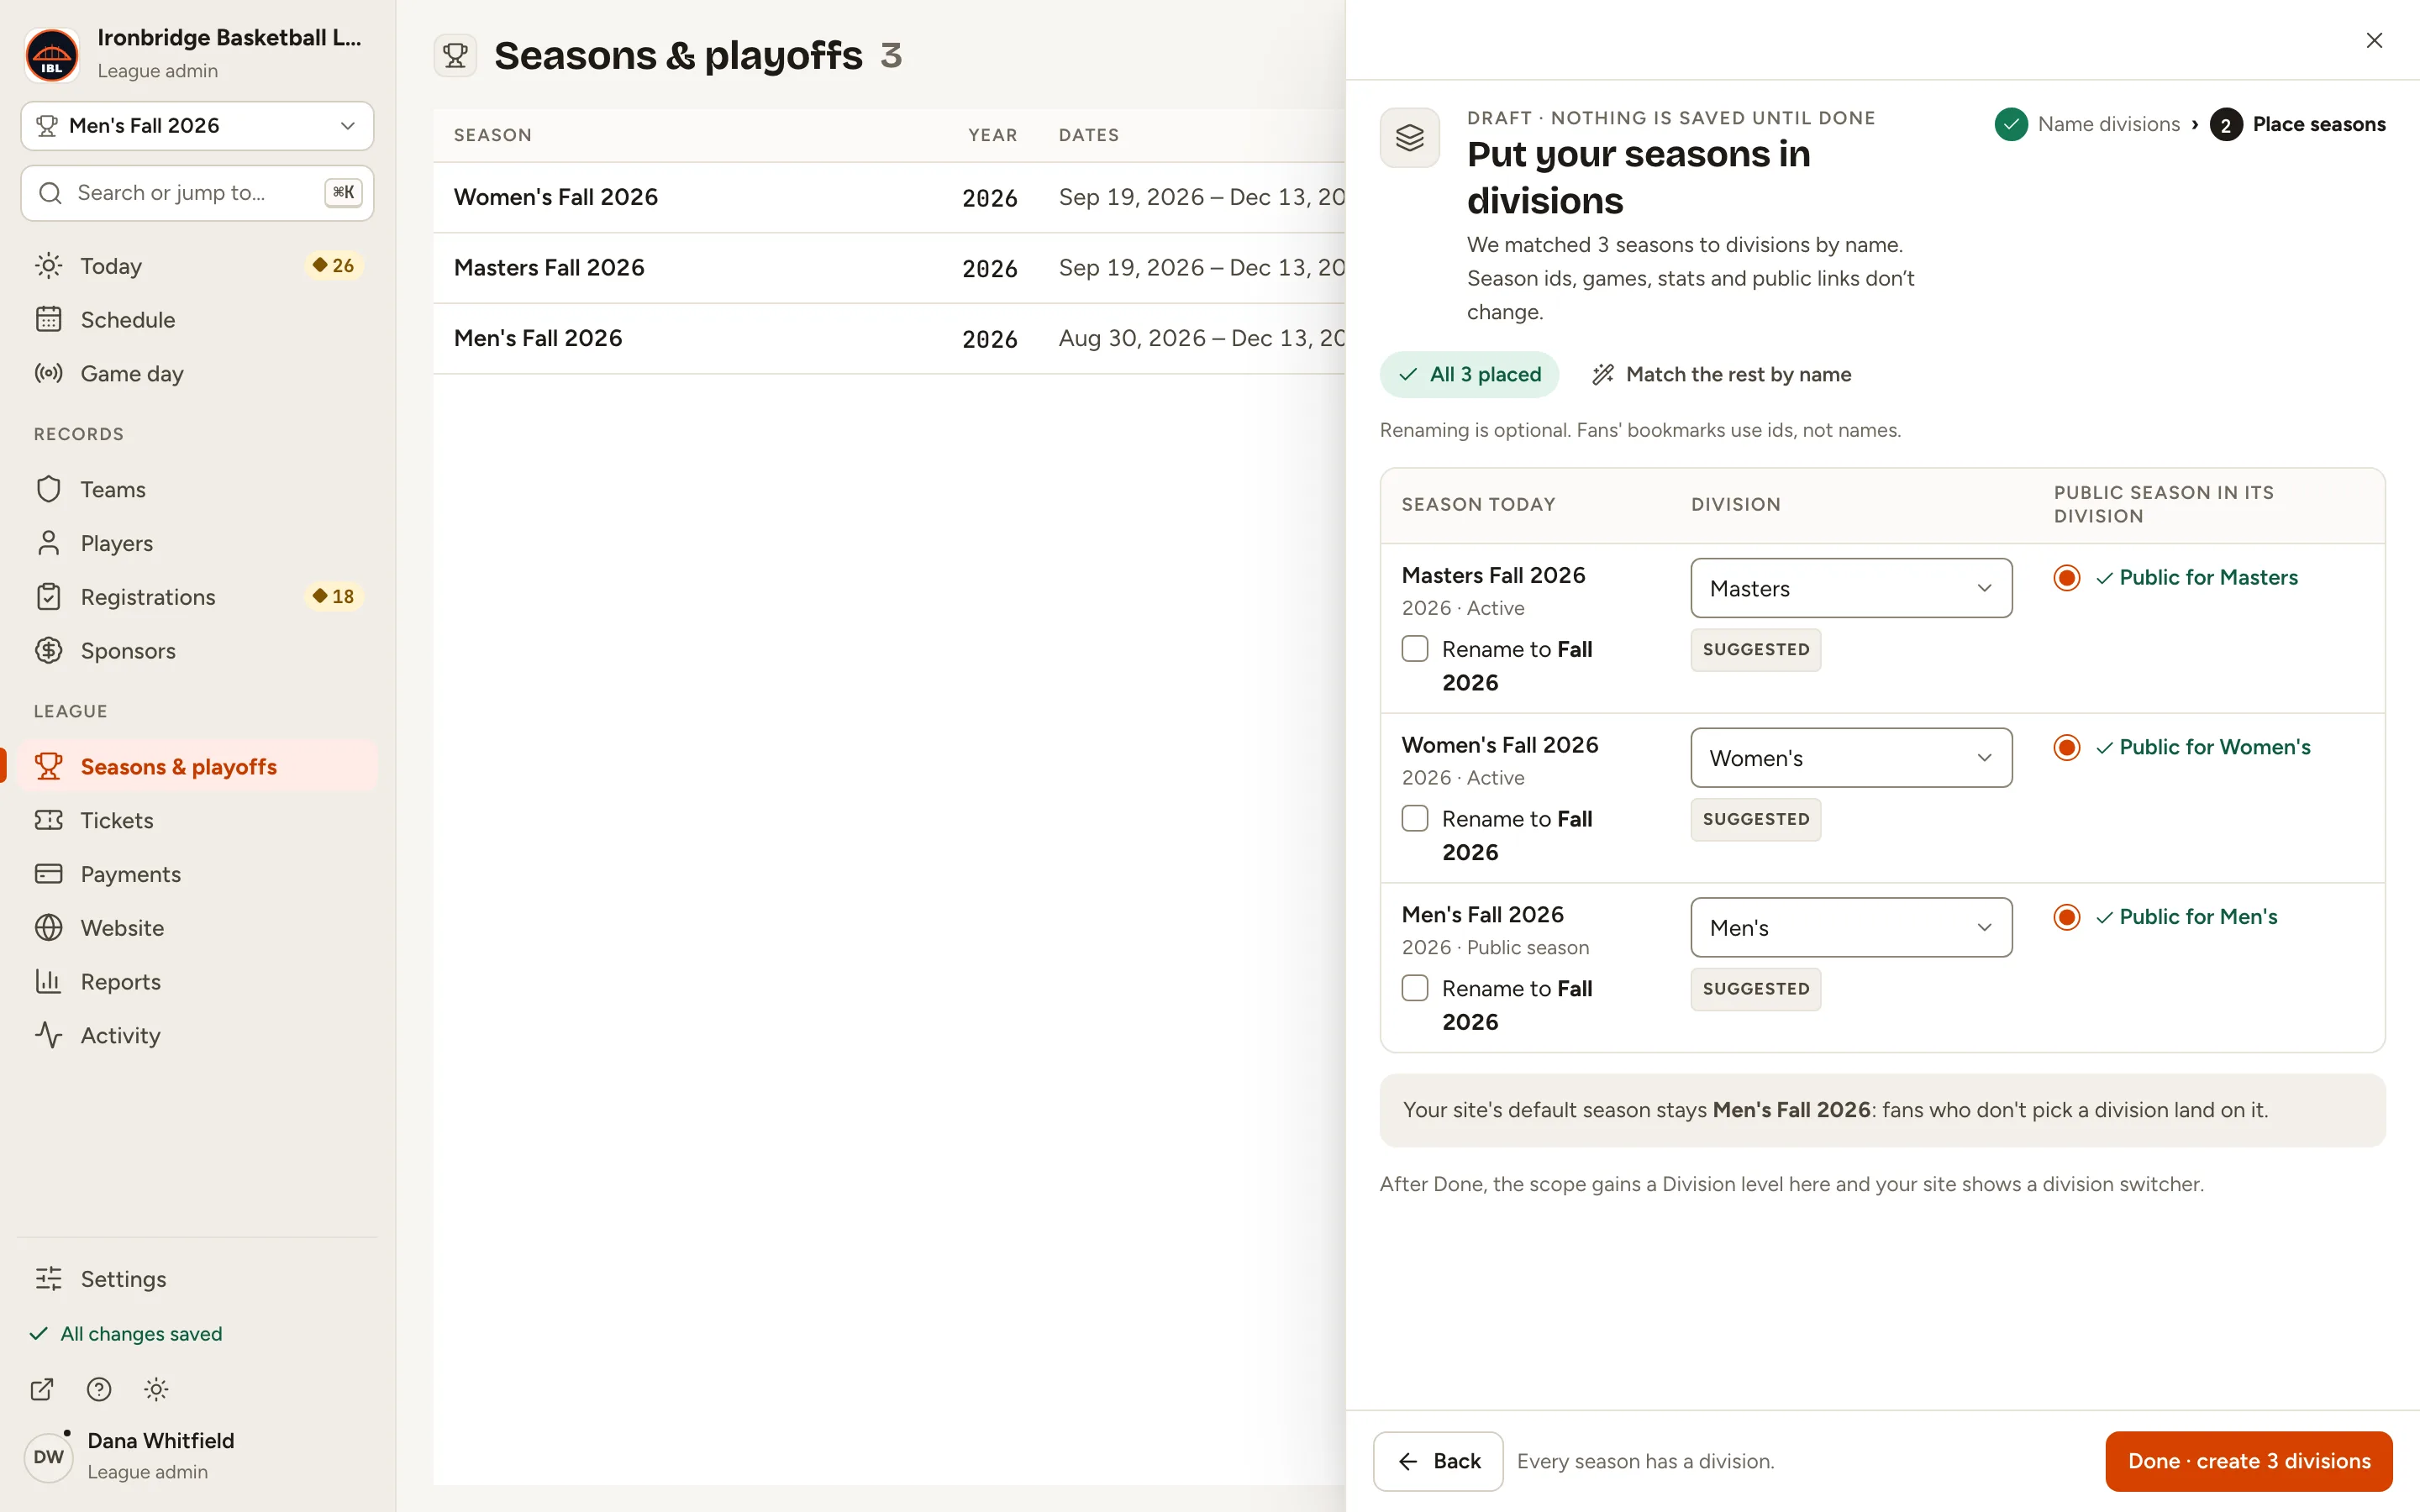
Fig. 5Each season matched to a division, marked Suggested. -
Step 6: Optional: tick Rename to Fall 2026 under each season.
The division name is dropped from the season name, so Men’s Fall 2026 becomes Fall 2026 inside the Men’s division. Renaming is optional: fans’ bookmarks use ids, not names.
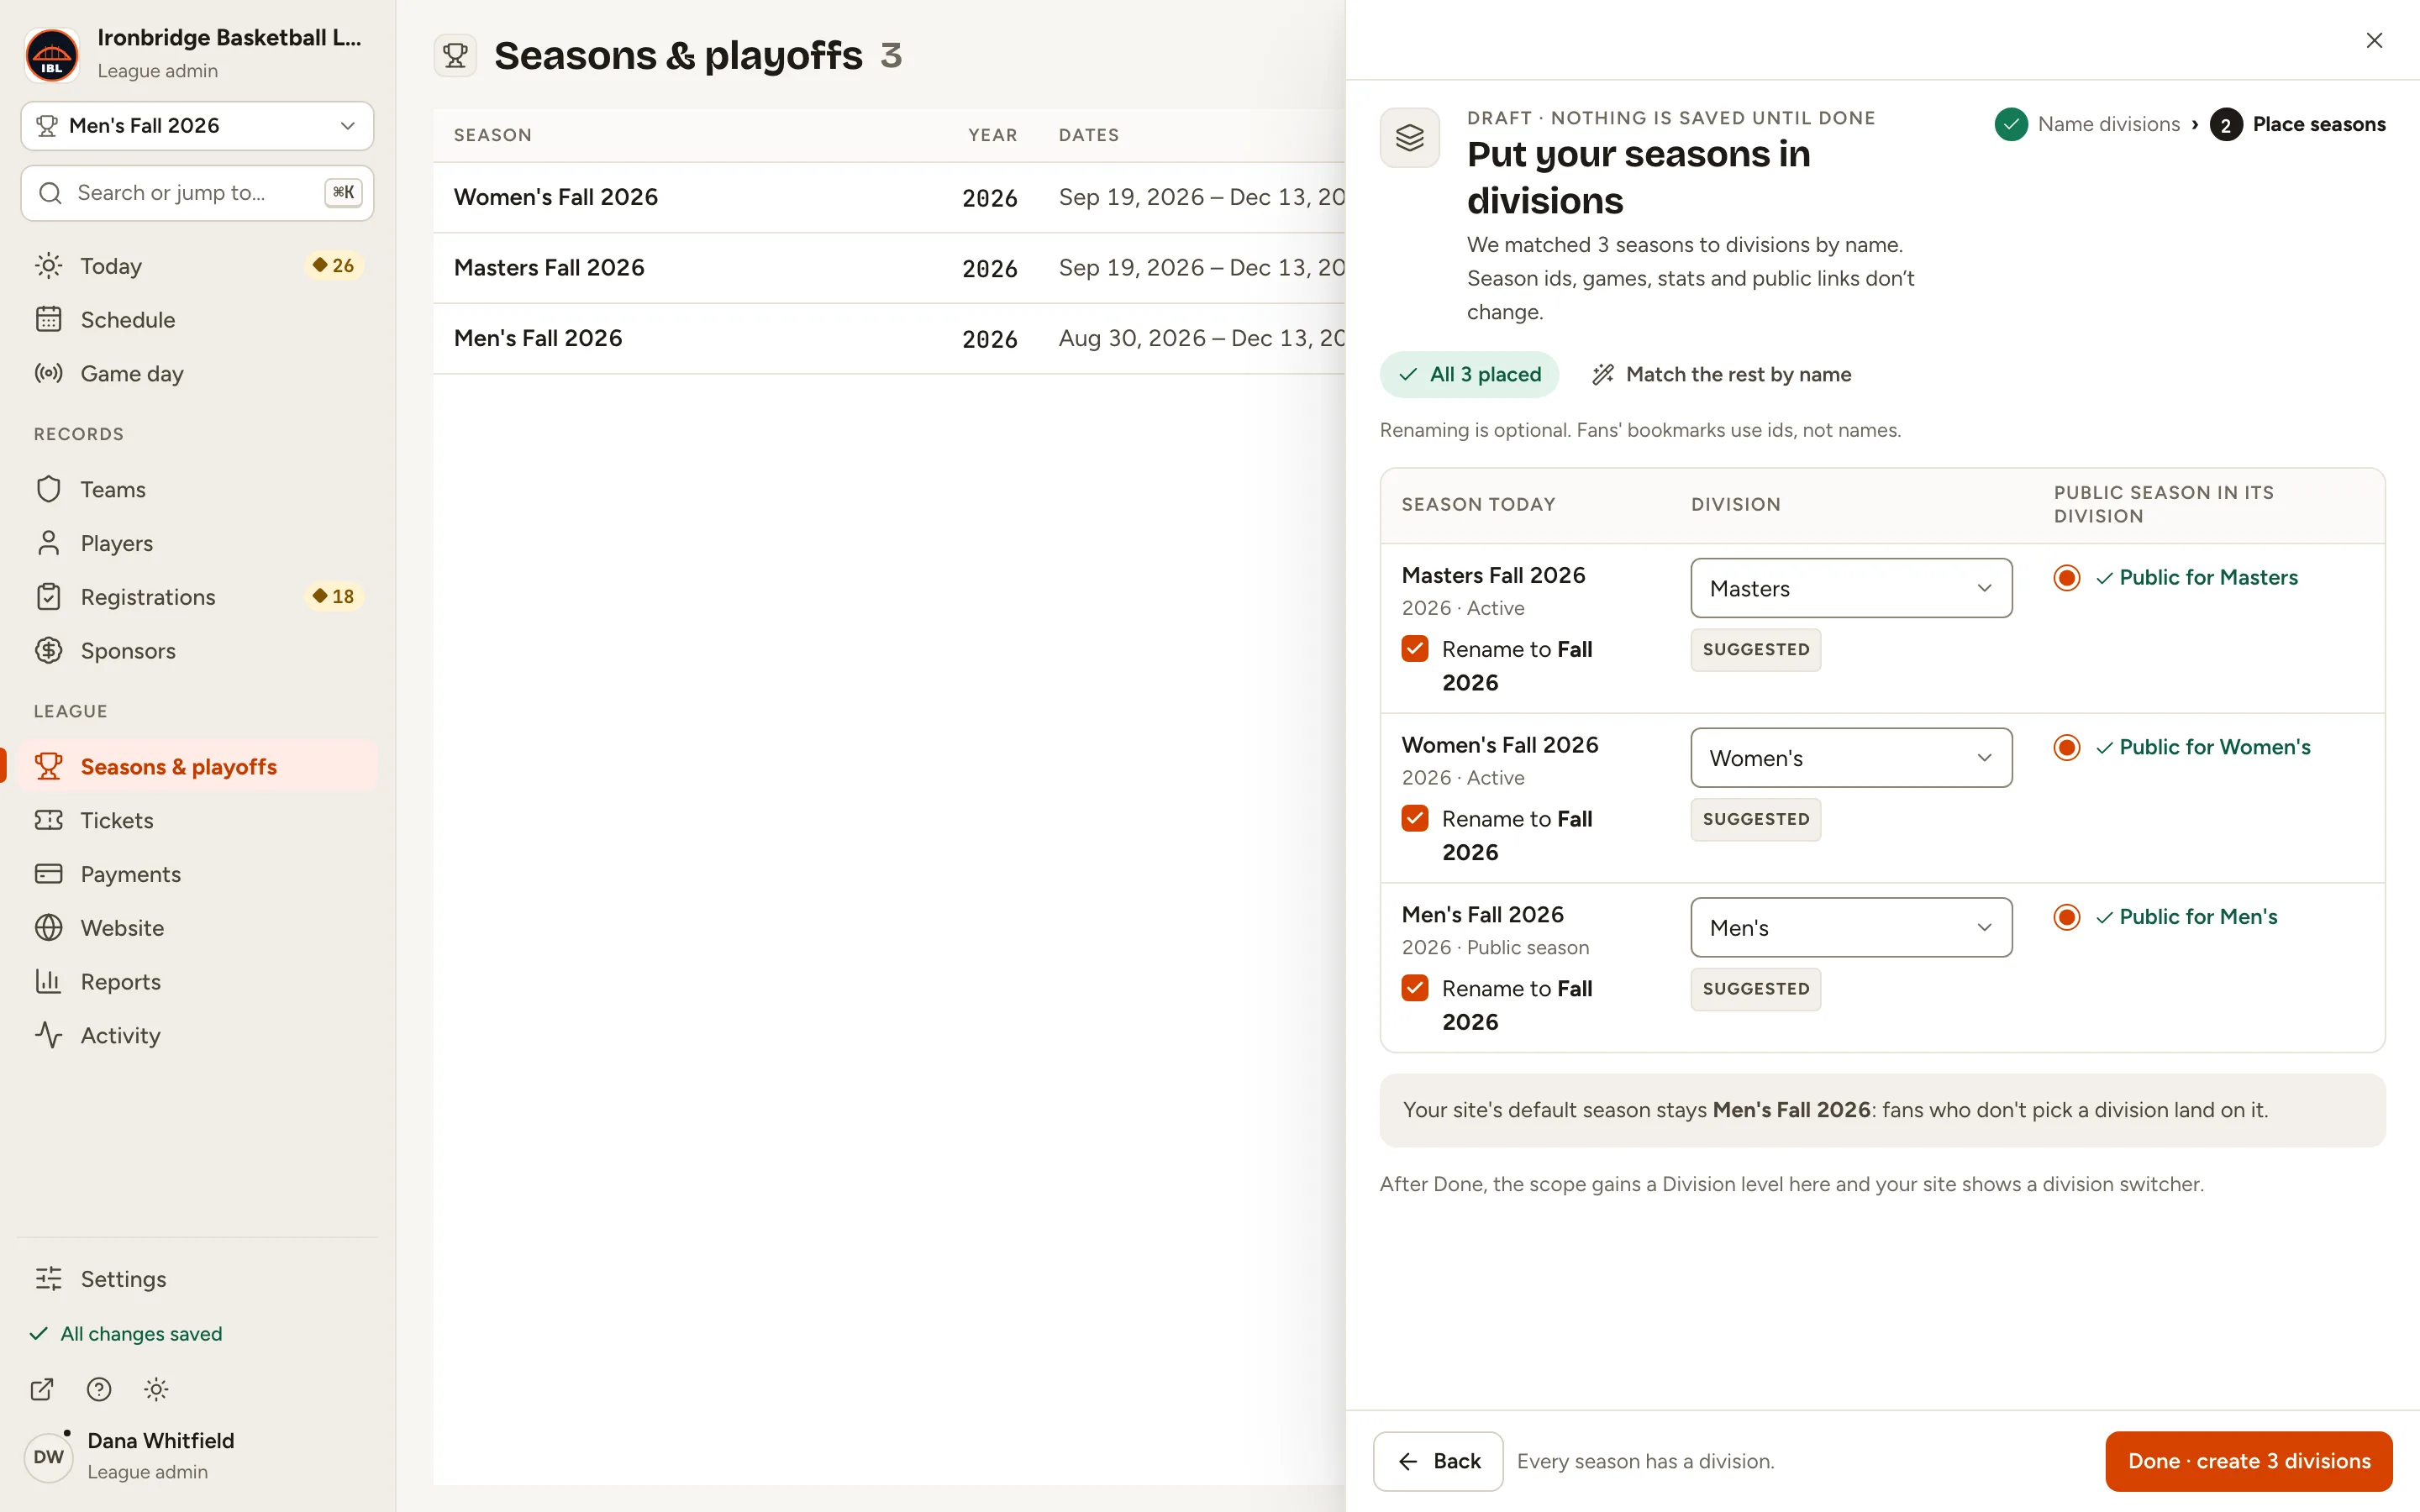
Fig. 6Rename to Fall 2026 drops the division from the season name. -
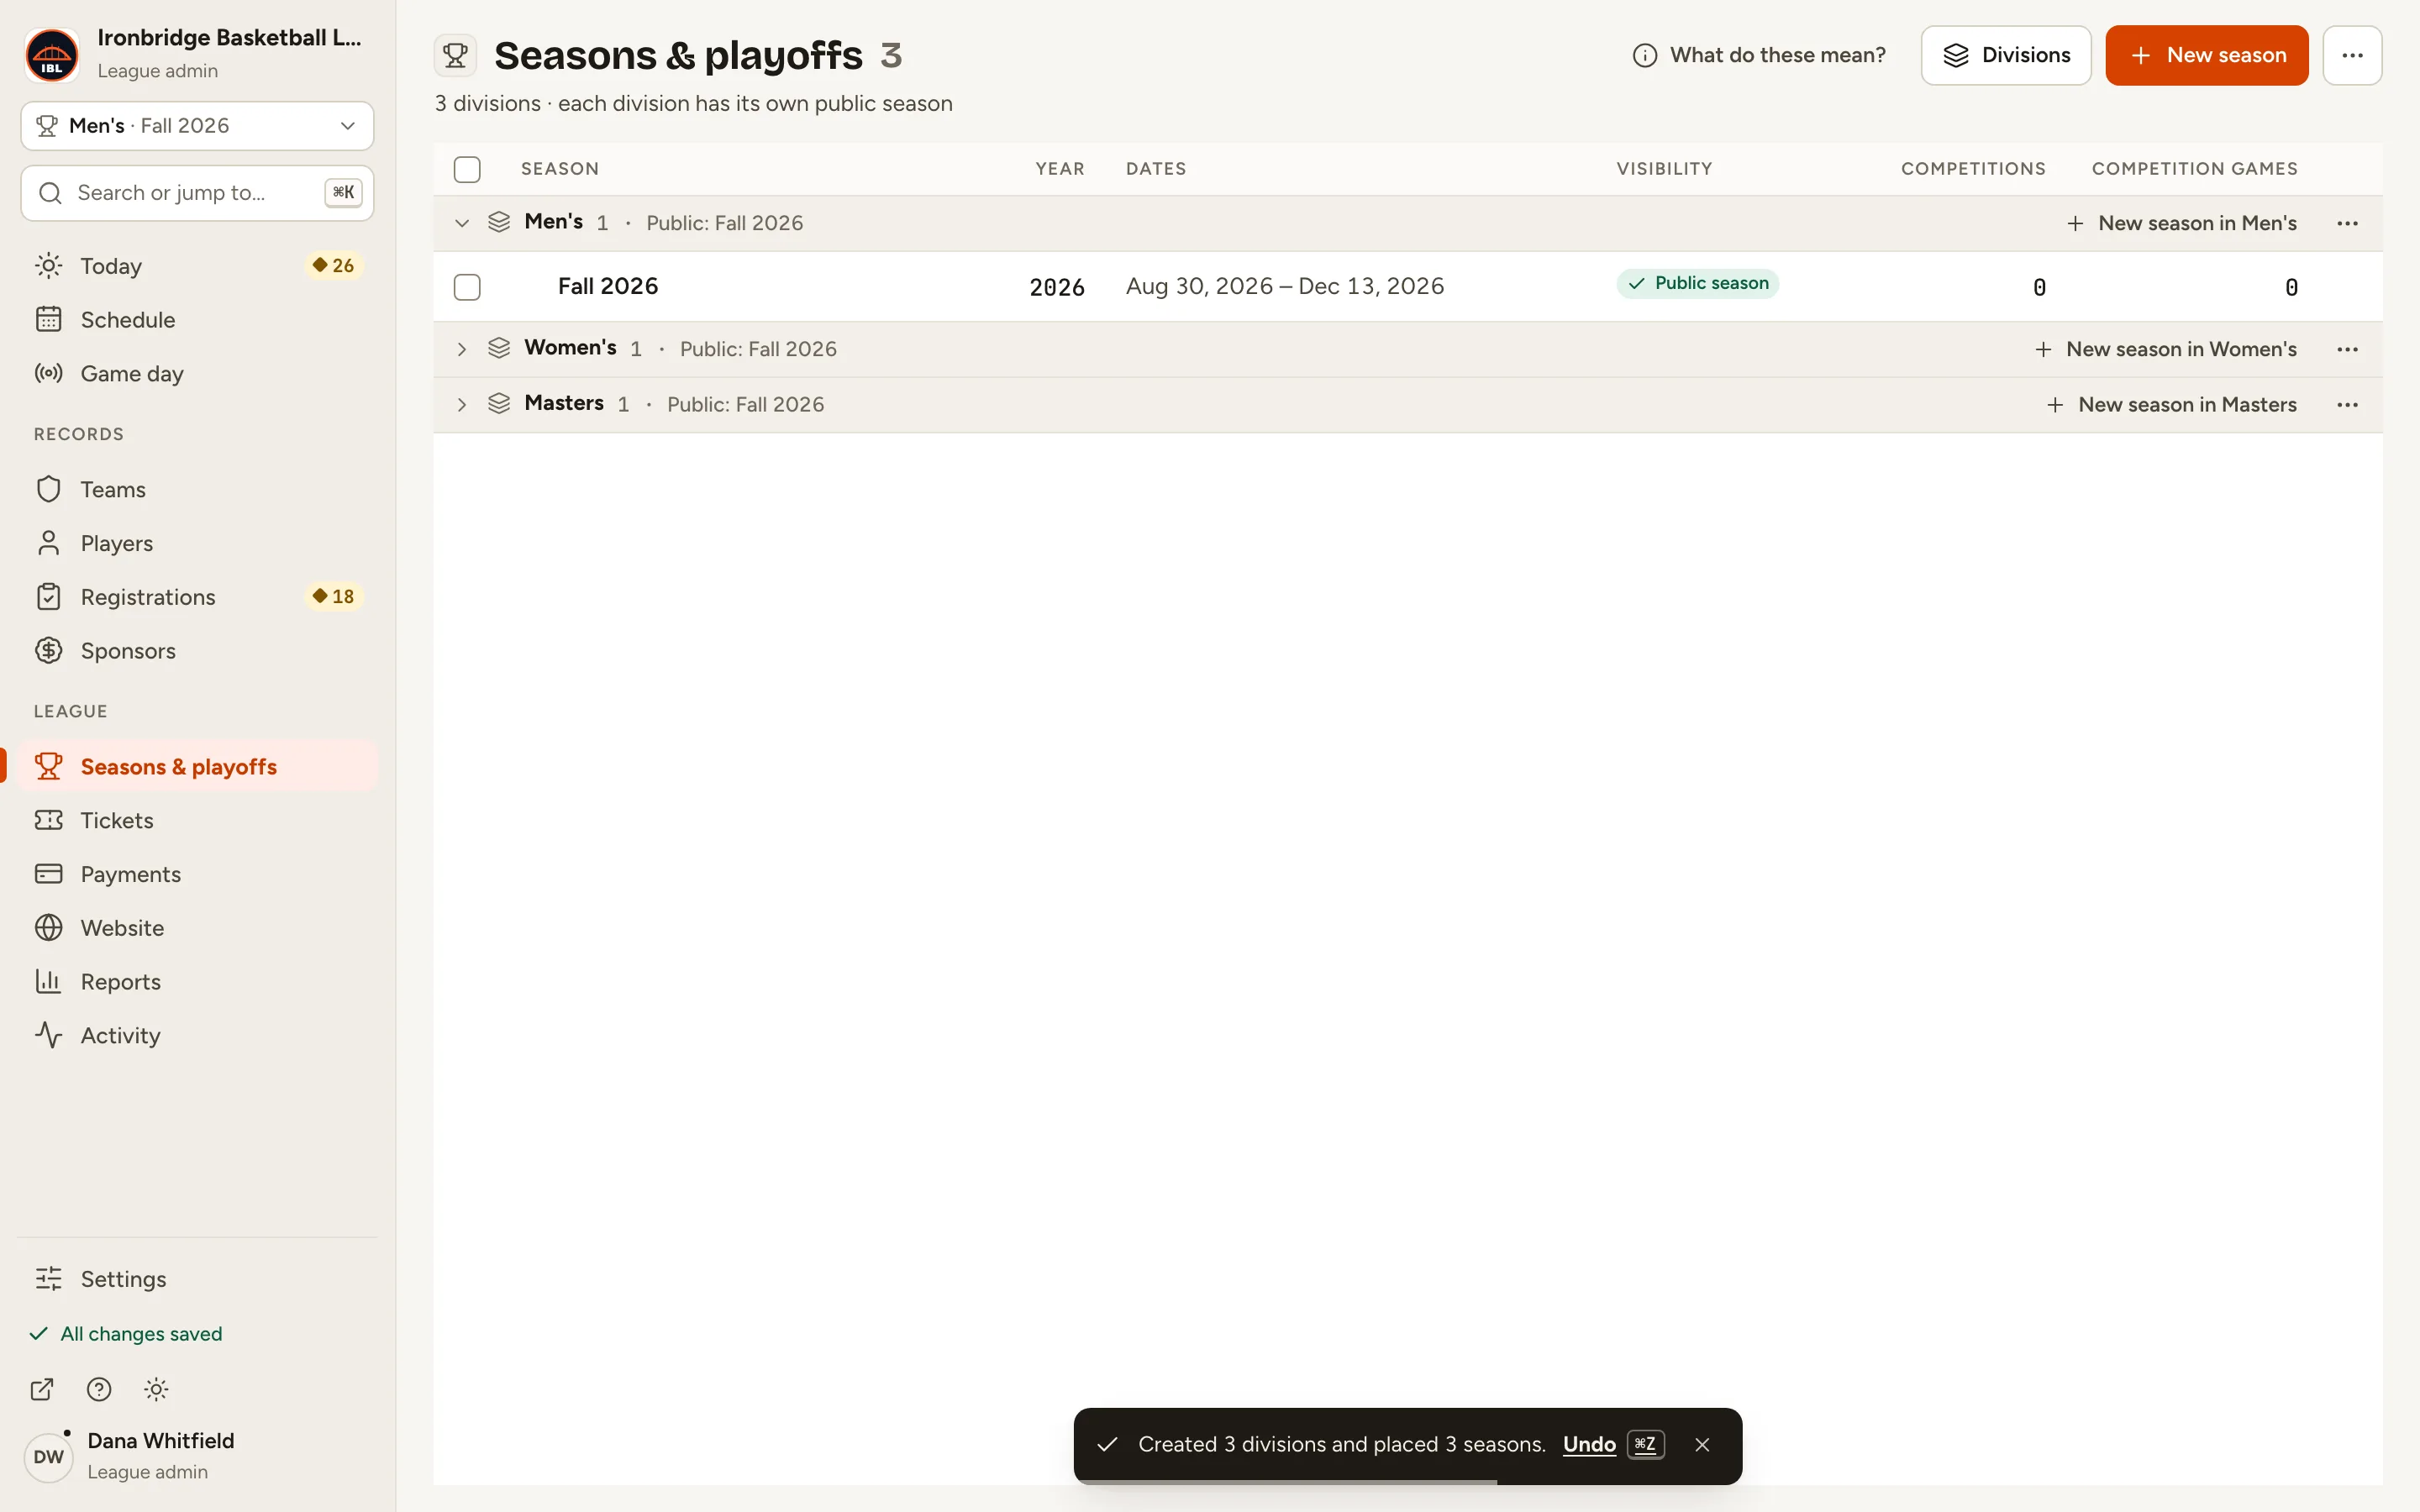
Step 7: Check the Public season in its division for each one, then click Done · create 3 divisions.
Your divisions are created and your seasons placed in them. An Undo appears for 6 seconds in case you change your mind.
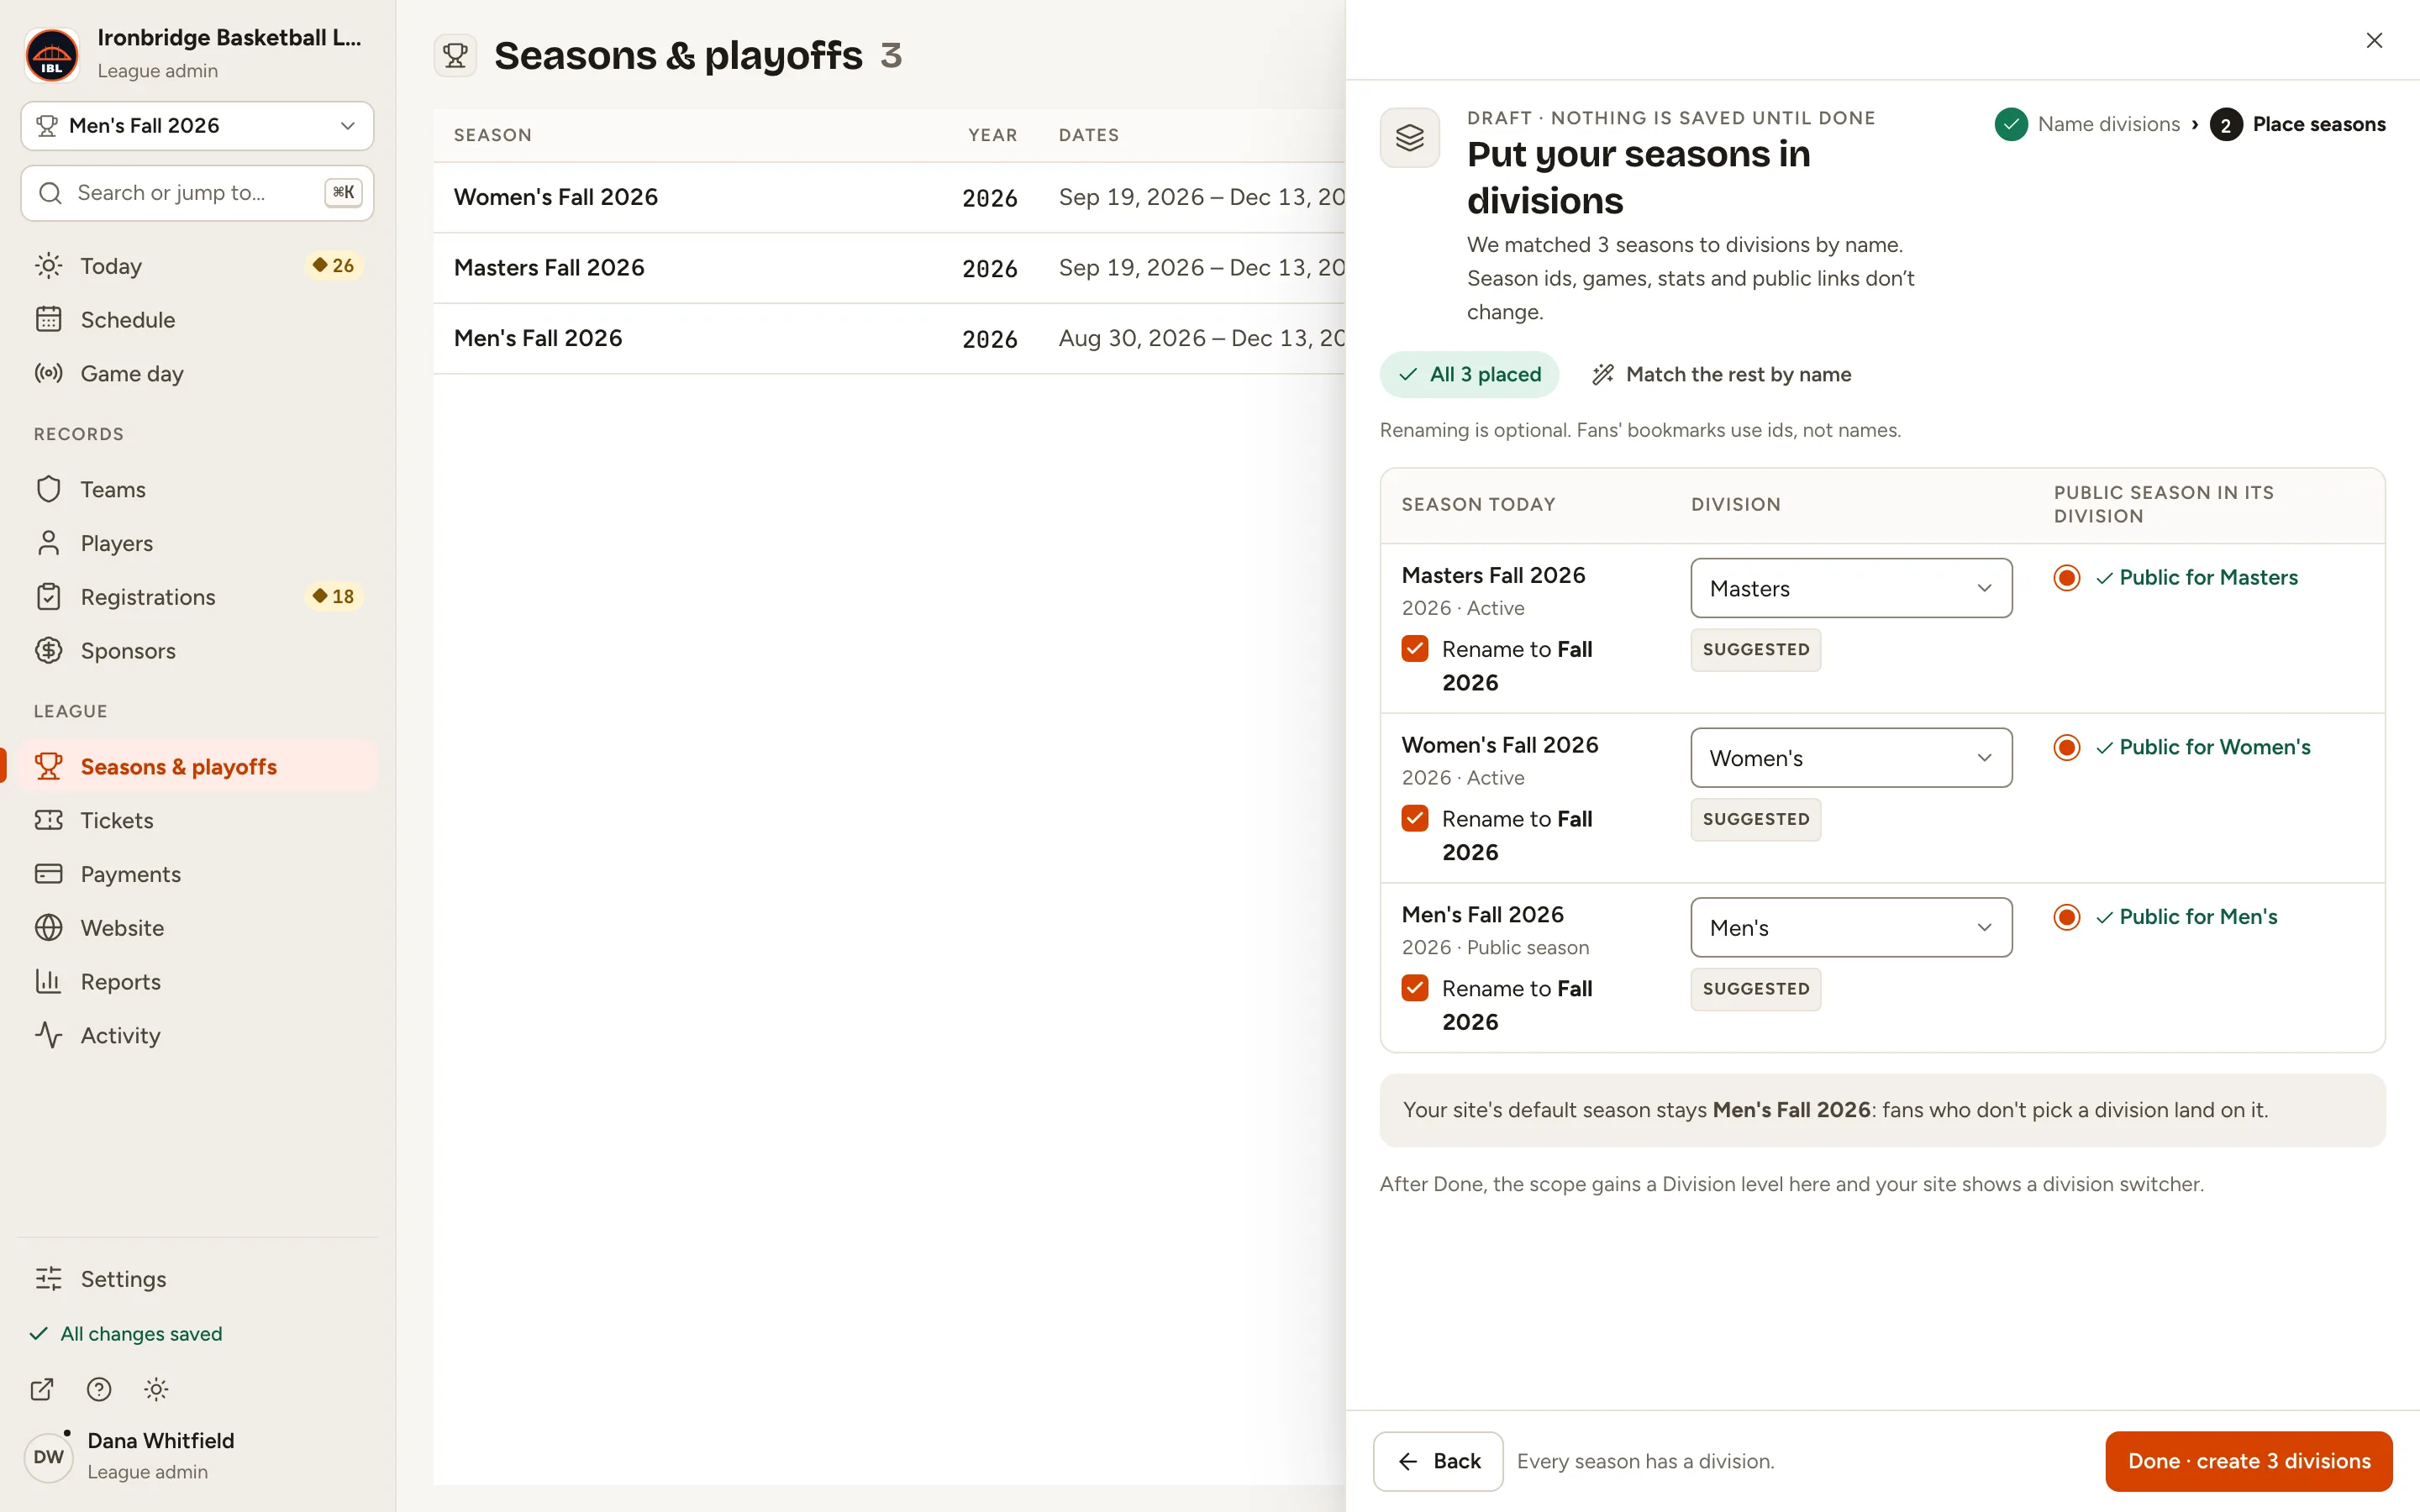
Fig. 7Done creates the divisions. -
Step 8: Click the scope picker at the top left and choose All divisions, or one division.
The picker now has a Division level. With All divisions, Today, Schedule and Seasons show every division at once. Other pages ask you to pick one division.
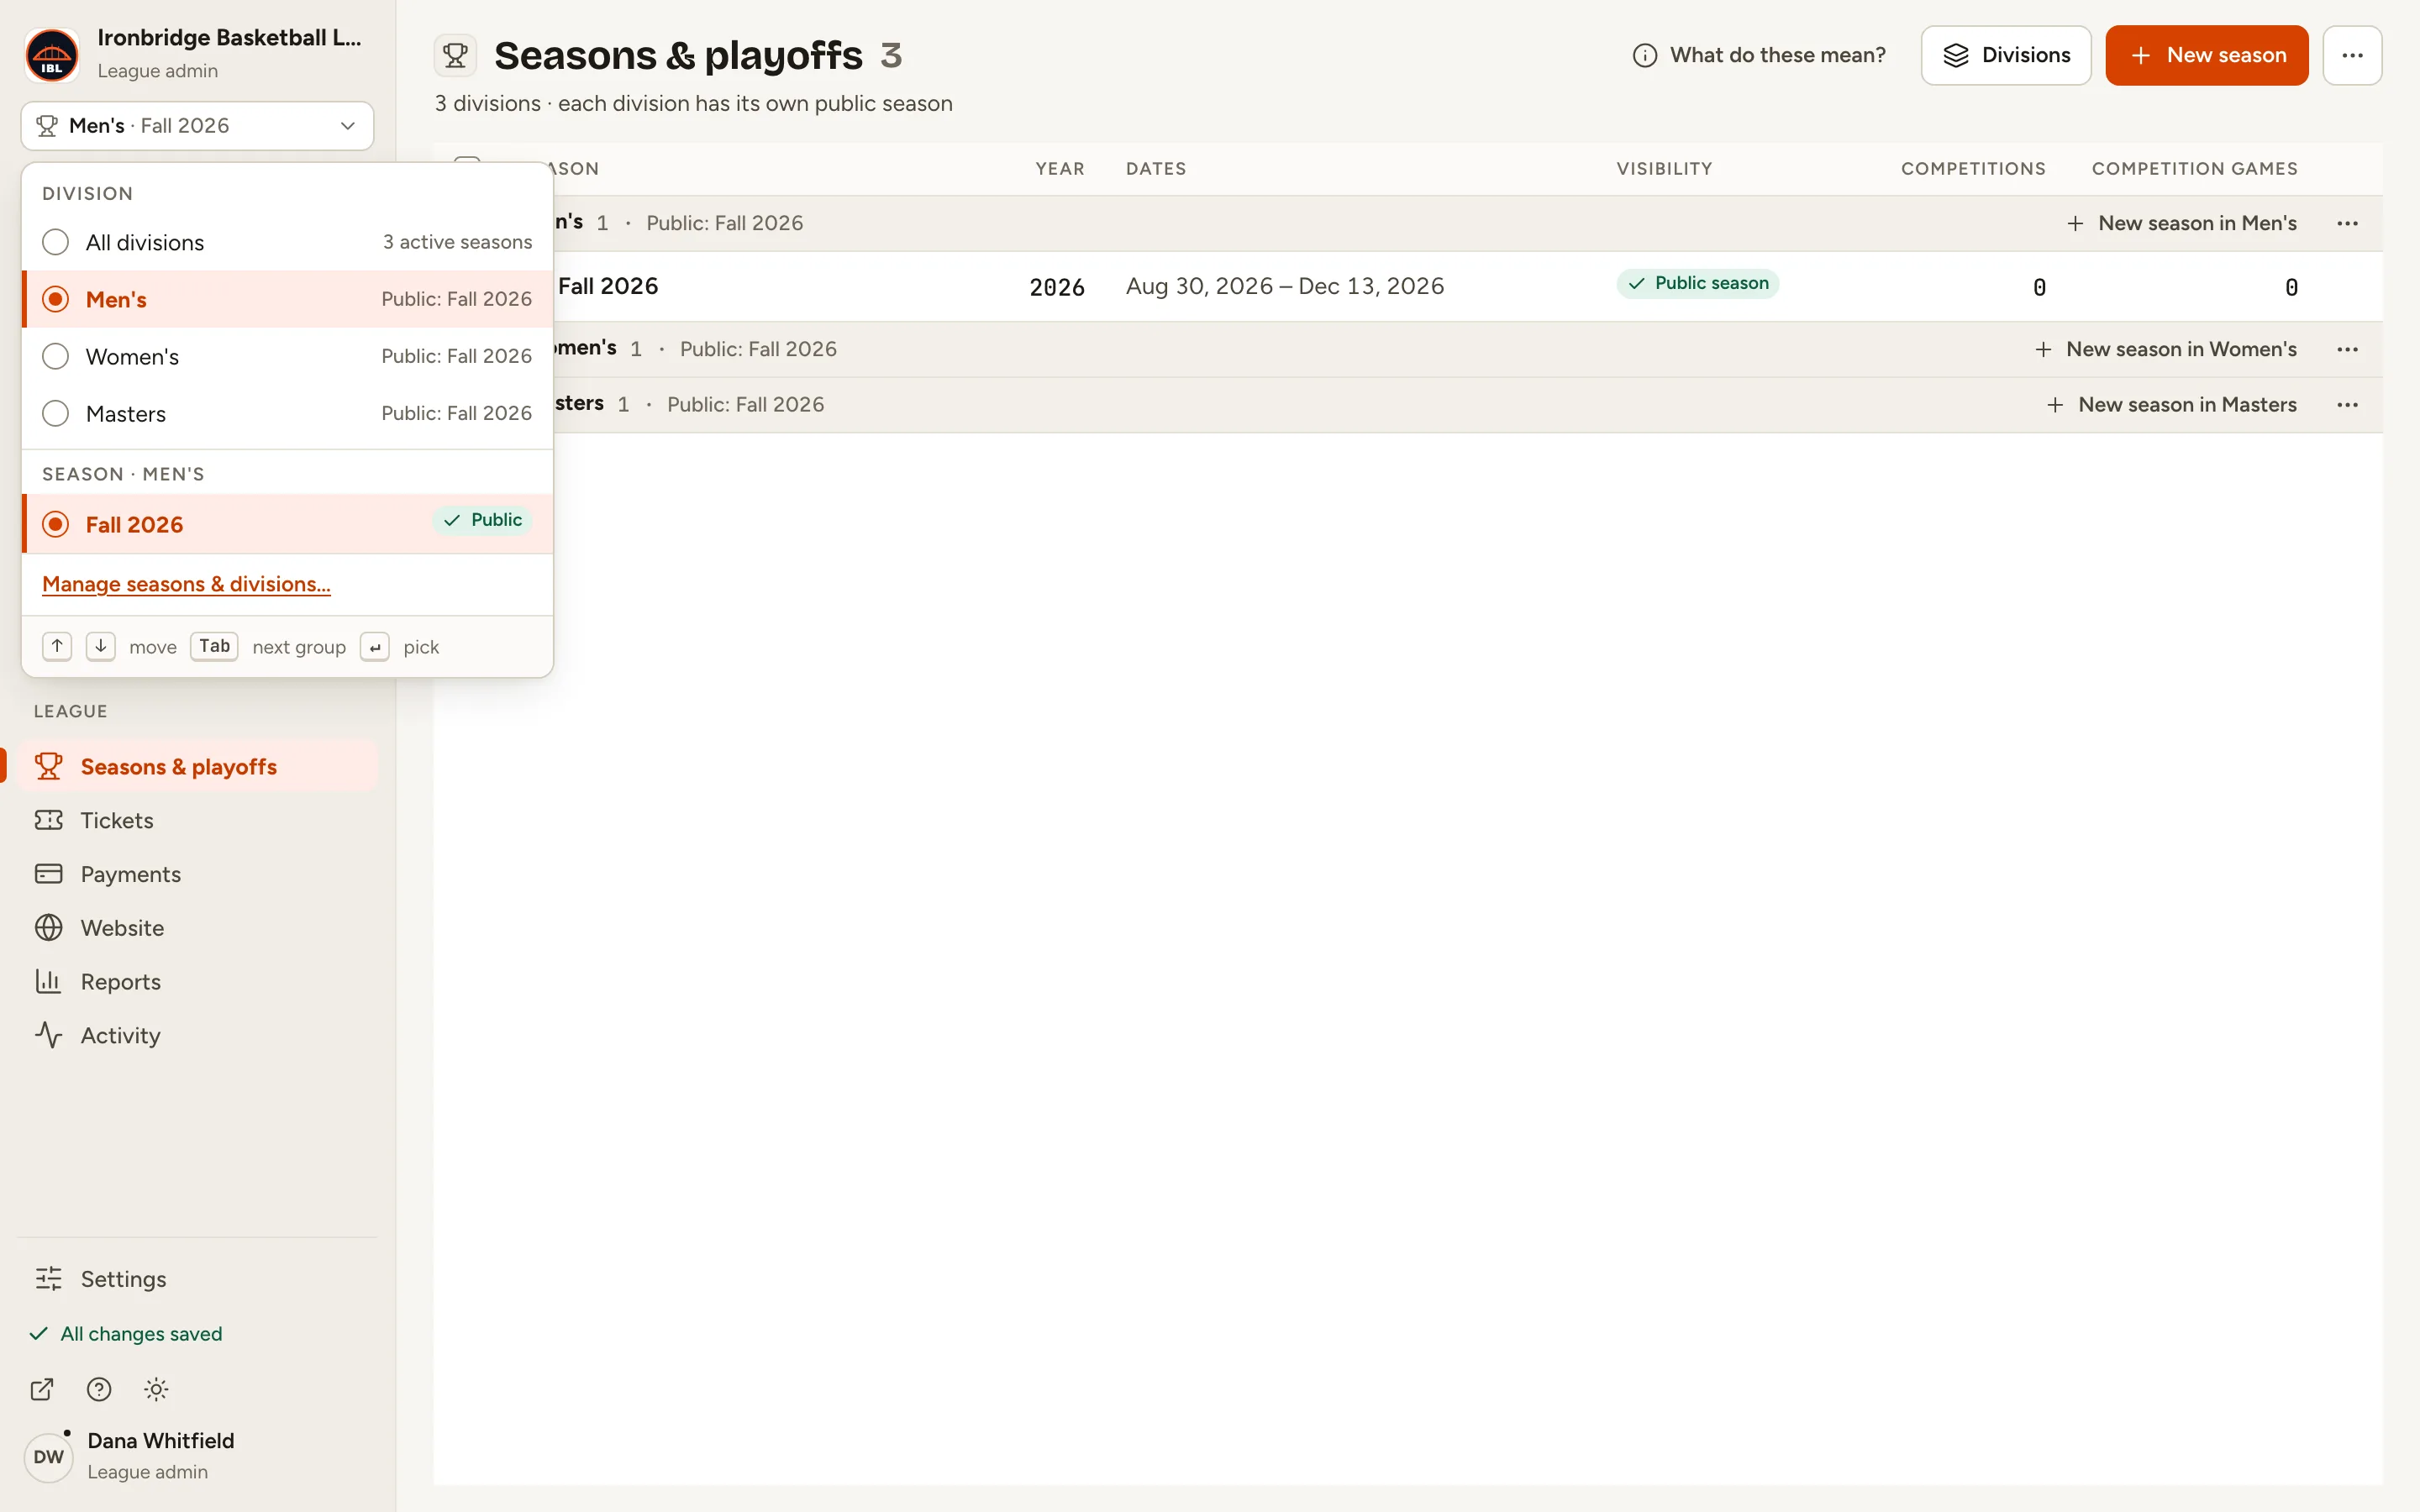
Fig. 8The scope picker now has a Division level. -
Step 9: On your website, open Schedule and pick a division.
From the admin, click ↗ (View public site) at the bottom of the sidebar; your website opens in a new tab. Once you pick a division, the schedule shows only its games, with its standings further down. Home, Teams, Players and Stats follow the same pick.
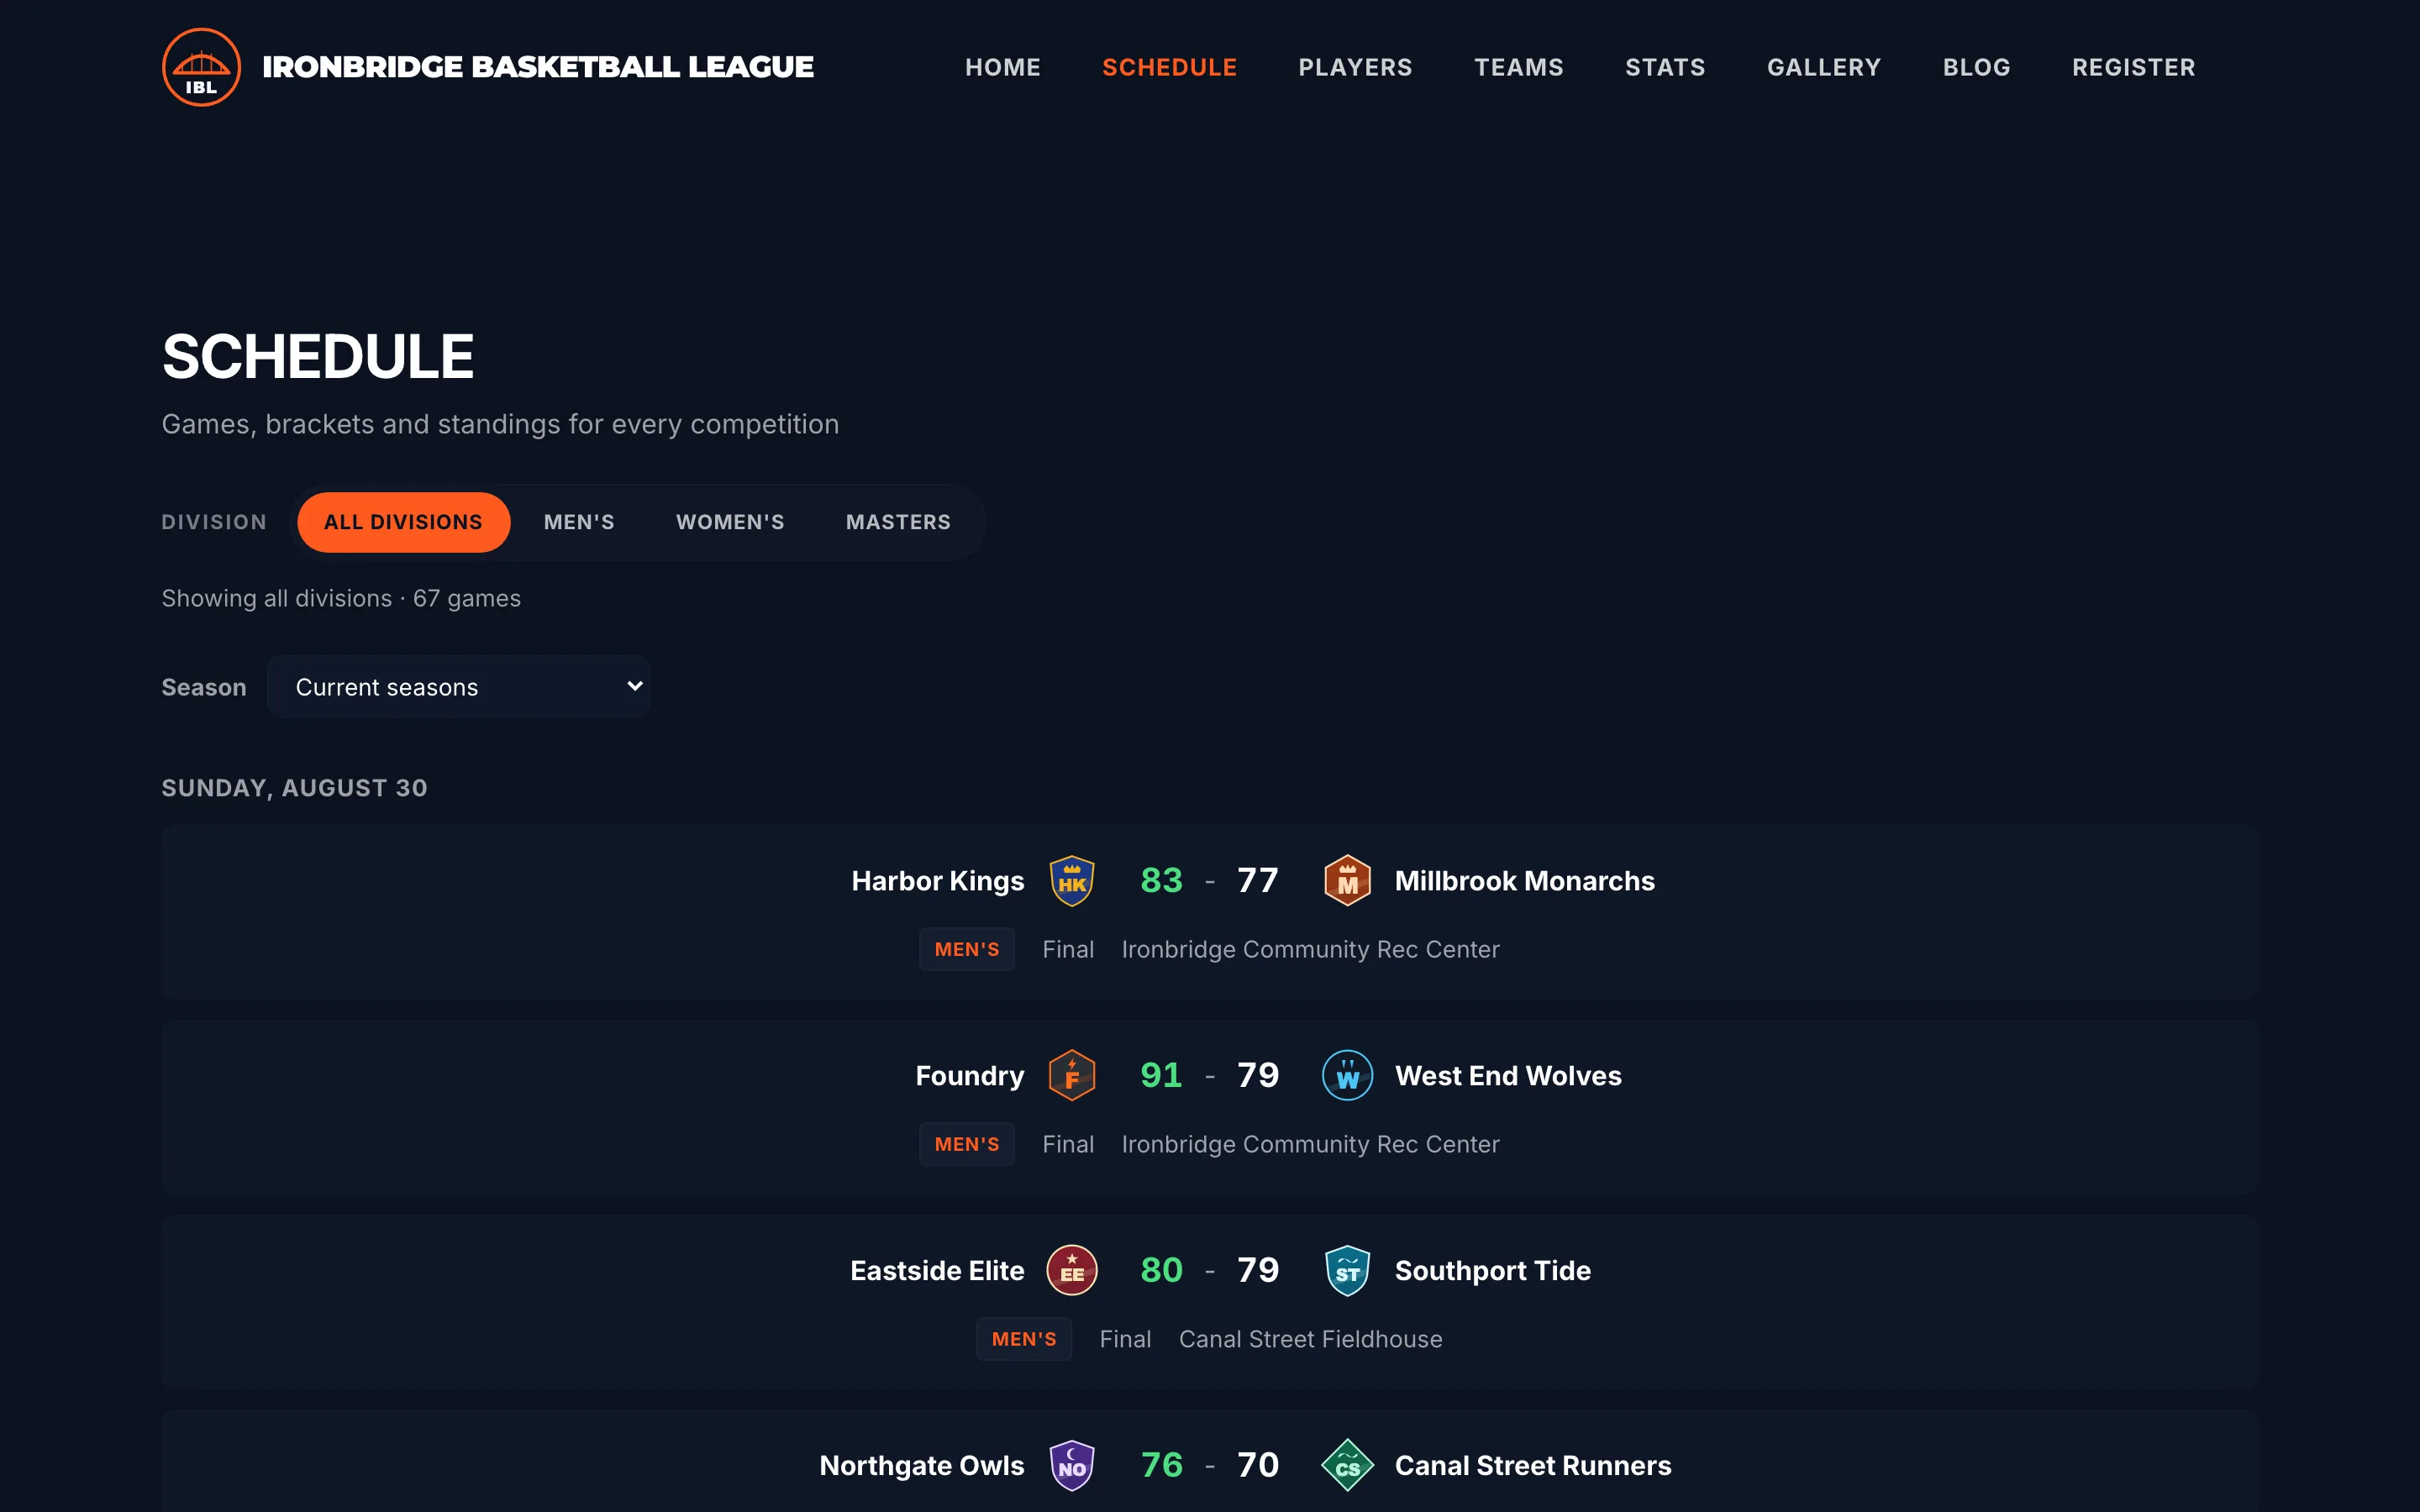
Fig. 9Your website’s Schedule with the division switcher.
What you’ll see
Your seasons are in divisions, and each division has its own public season, standings and stats. In the admin, the scope picker switches between divisions; on your website, fans pick one with the switcher.