
ScoreLM Guides
scorelm.com

Create your first season and teams

By the end you’ll have a season your teams play in, with every team added to it.

  • Who: League admin or Editor
  • Time: 5 min
  • Steps: 9
Video · 1:28 · Voiceover · every step is also written on screen Prefer to read? Steps below

Before you start

  • Sign in to your league admin.
  • This guide starts from a new league with no seasons yet. If you already have a season, start at step 6.

Steps

  1. Step 1: On Today, find Get your season ready and click Continue next to Create your season.

    Today lists what your league still needs. The first open step is highlighted, and Continue takes you straight to it.
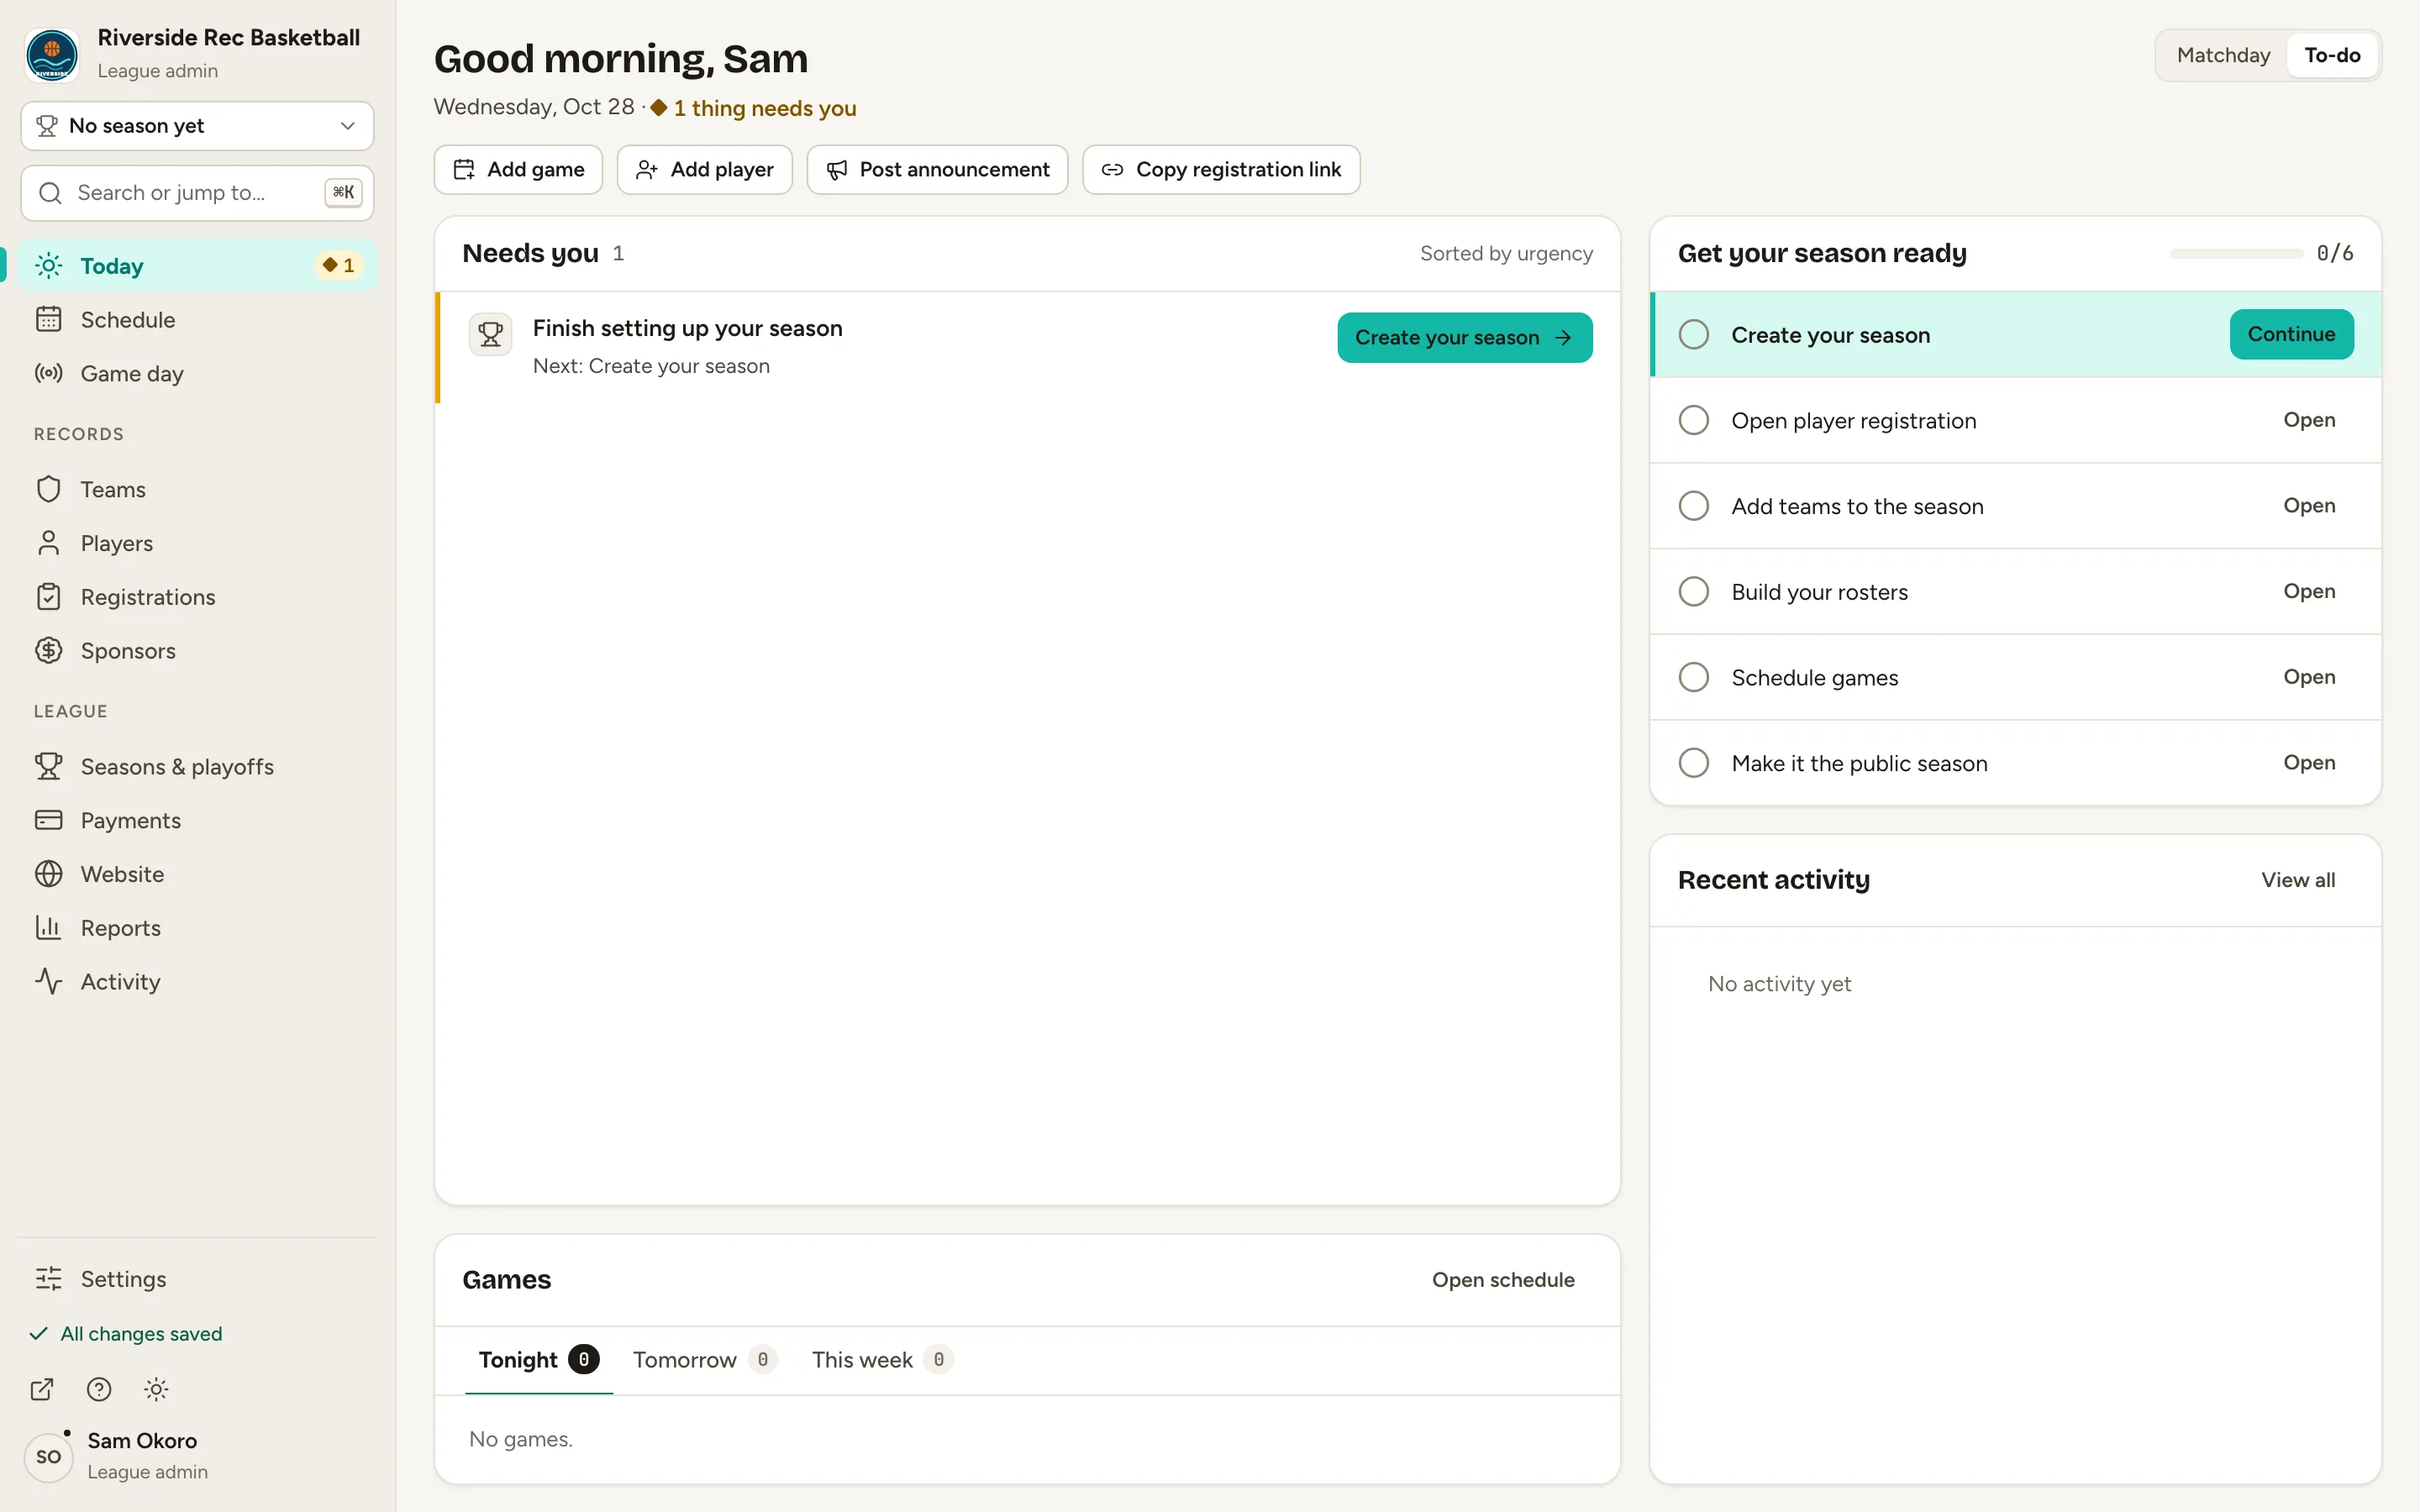
    Fig. 1

    Scroll sideways to see the whole screen.

    The Today page. A card titled Get your season ready lists setup steps, with a Continue button on Create your season.
    Fig. 1Today with the setup checklist. Create your season is the next step.
  2. Step 2: On Seasons & playoffs, click New season at the top right.

    The New season form opens. The year is already filled in with this year.
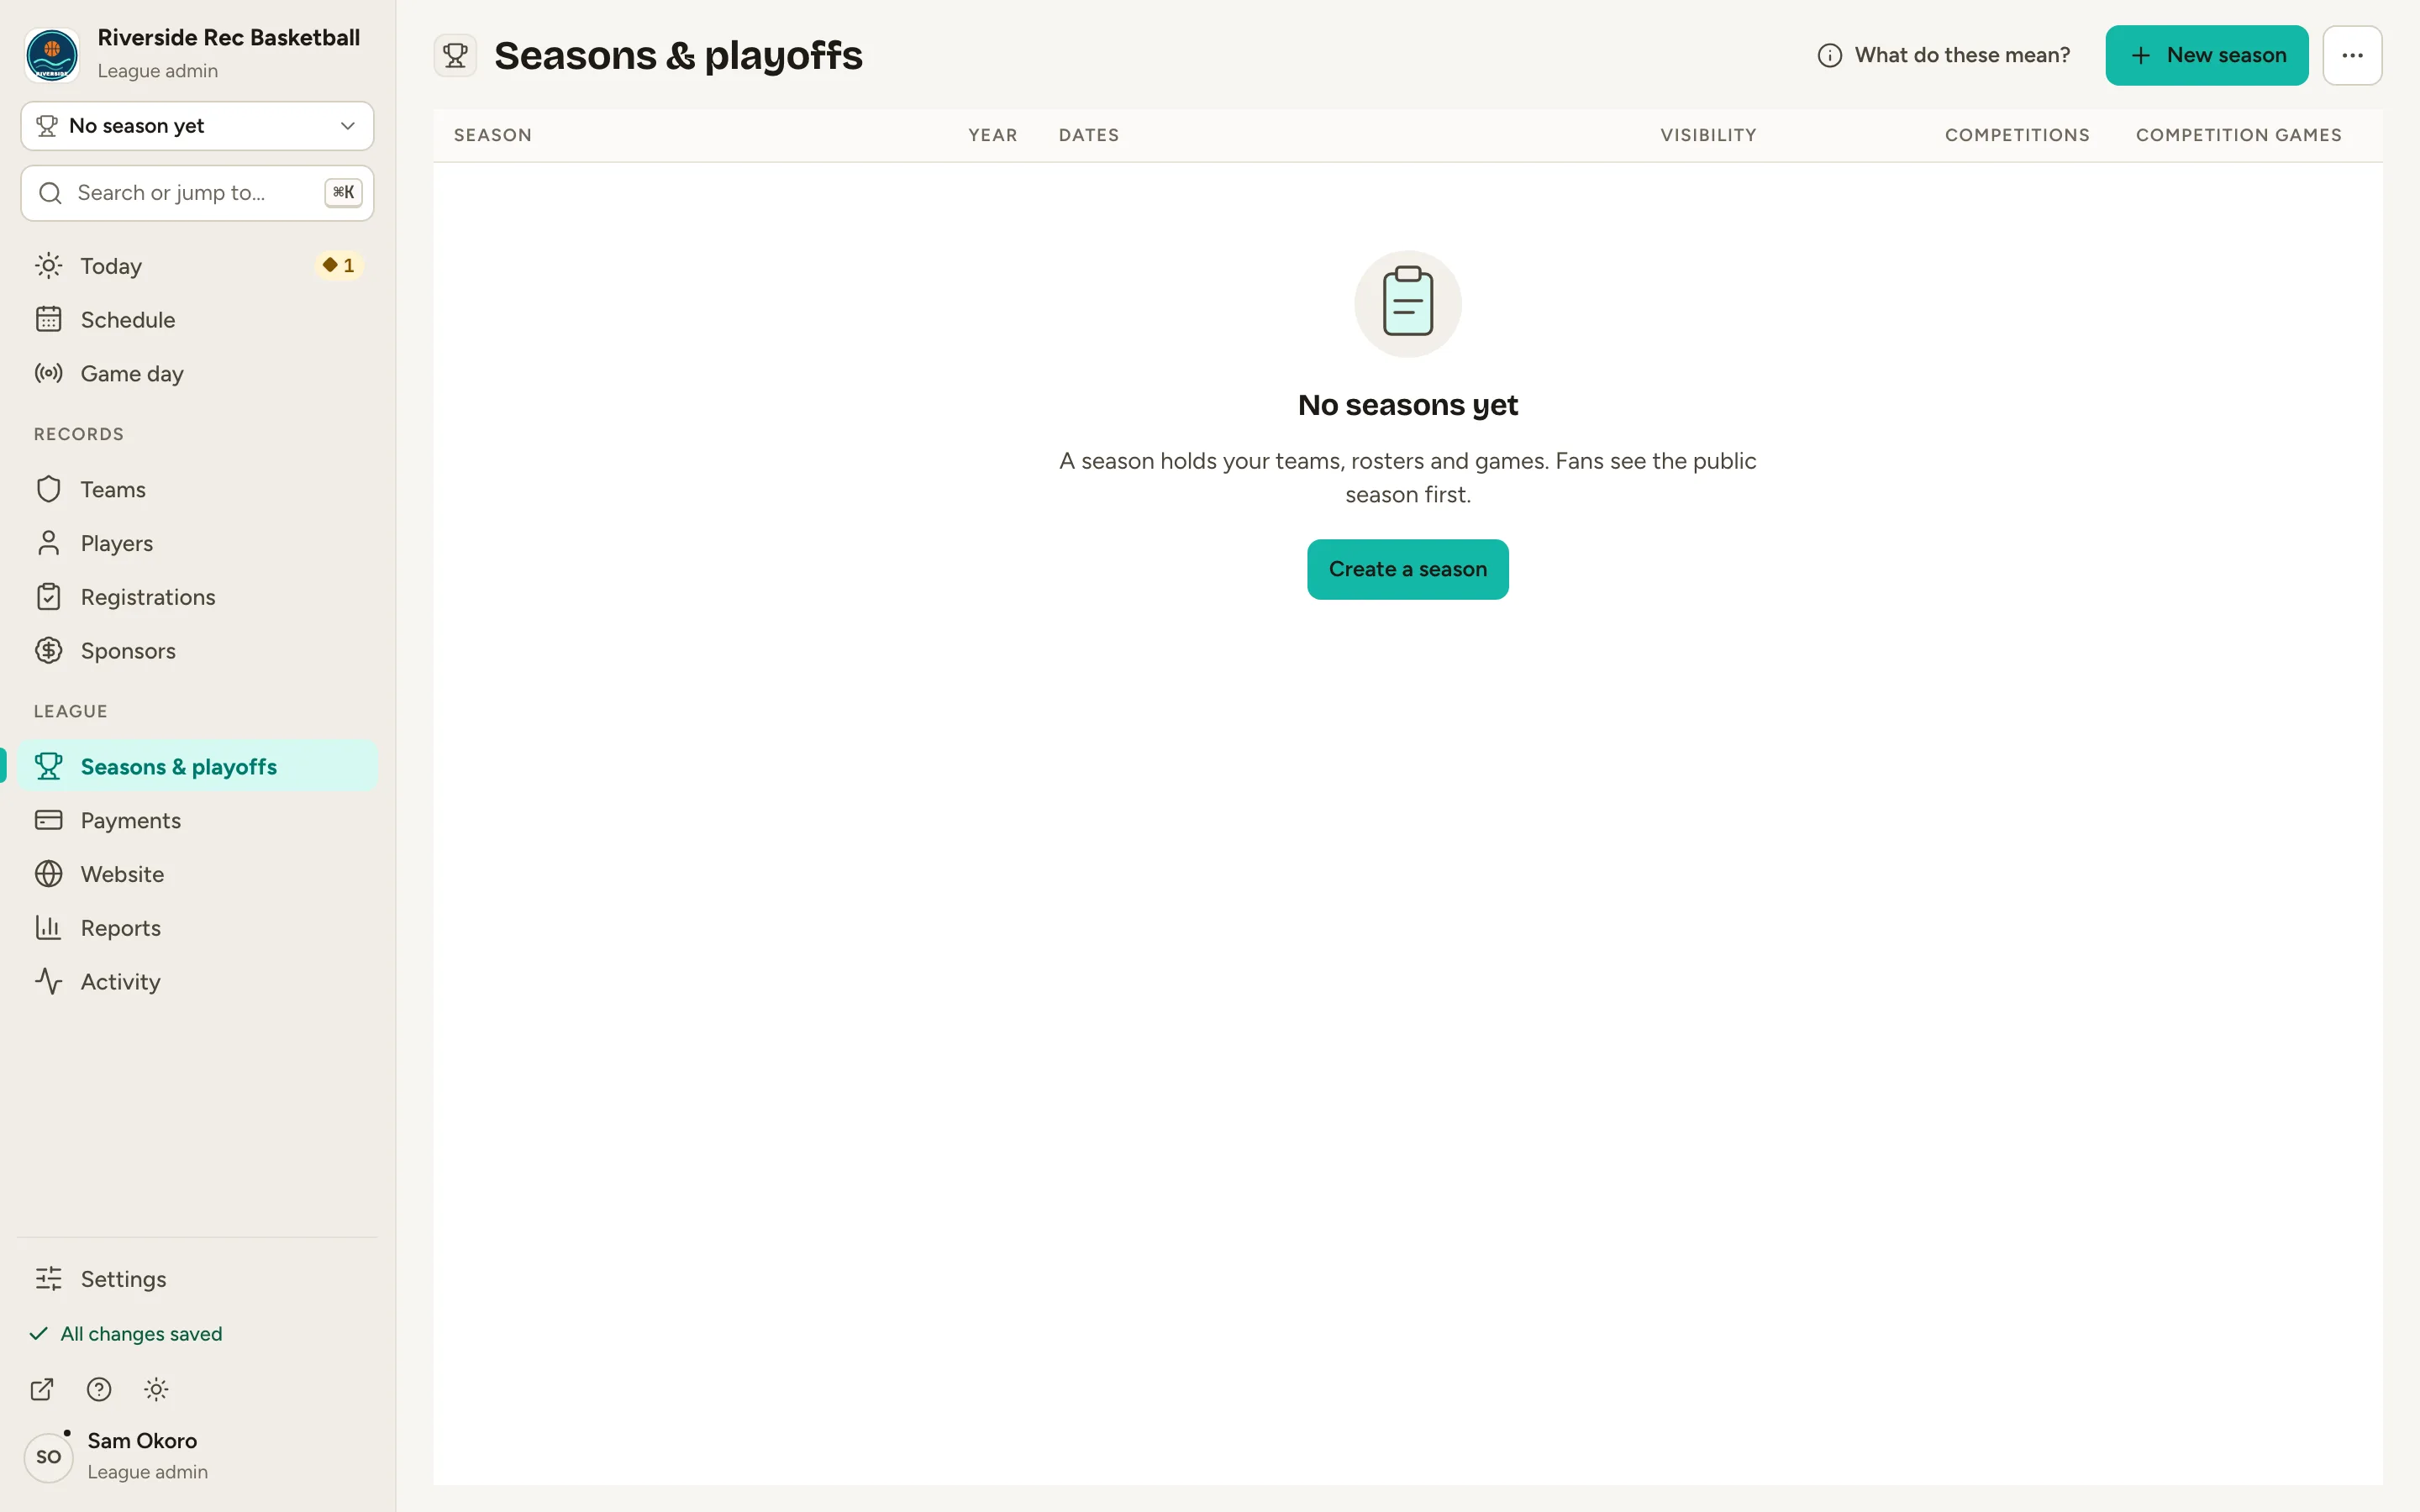
    Fig. 2

    Scroll sideways to see the whole screen.

    The Seasons & playoffs page with no seasons yet and a New season button at the top right.
    Fig. 2Seasons & playoffs, with the New season button.
  3. Step 3: Check the Year, then type a Name, like Winter 2026.

    The name is optional. Two seasons in the same year need different names, so it’s worth adding one.
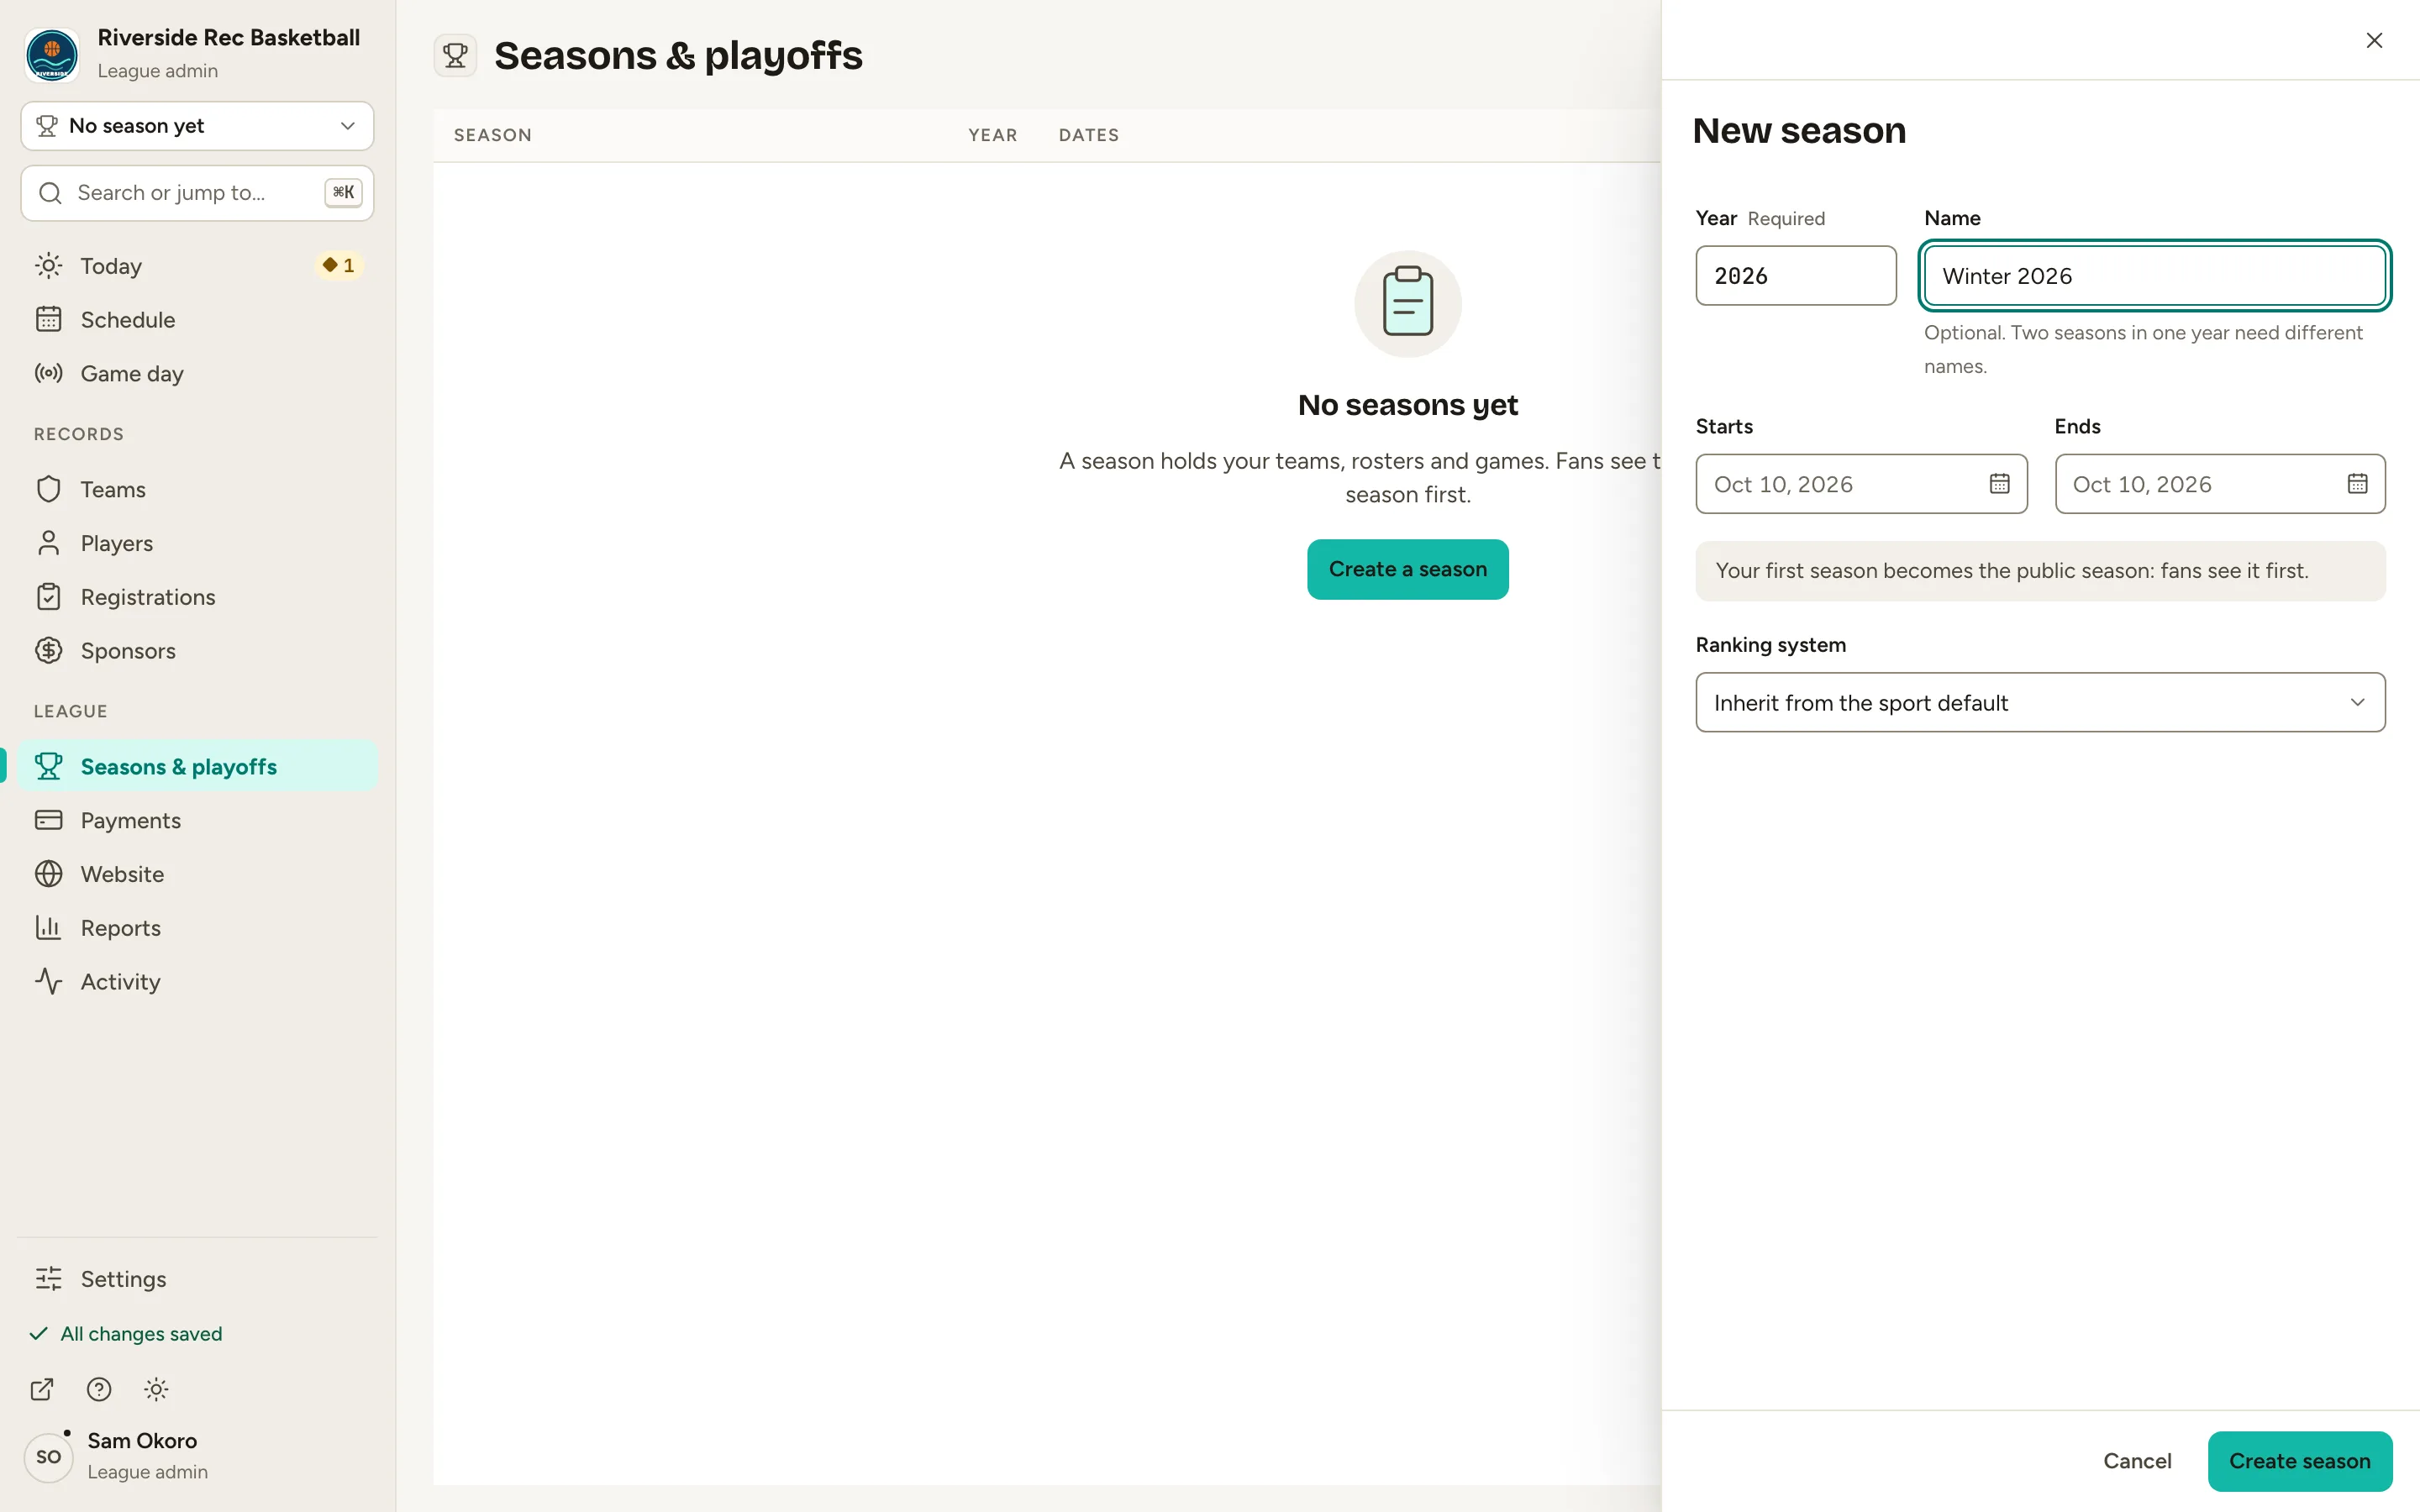
    Fig. 3

    Scroll sideways to see the whole screen.

    The New season form. Year shows 2026 and Name shows Winter 2026.
    Fig. 3The New season form with Year and Name filled in.
  4. Step 4: Set Starts and Ends to your first and last game days.

    The dates are optional too. The season has to end after it starts.
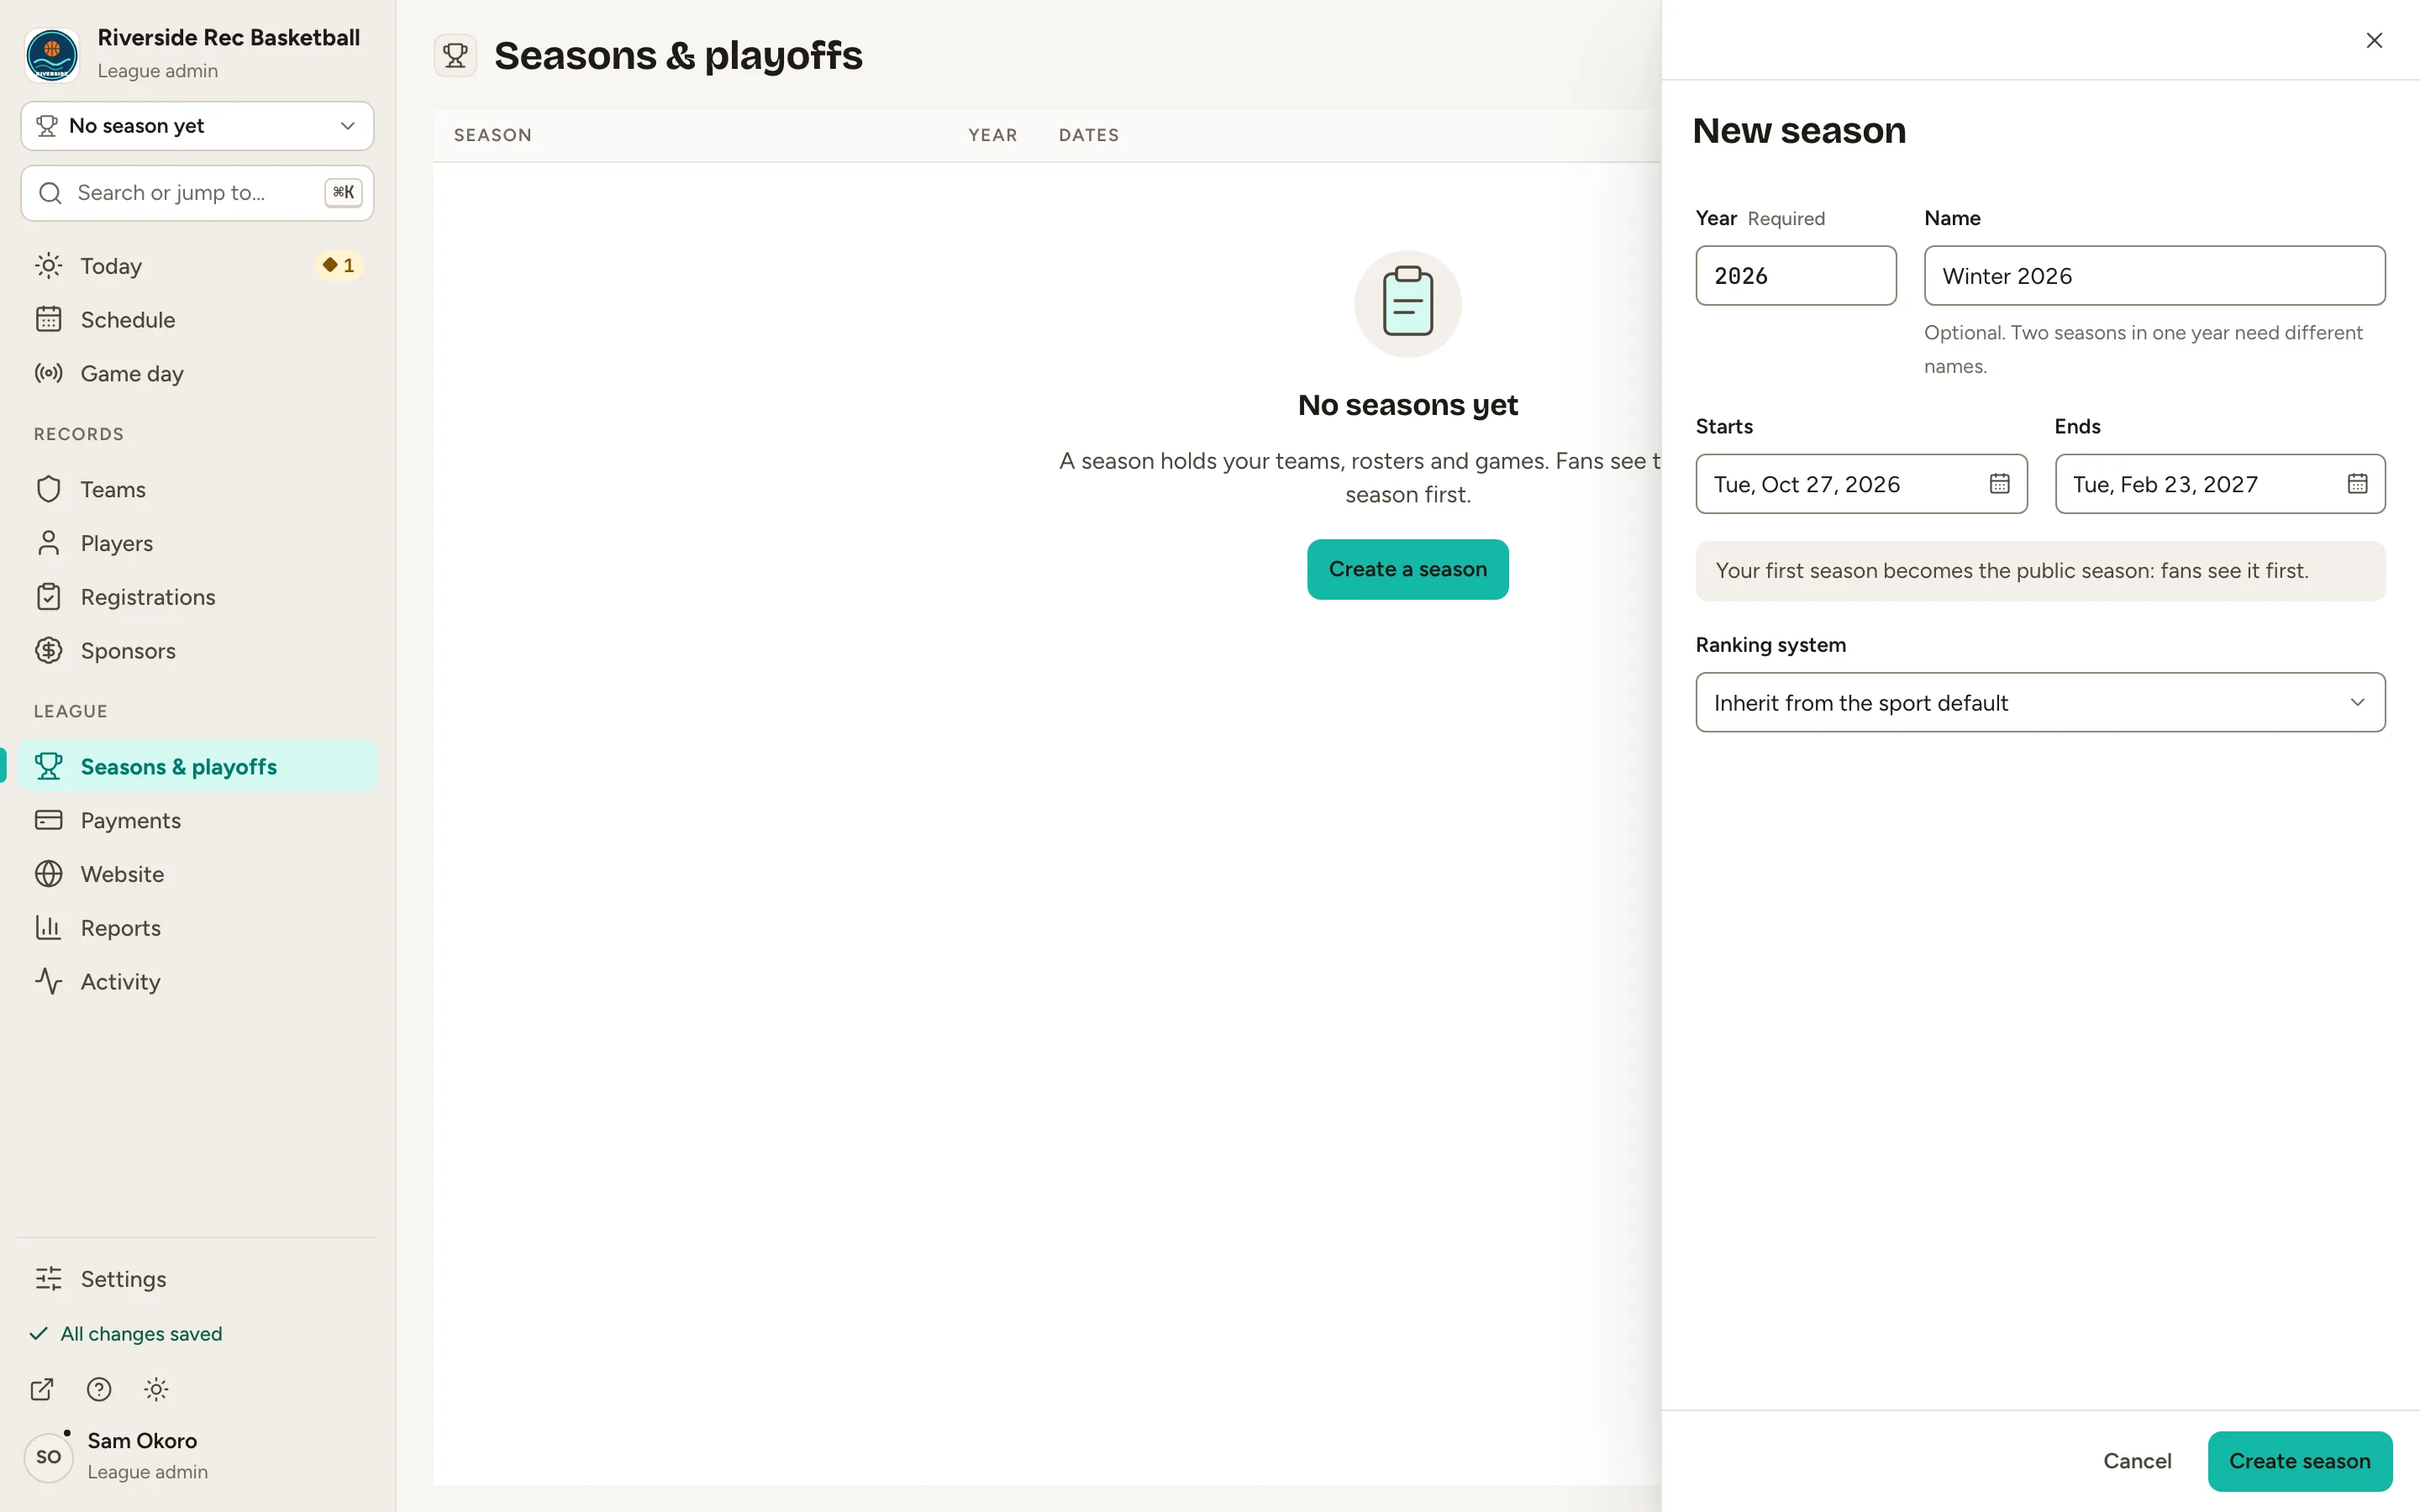
    Fig. 4

    Scroll sideways to see the whole screen.

    The Starts and Ends date fields filled in on the New season form.
    Fig. 4Starts and Ends set to the first and last game days.
  5. Step 5: Click Create season.

    Your first season becomes the public season: it’s the one fans see first on your website. The season opens, ready for teams.
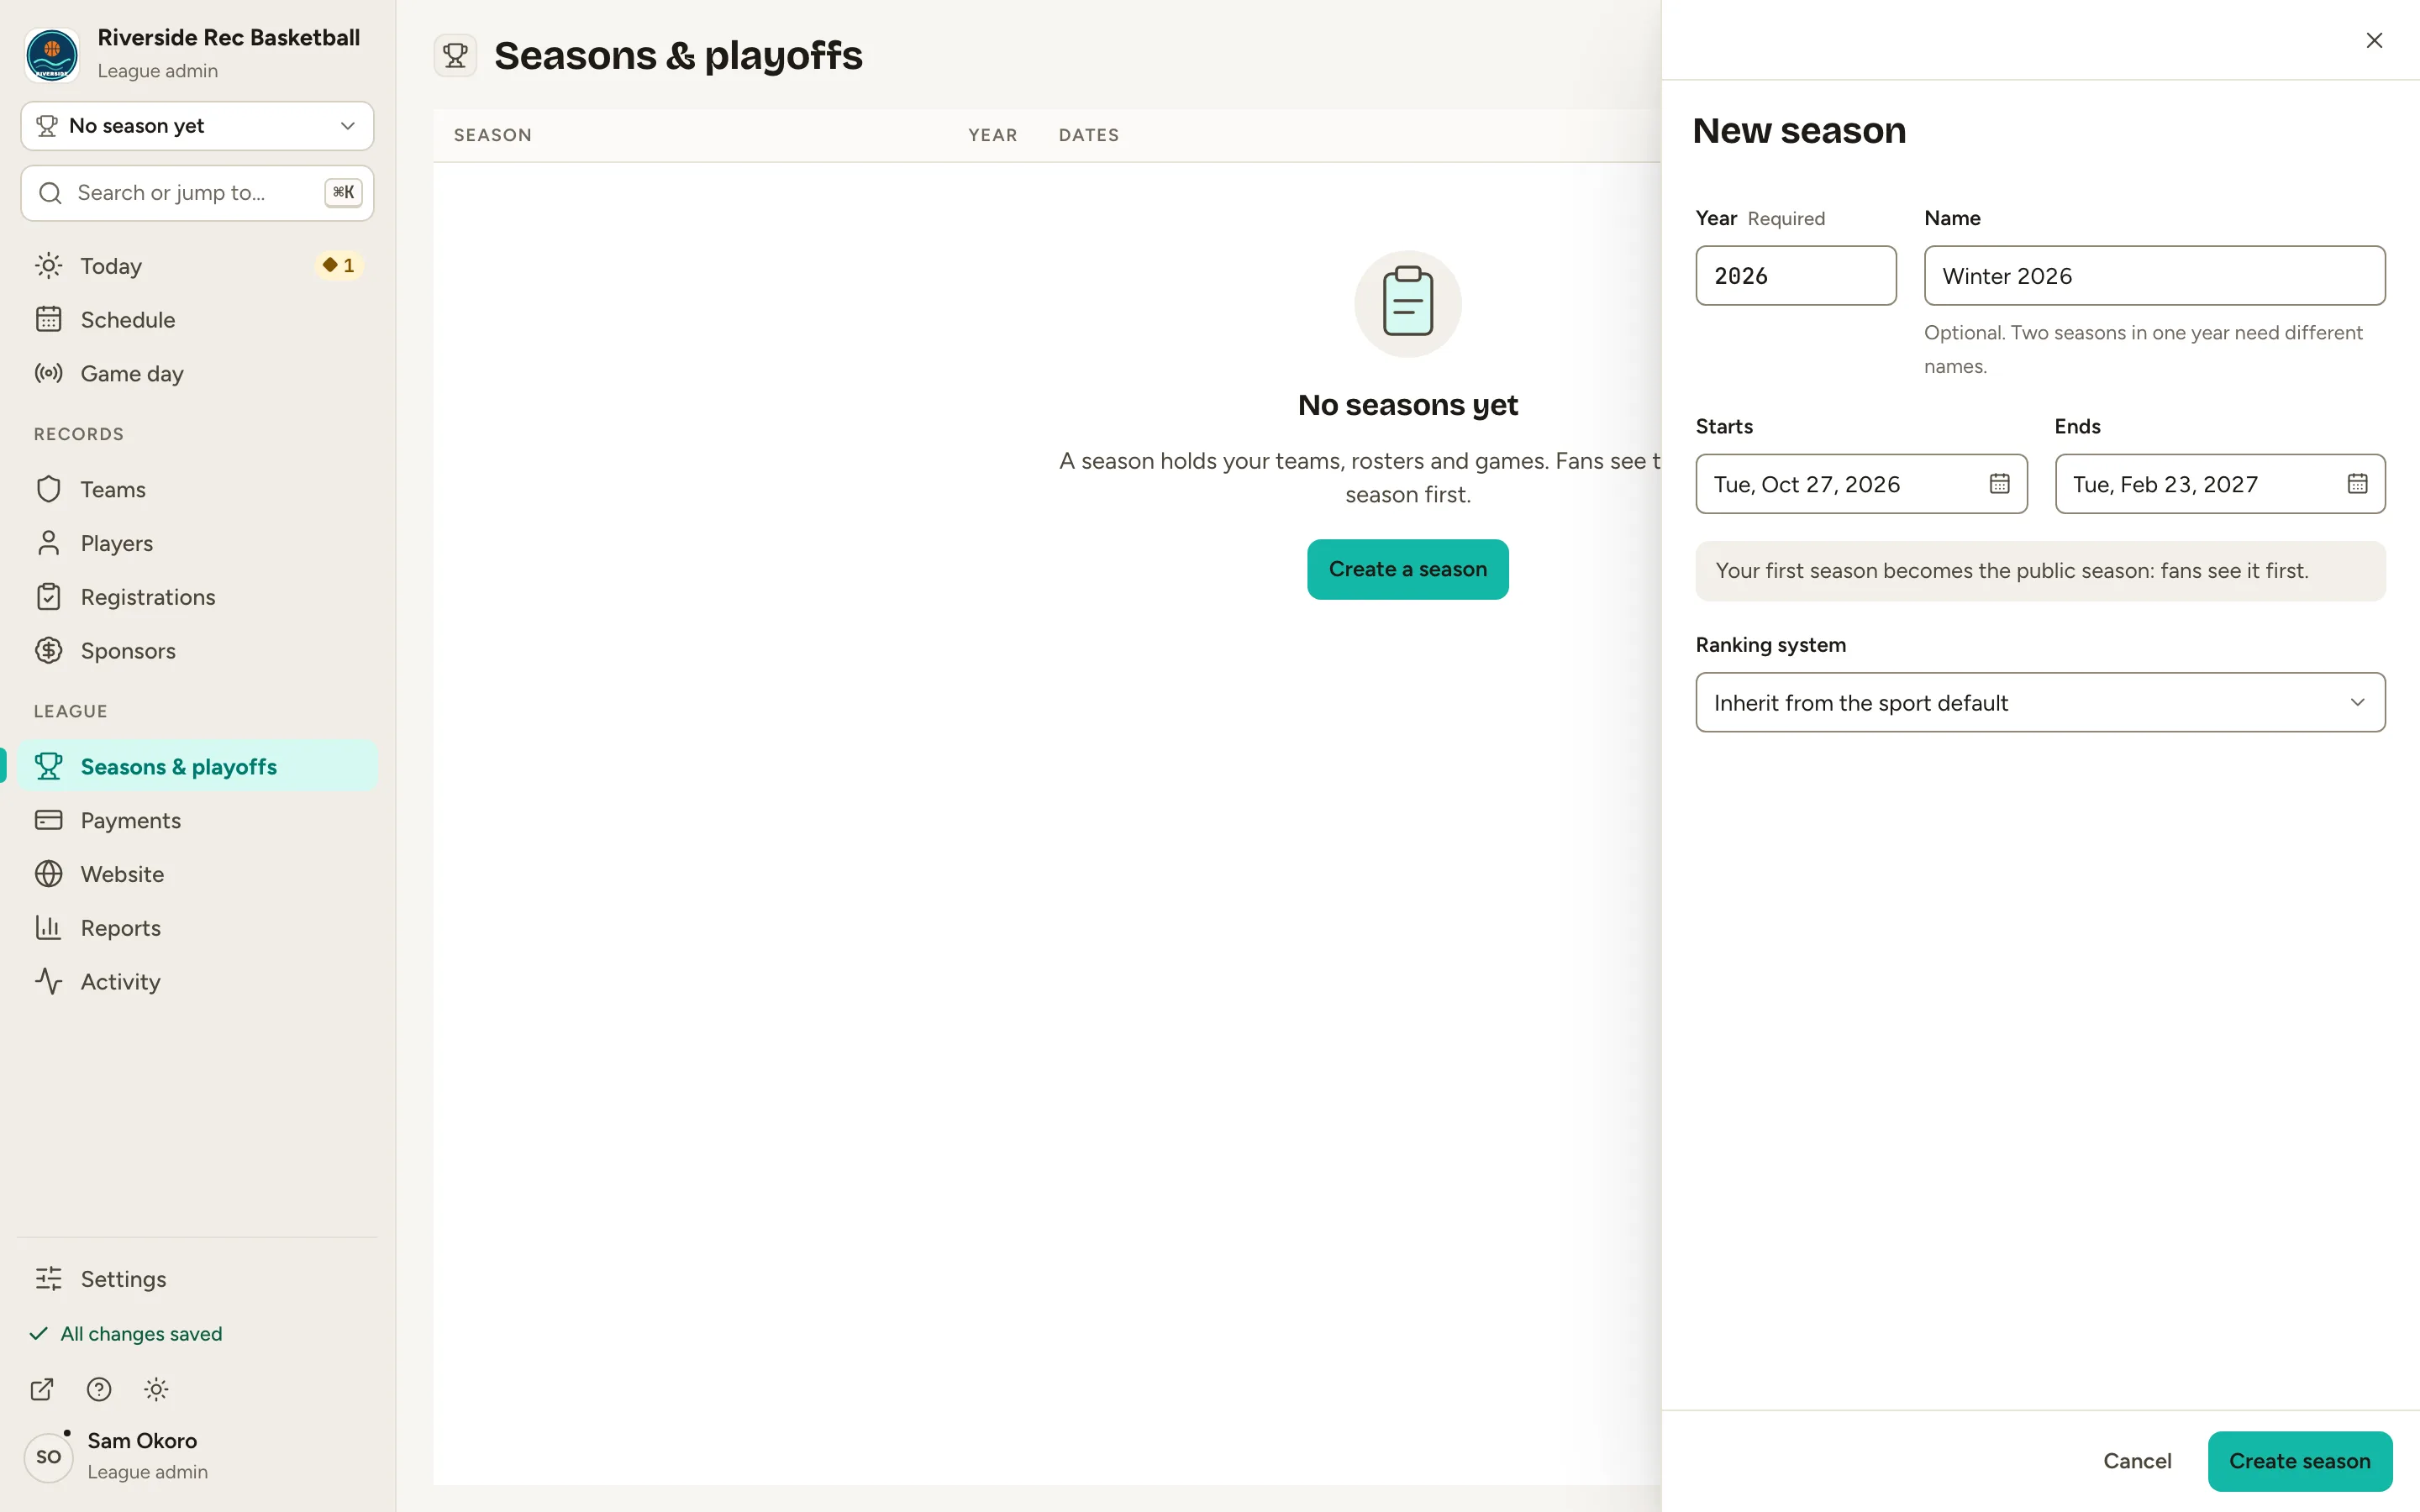
    Fig. 5

    Scroll sideways to see the whole screen.

    The bottom of the New season form, with the public-season note and the Create season button.
    Fig. 5The note under the dates: your first season becomes the public season.
  6. Step 6: In the left menu, click Teams, then Add team.

    The New team form opens. Add to Winter 2026 is already ticked, so each team joins your season as you create it.
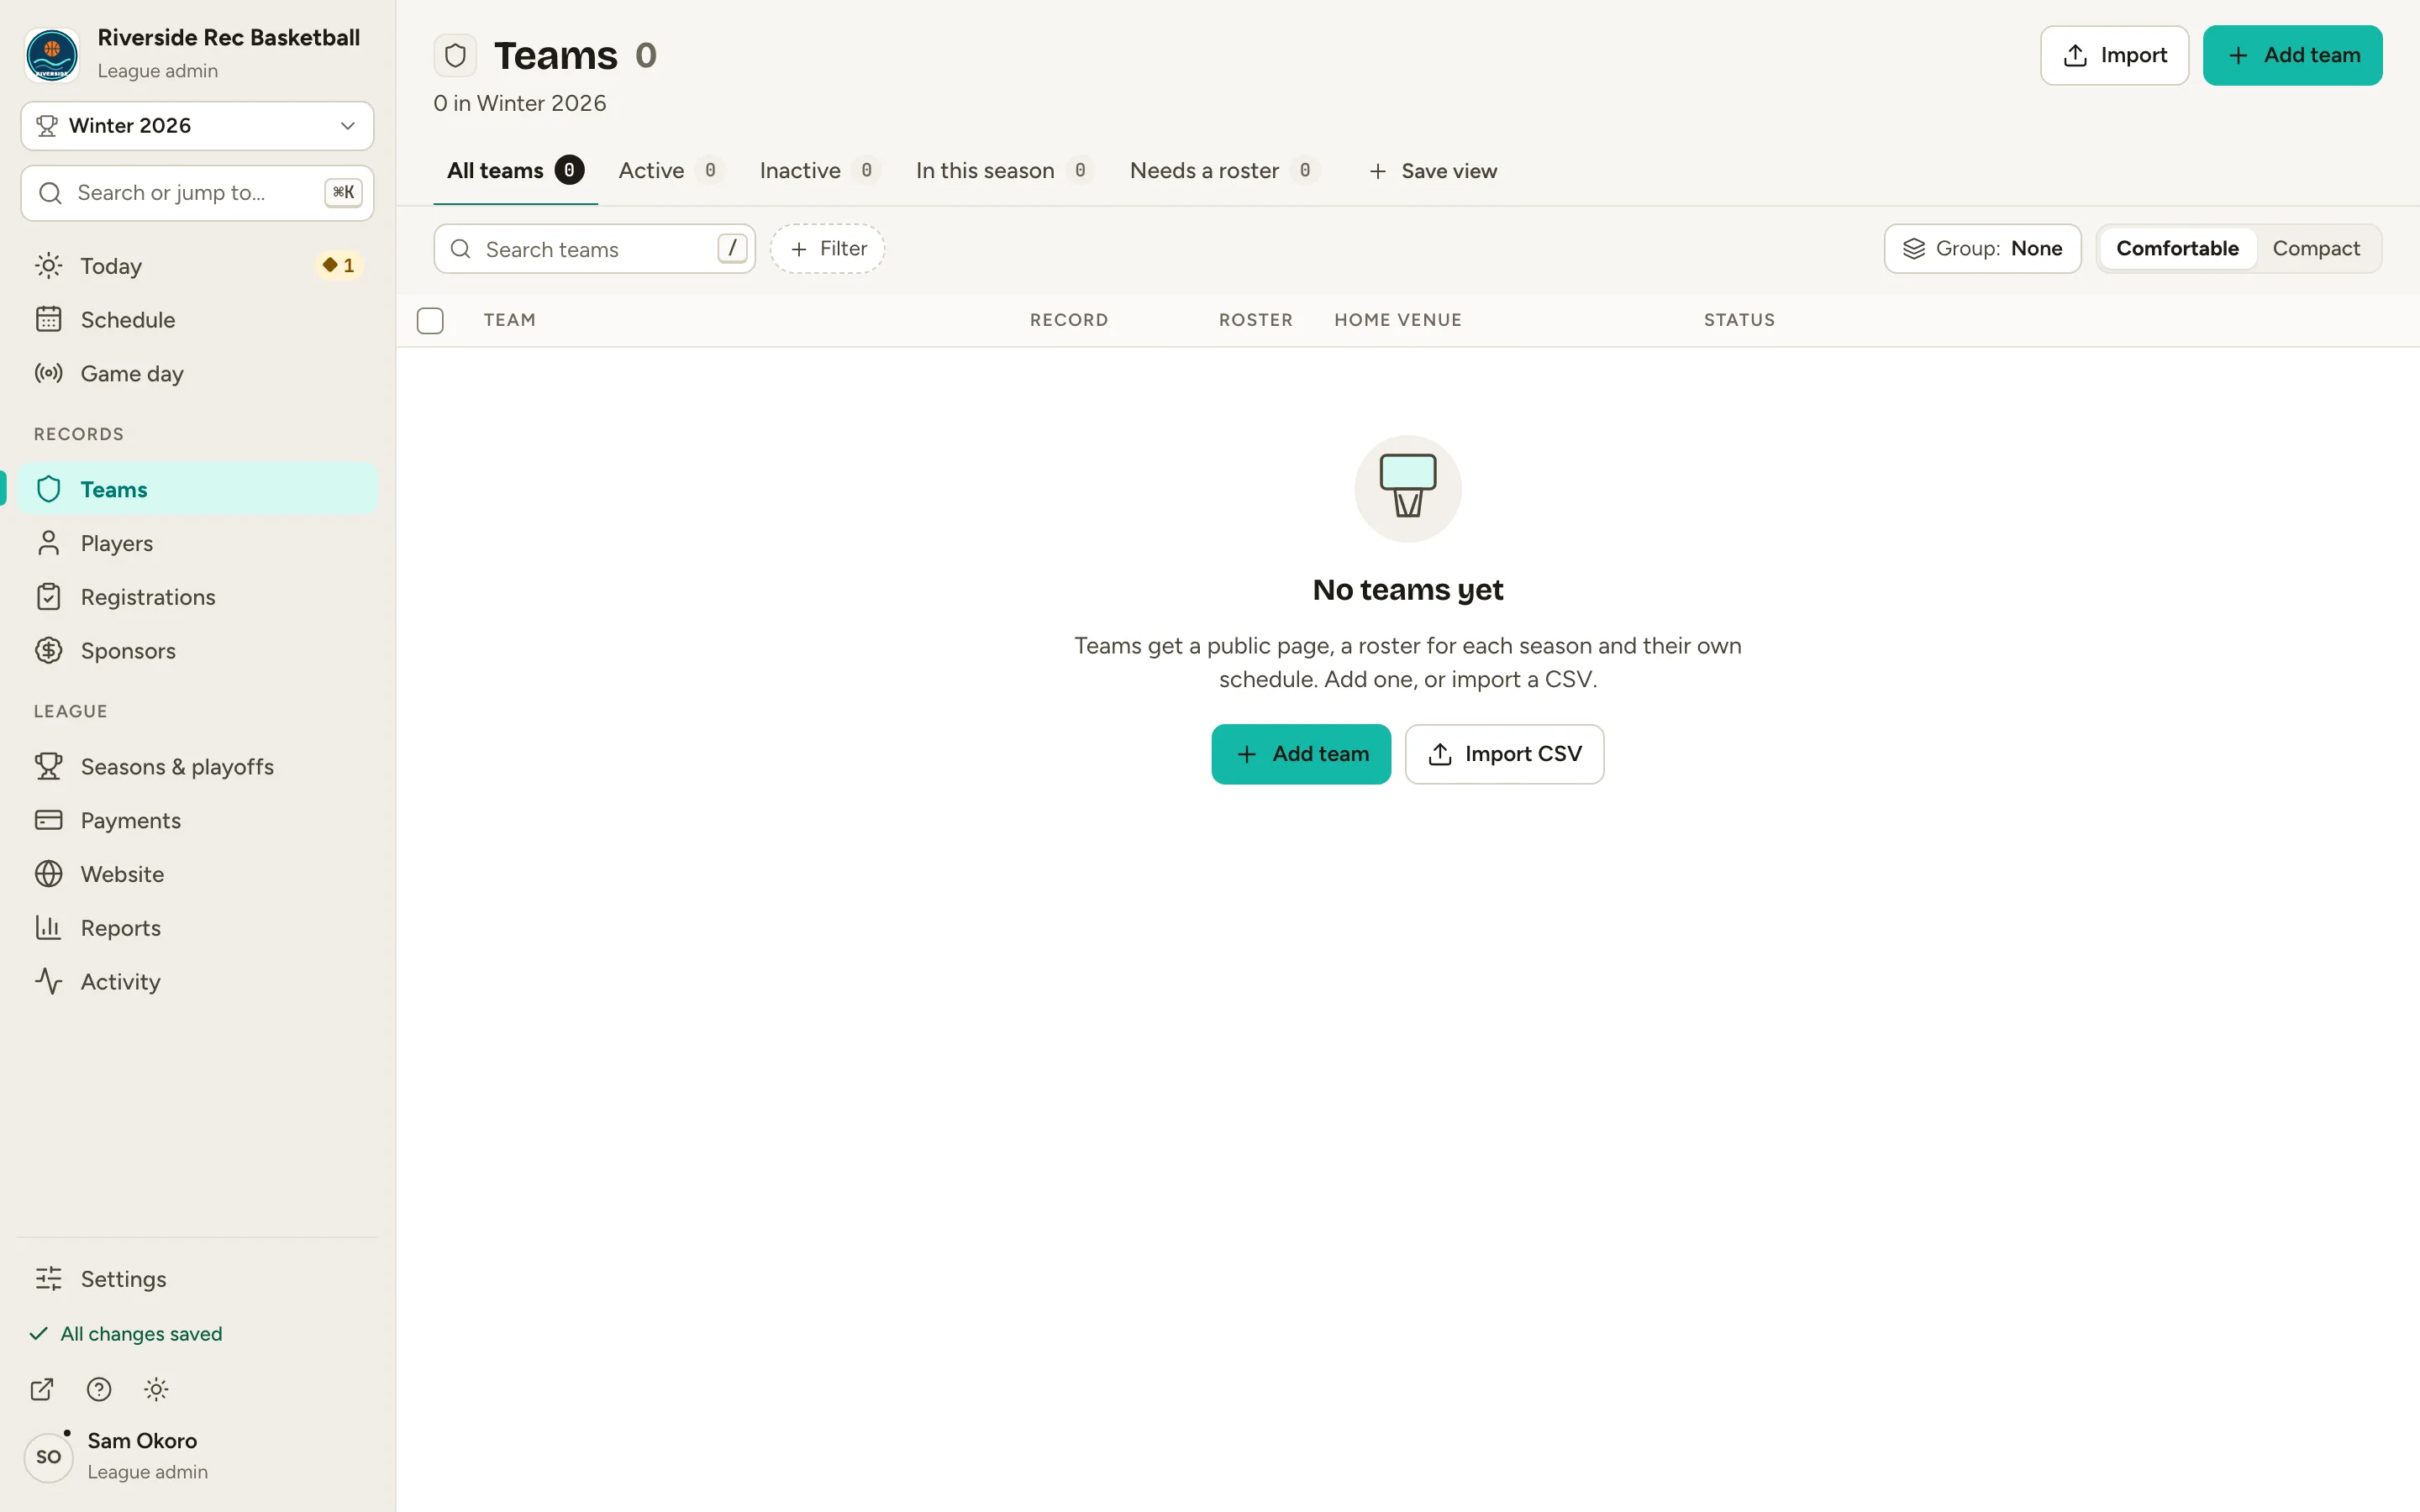
    Fig. 6

    Scroll sideways to see the whole screen.

    The Teams page with no teams yet and an Add team button.
    Fig. 6Teams, with the Add team button.
  7. Step 7: Type the Team name and a Short code, like River Rats and RRT.

    Schedules, standings and CSV imports use the short code. Use up to 10 letters and digits.
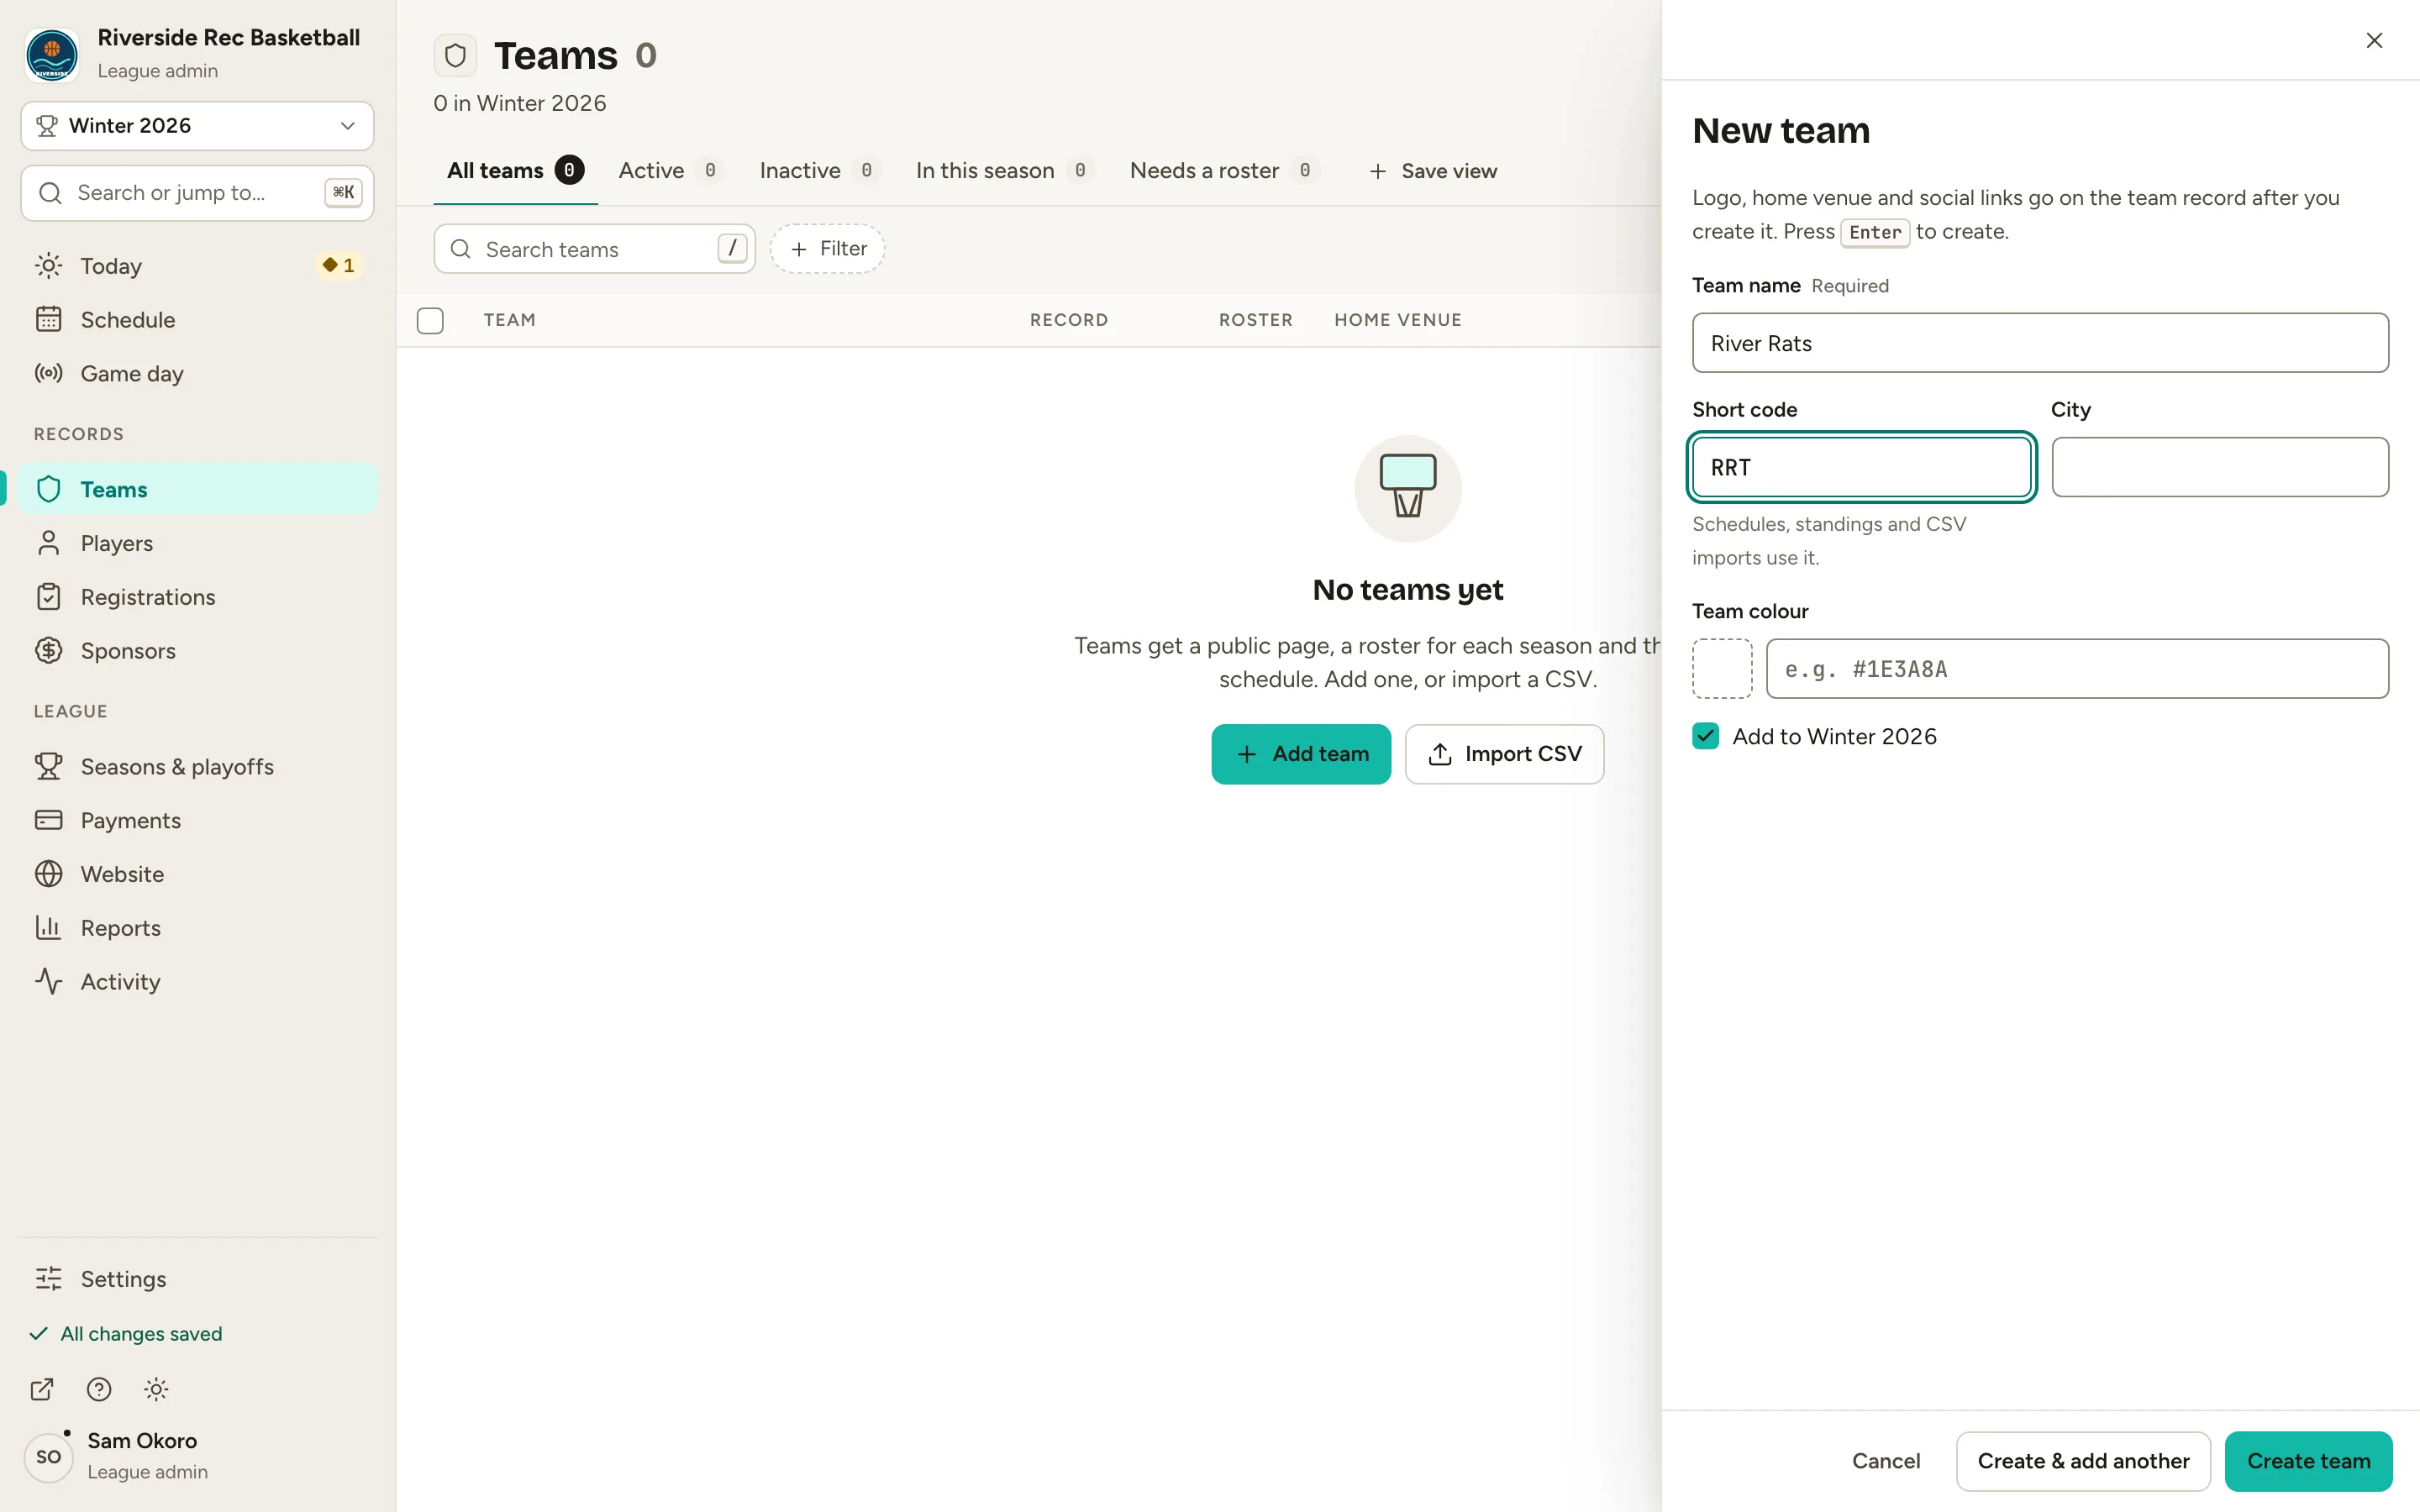
    Fig. 7

    Scroll sideways to see the whole screen.

    The New team form. Team name shows River Rats and Short code shows RRT, with Add to Winter 2026 ticked.
    Fig. 7The New team form with a name and short code.
  8. Step 8: Click Create & add another.

    The team is created and the form clears for the next one. Add the rest of your teams the same way.
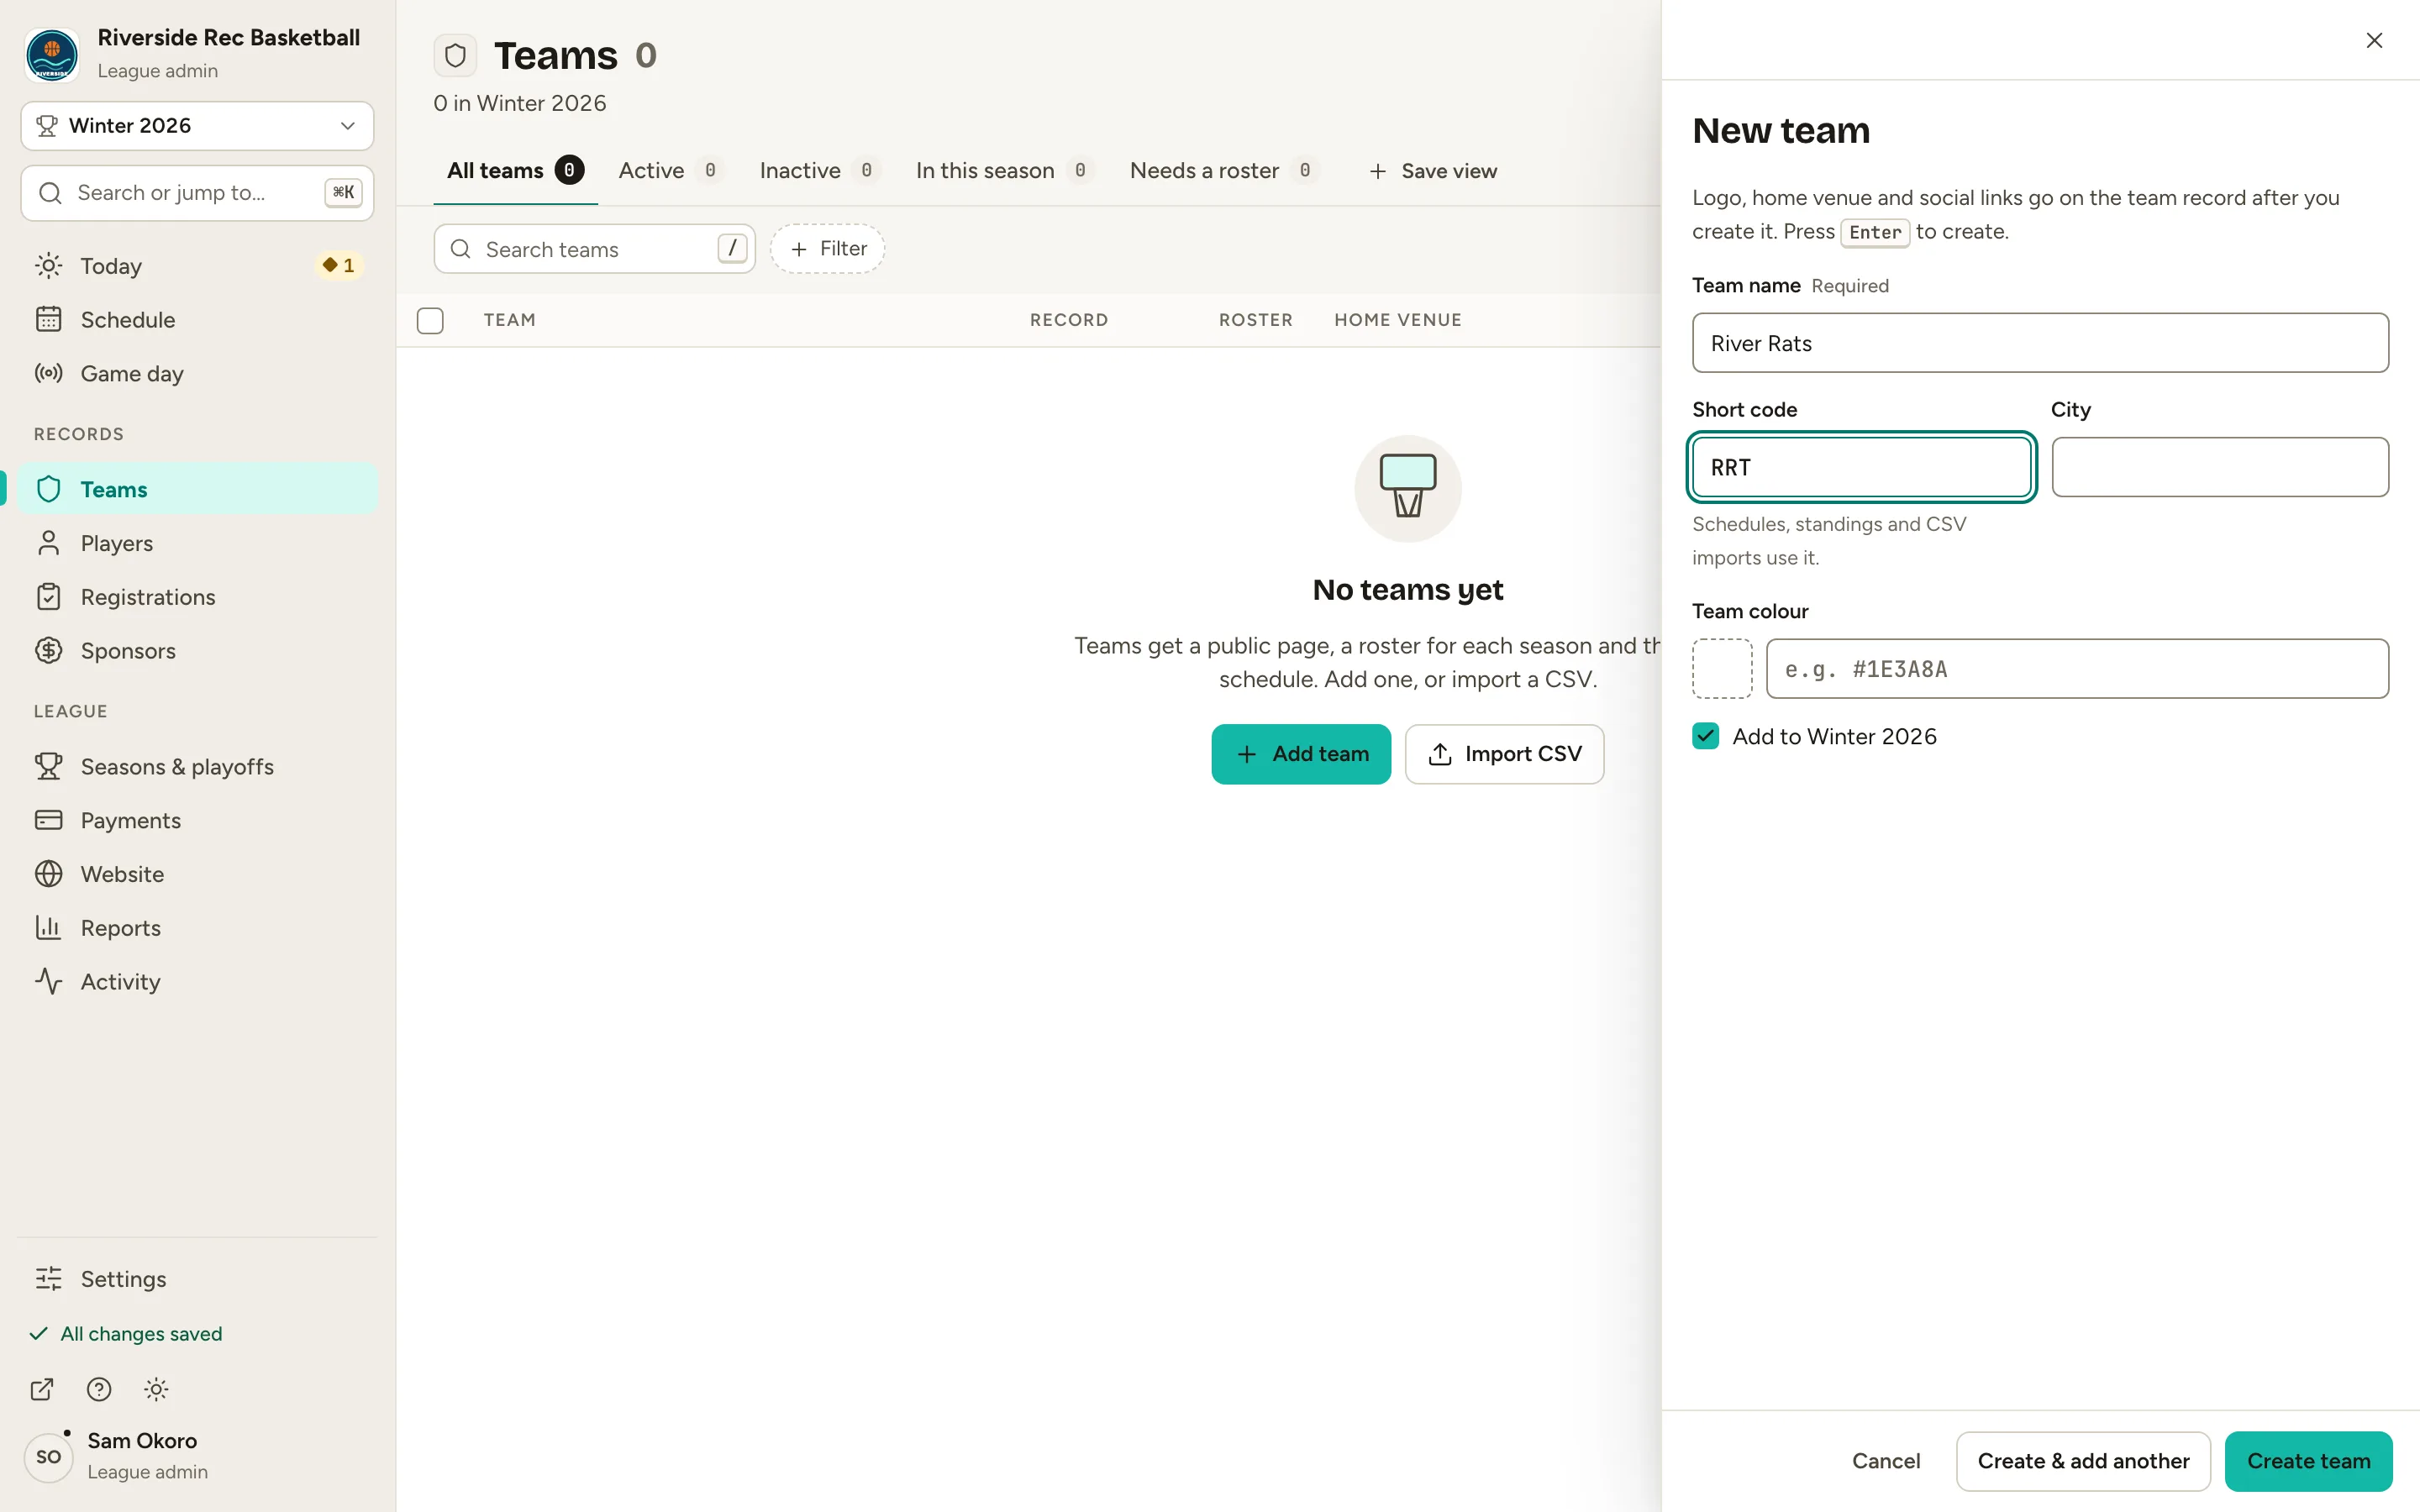
    Fig. 8

    Scroll sideways to see the whole screen.

    The New team form footer with Cancel, Create & add another and Create team.
    Fig. 8Create & add another keeps the form open for the next team.
  9. Step 9: For your last team, click Create team. Then click × (Close) at the top right of its record.

    Create team saves your last team and opens its record over the list. Close it to see all your teams in Winter 2026.
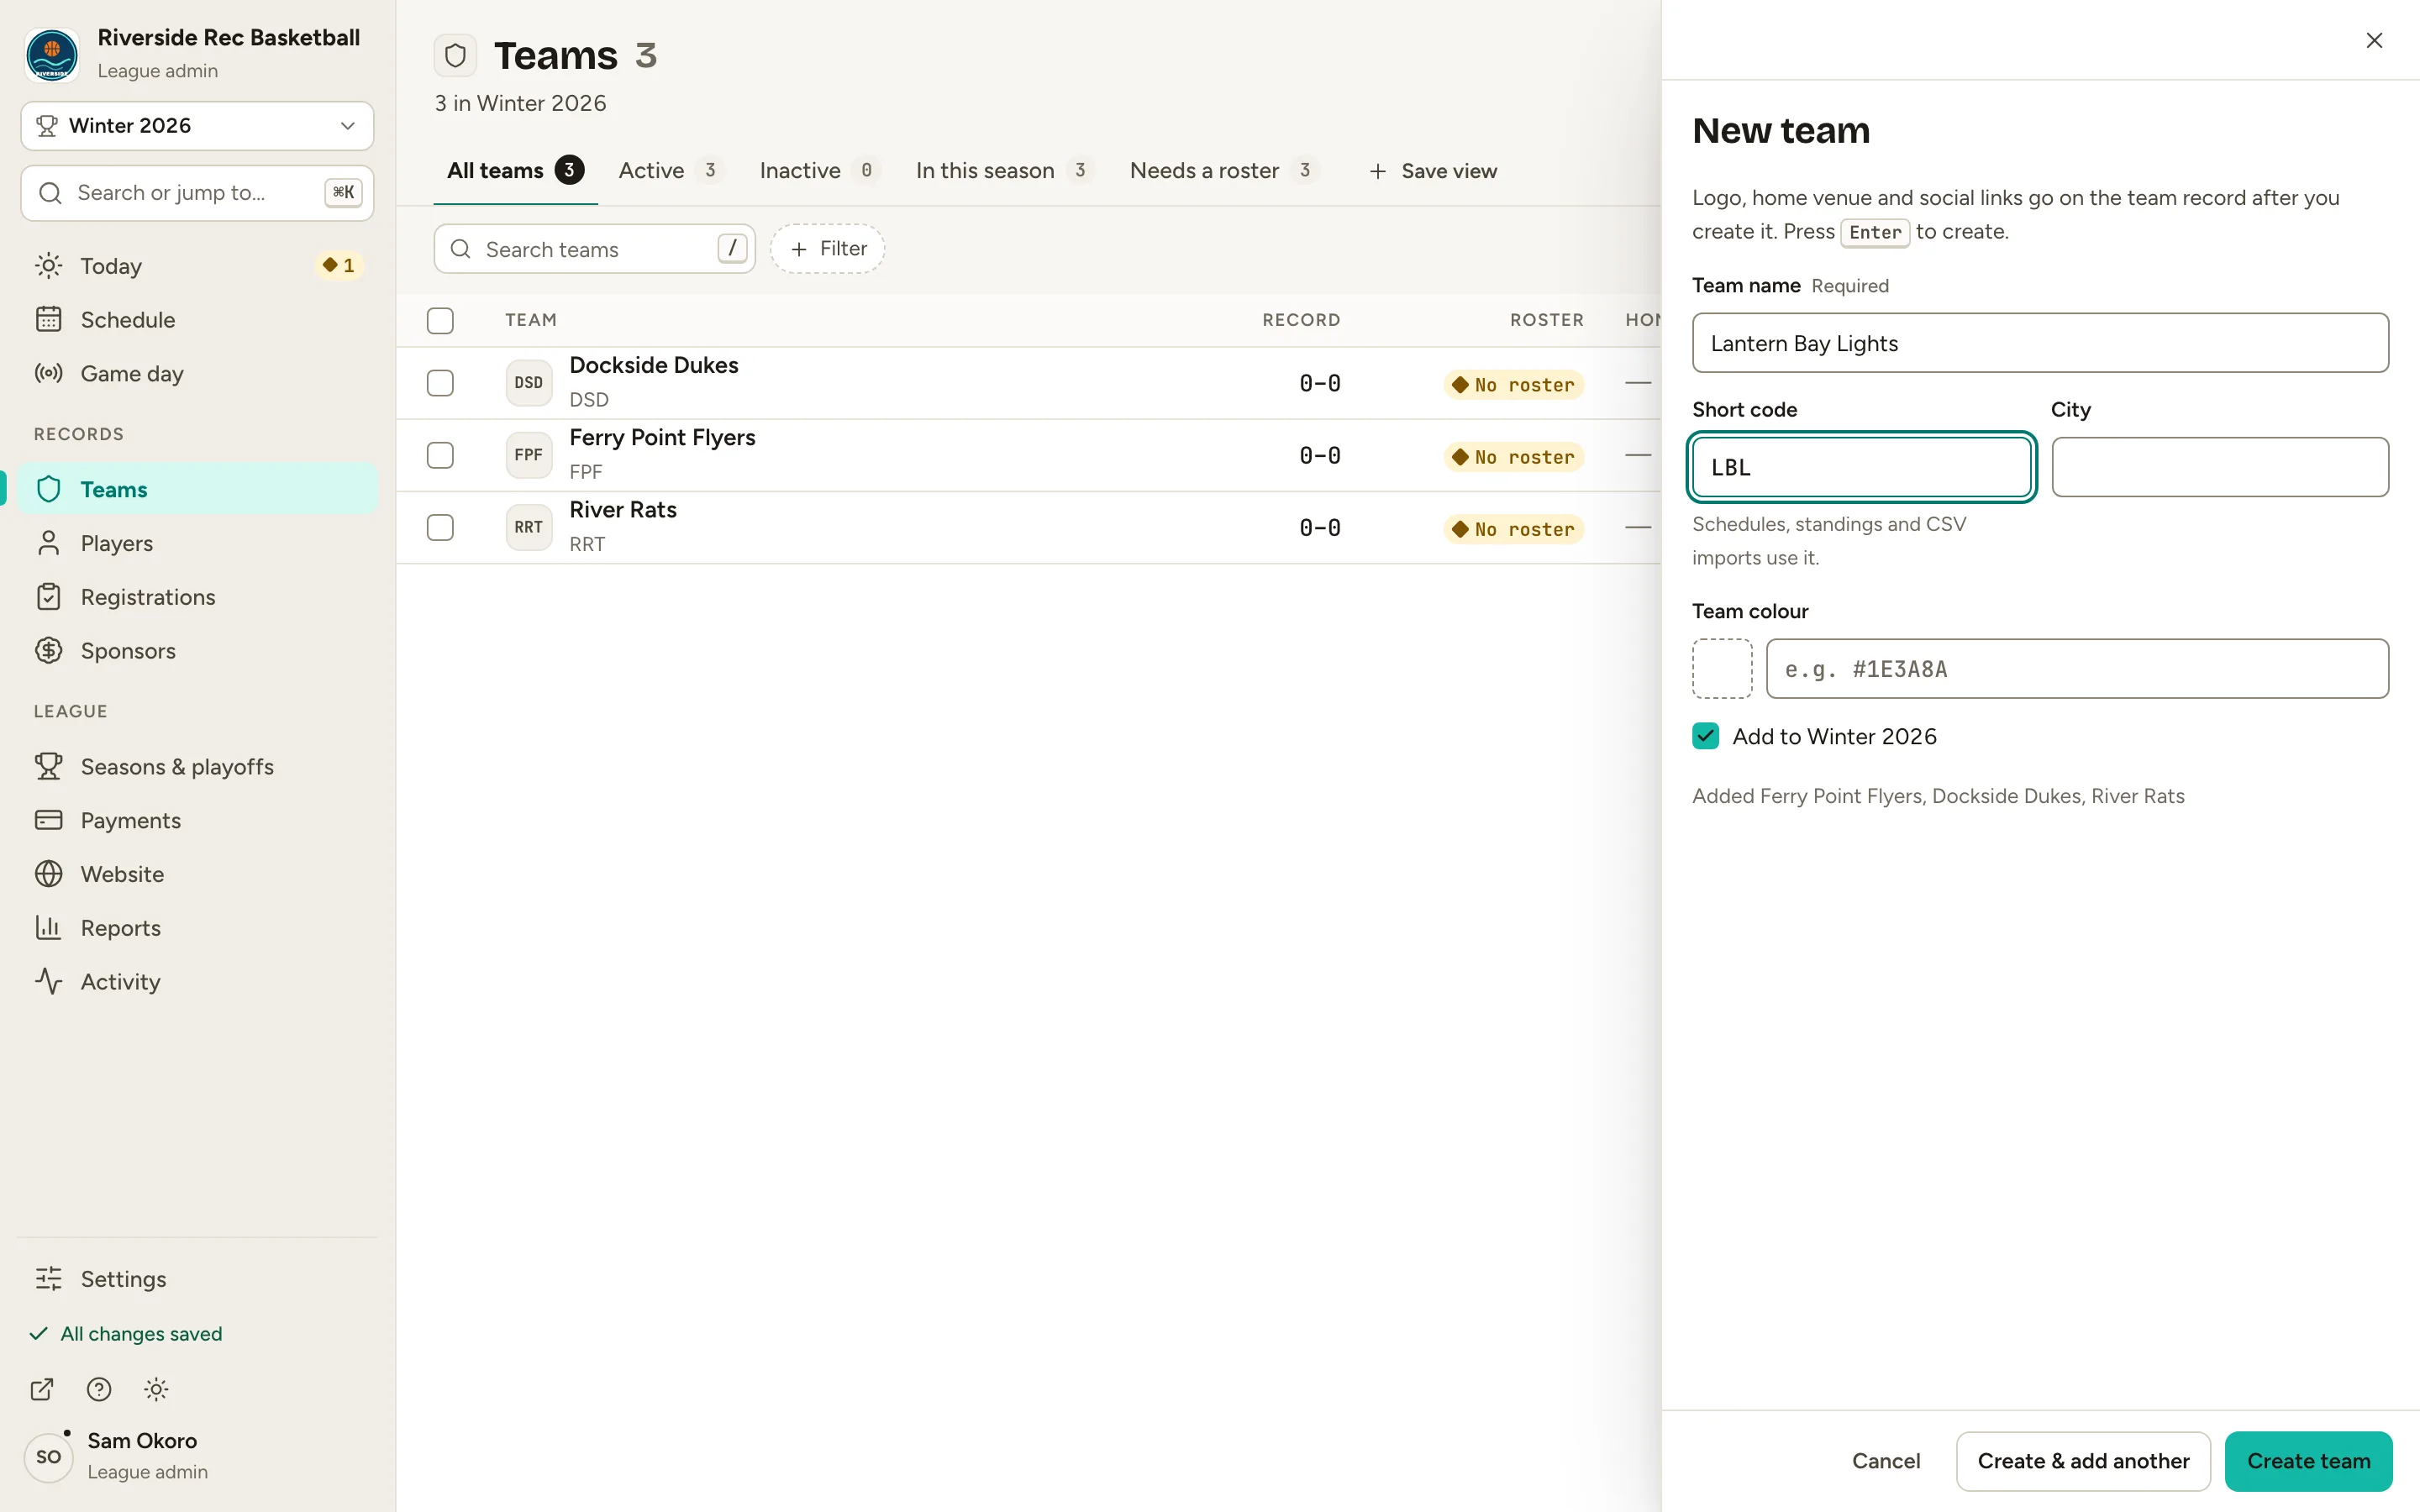
    Fig. 9

    Scroll sideways to see the whole screen.

    The New team form with Lantern Bay Lights filled in and the Create team button.
    Fig. 9Create team saves your last team.
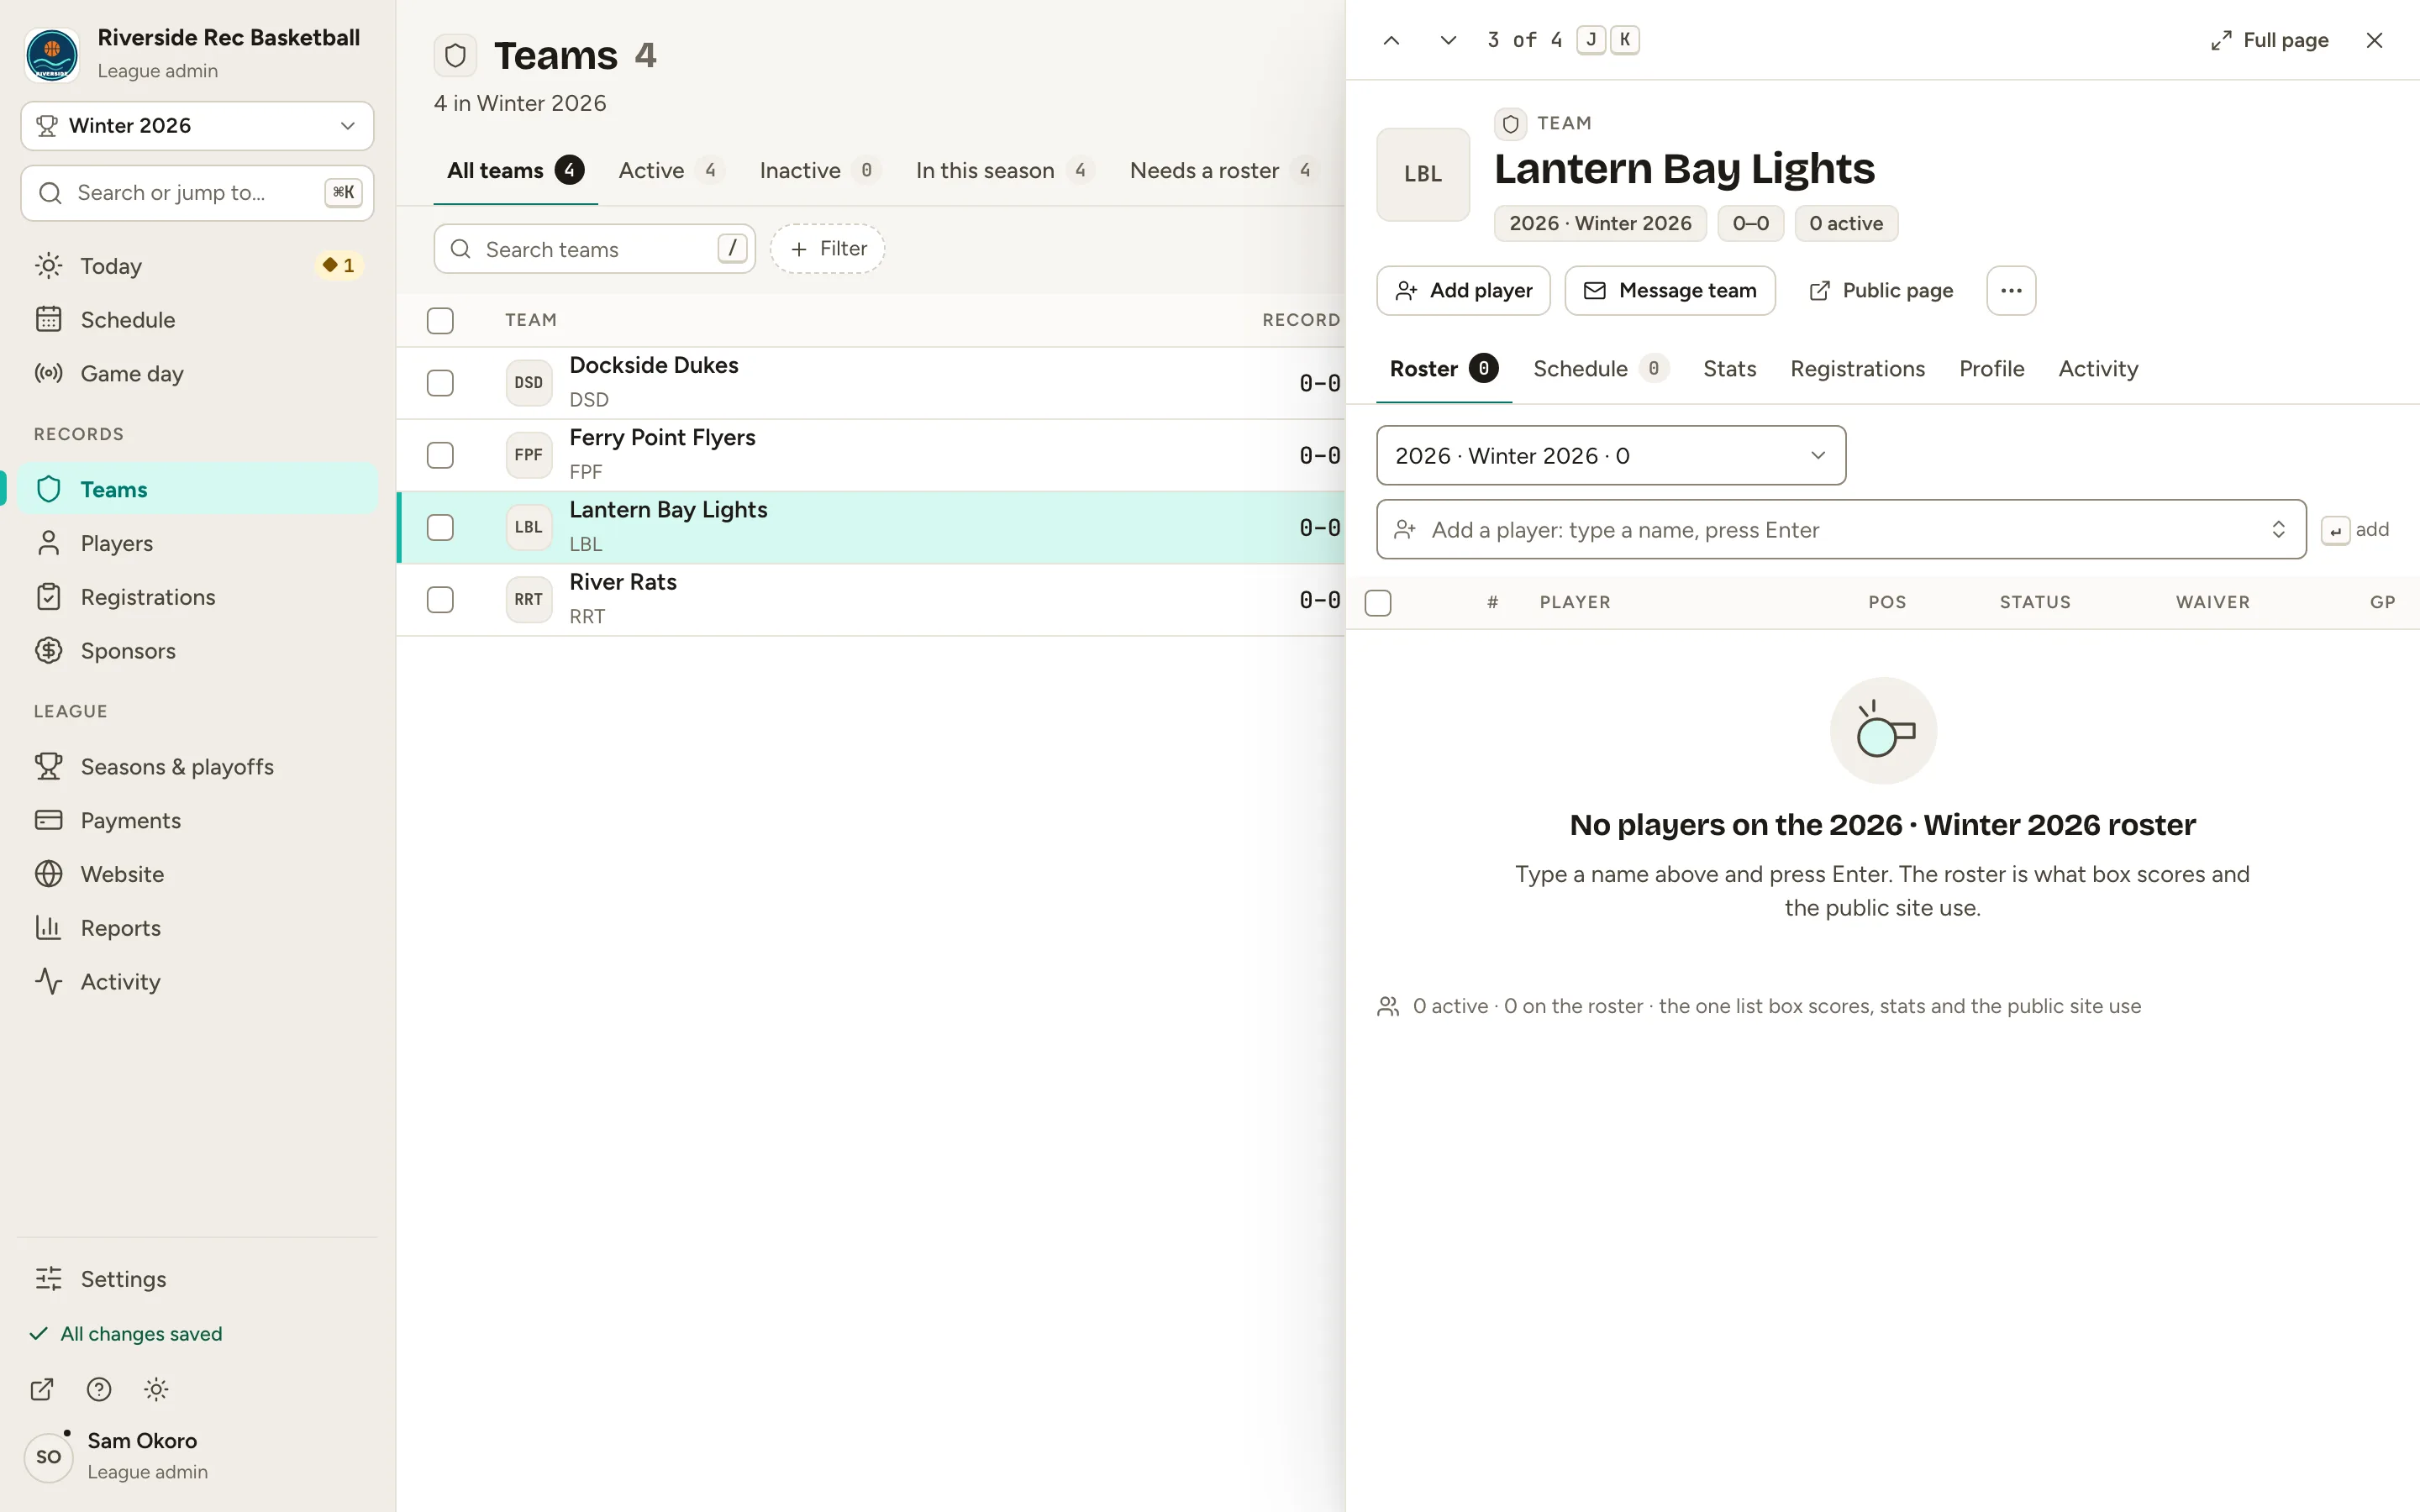
    Fig. 9b

    Scroll sideways to see the whole screen.

    The Lantern Bay Lights team record open over the Teams list, with the Close (×) button at its top right.
    Fig. 9bThe new team’s record opens. Click × (Close) at the top right to see all your teams.

What you’ll see

You have a season, Winter 2026, and your teams are in it. It’s your public season, so it’s the one your website opens on. Teams also get their own public pages.
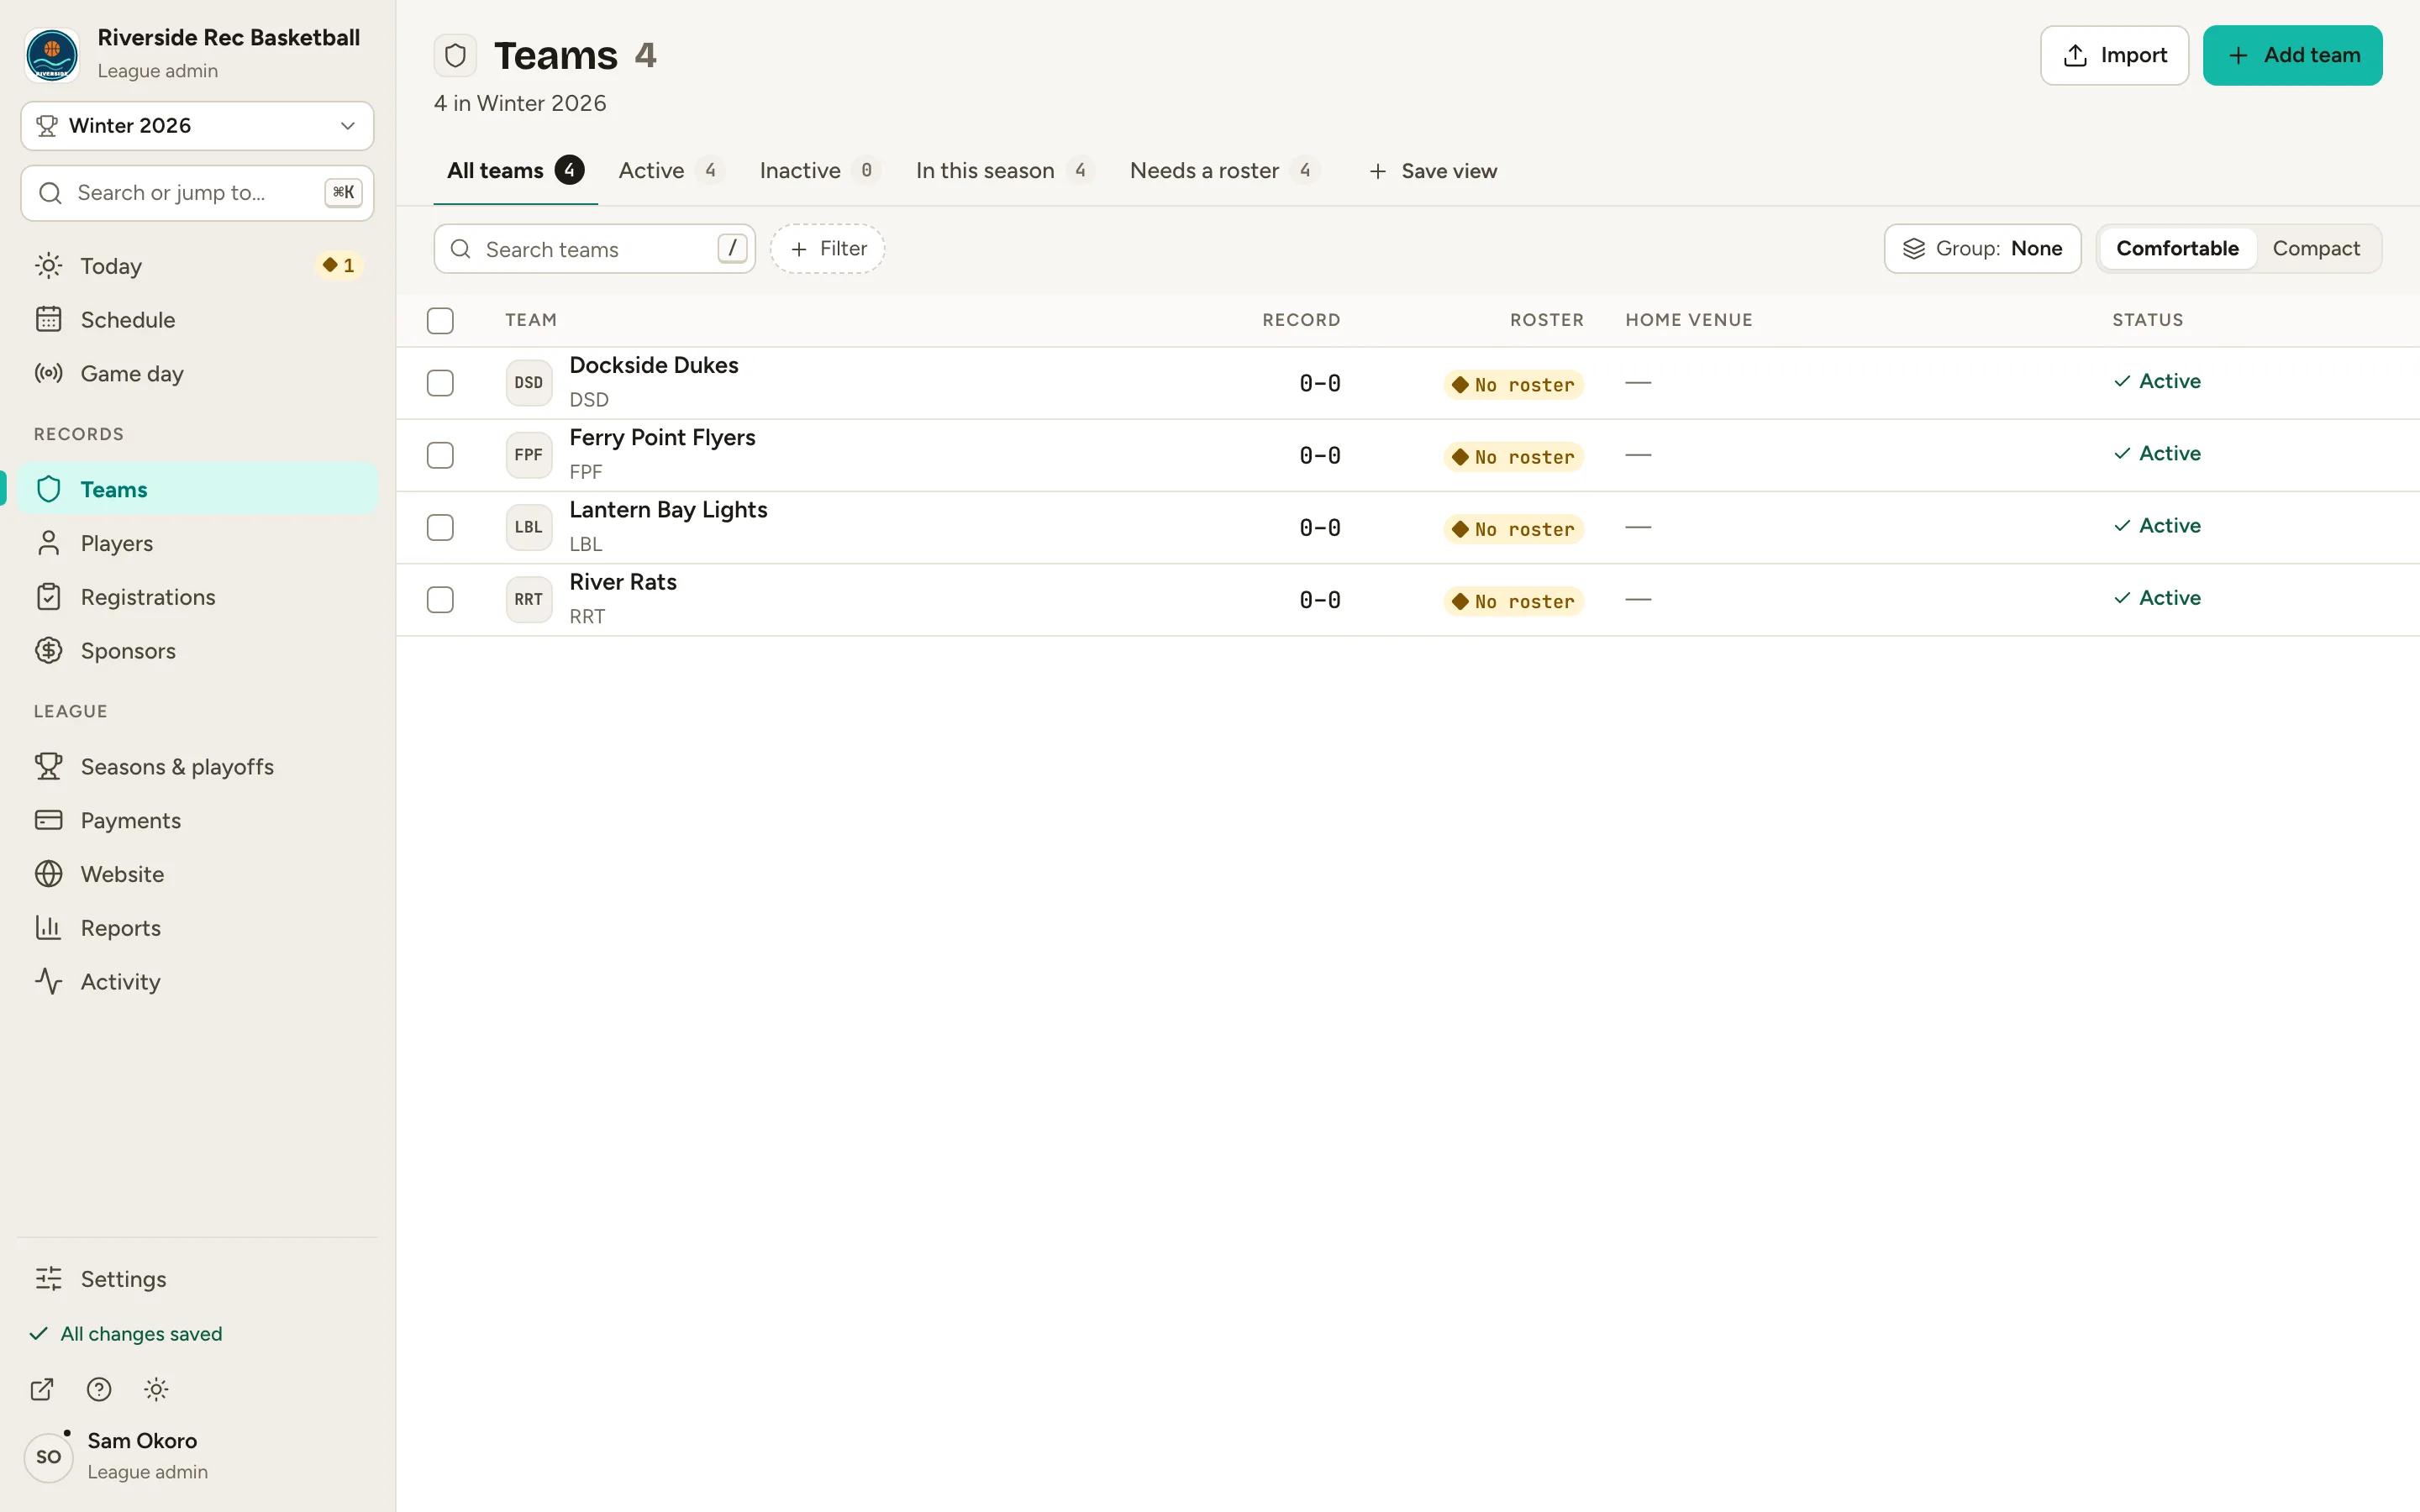
Fig. 10

Scroll sideways to see the whole screen.

The Teams list in the admin with four teams; its header reads 4 in Winter 2026.
Fig. 10Teams in the admin: every team is in Winter 2026.
Fig. 11

Scroll sideways to see the whole screen.

The public website’s Teams page with the four teams.
Fig. 11Your website’s Teams page lists the same teams.

Common questions

Do I have to name the season?
No. A season without a name shows as its year, like “2026 Season”. Two seasons in the same year need different names, though.
What is the public season?
It’s the season your website opens on: the public schedule, standings and stats start there. Your first season becomes it automatically. Later you can pick another one from the season’s menu in Seasons & playoffs with Make it the public season….
Can I add a lot of teams at once?
Yes. On Teams, click Import to upload a CSV or paste rows from a spreadsheet. The columns are matched for you, and you review the rows before anything is added.
I already have teams. How do I add them to a new season?
Open the season in Seasons & playoffs, go to its Teams tab and click Add teams. Pick the teams that play this season.
How do I remove a team I added by mistake?
On Teams, select it and choose Delete. Deleting removes the team with its games, box scores and roster rows, and it can’t be undone, so check first.